Dan Becker's Model Trains - Z Scale Tunnels and Tracks
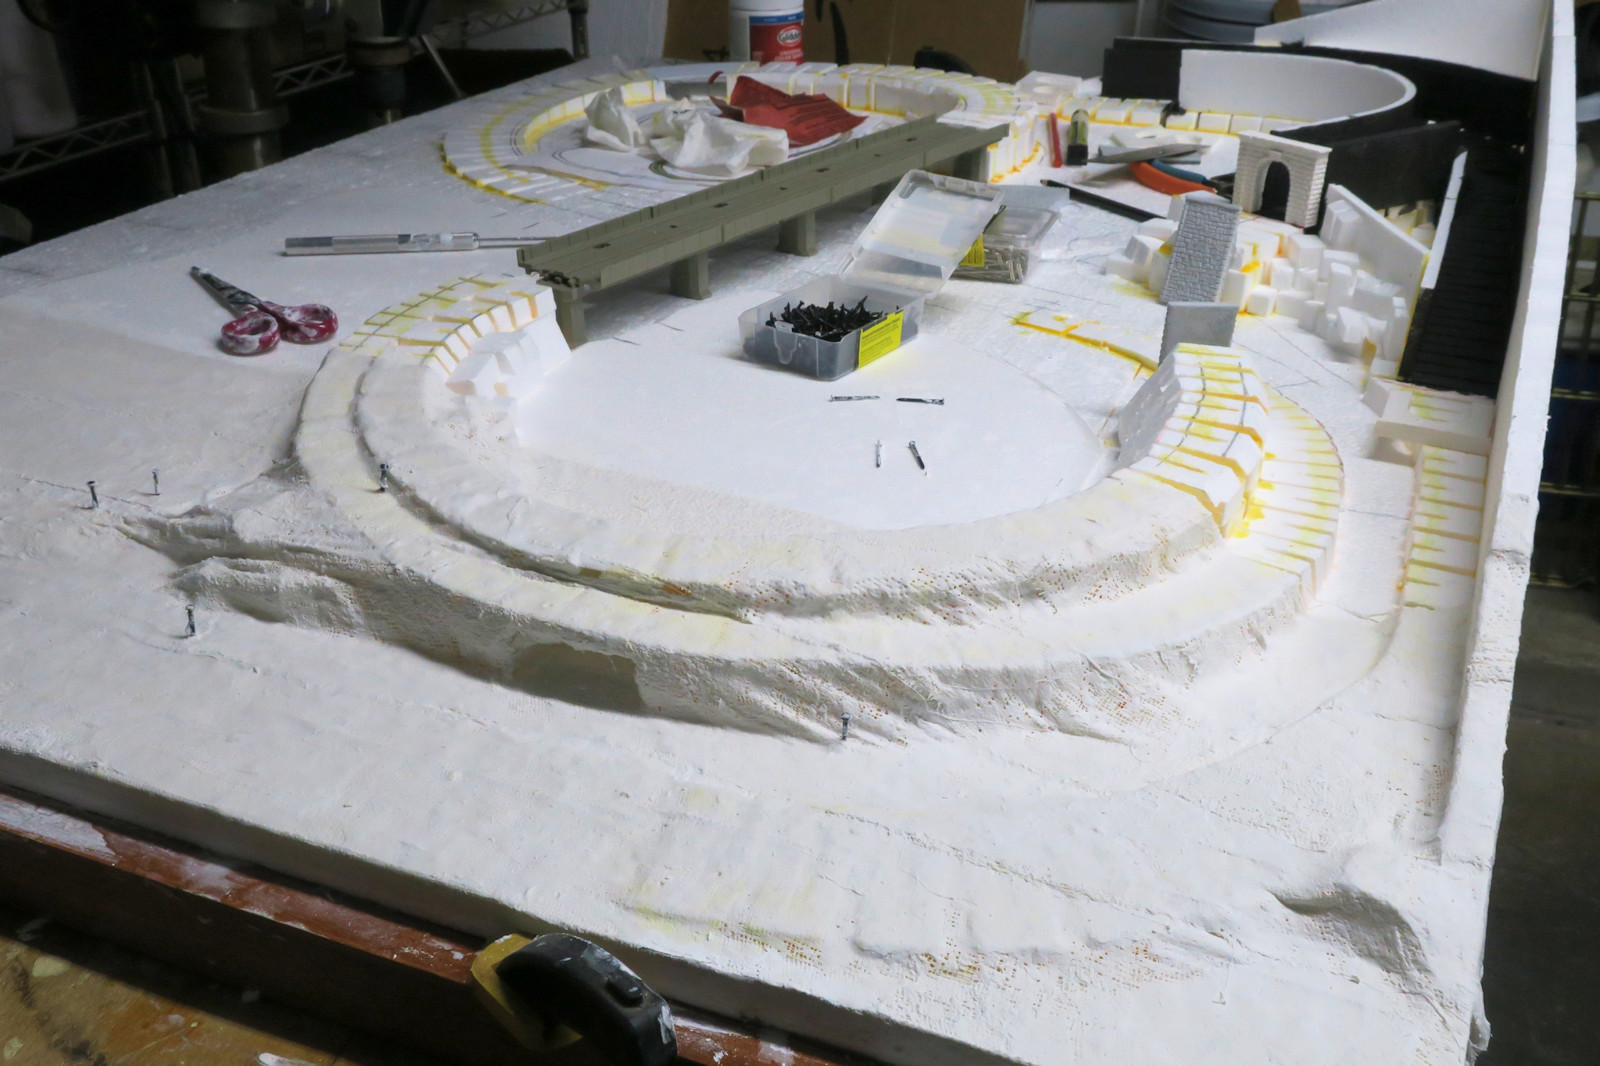
Plaster cloth going down
In the previous article, lots of styrofoam was cut and glued to created the
Z scale train layout subterrain.
In this article I continue shaping and molding the layout and start to lay some track.
In the background of this photo, you see lots of chunks of styrofoam glued to the table top with yellow wood glue.
The tunnel at the right is painted black to make a dark passage for trains under a future mountain.
In the foreground, plaster cloth is wet and layed over the styrofoam.
The plaster cloth hardens into a paper-mâché-like shell which looks more like natural hills and cliffs
and takes paint more readily.
Many hobby shops sell hobbyist plaster cloth, but I bought a big generic package which was very inexpensive.
For this 4 foot by 3 foot (1.2 by 0.9m) layout, I used four rolls of cloth so far, and I have about 8 rolls remaining.
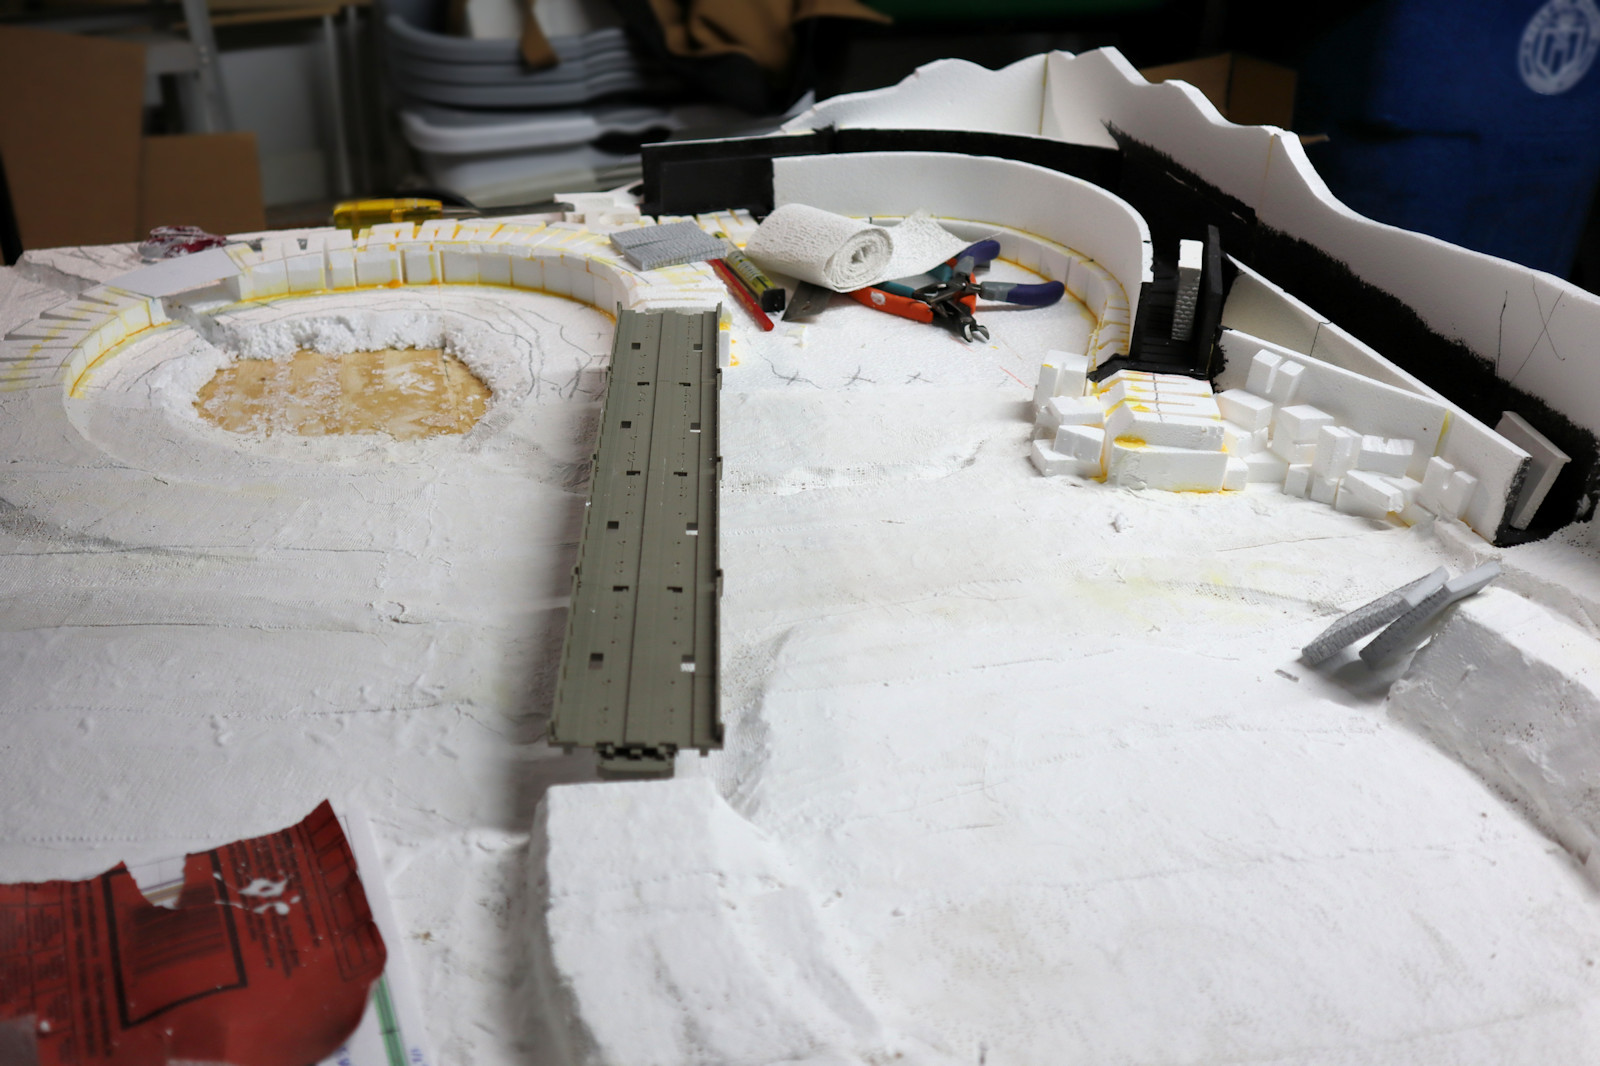
More cloth and a bridge
This photo shows more cloth going down.
Some of the seems between adjacent clothes are visible.
I tried to wet and smooth the cloth as much as possible, but the double edges are still visible.
This is one area where newsprint paper-mâché might be better than cloth: it's smoother and
flatter, which might fit better with Z scale.
In the middle of the photo is a a Rokuhan concrete viaduct bridge.
These are becoming more popular in the United States.
It gives my layout a nice double line across the dense middle area of my layout.
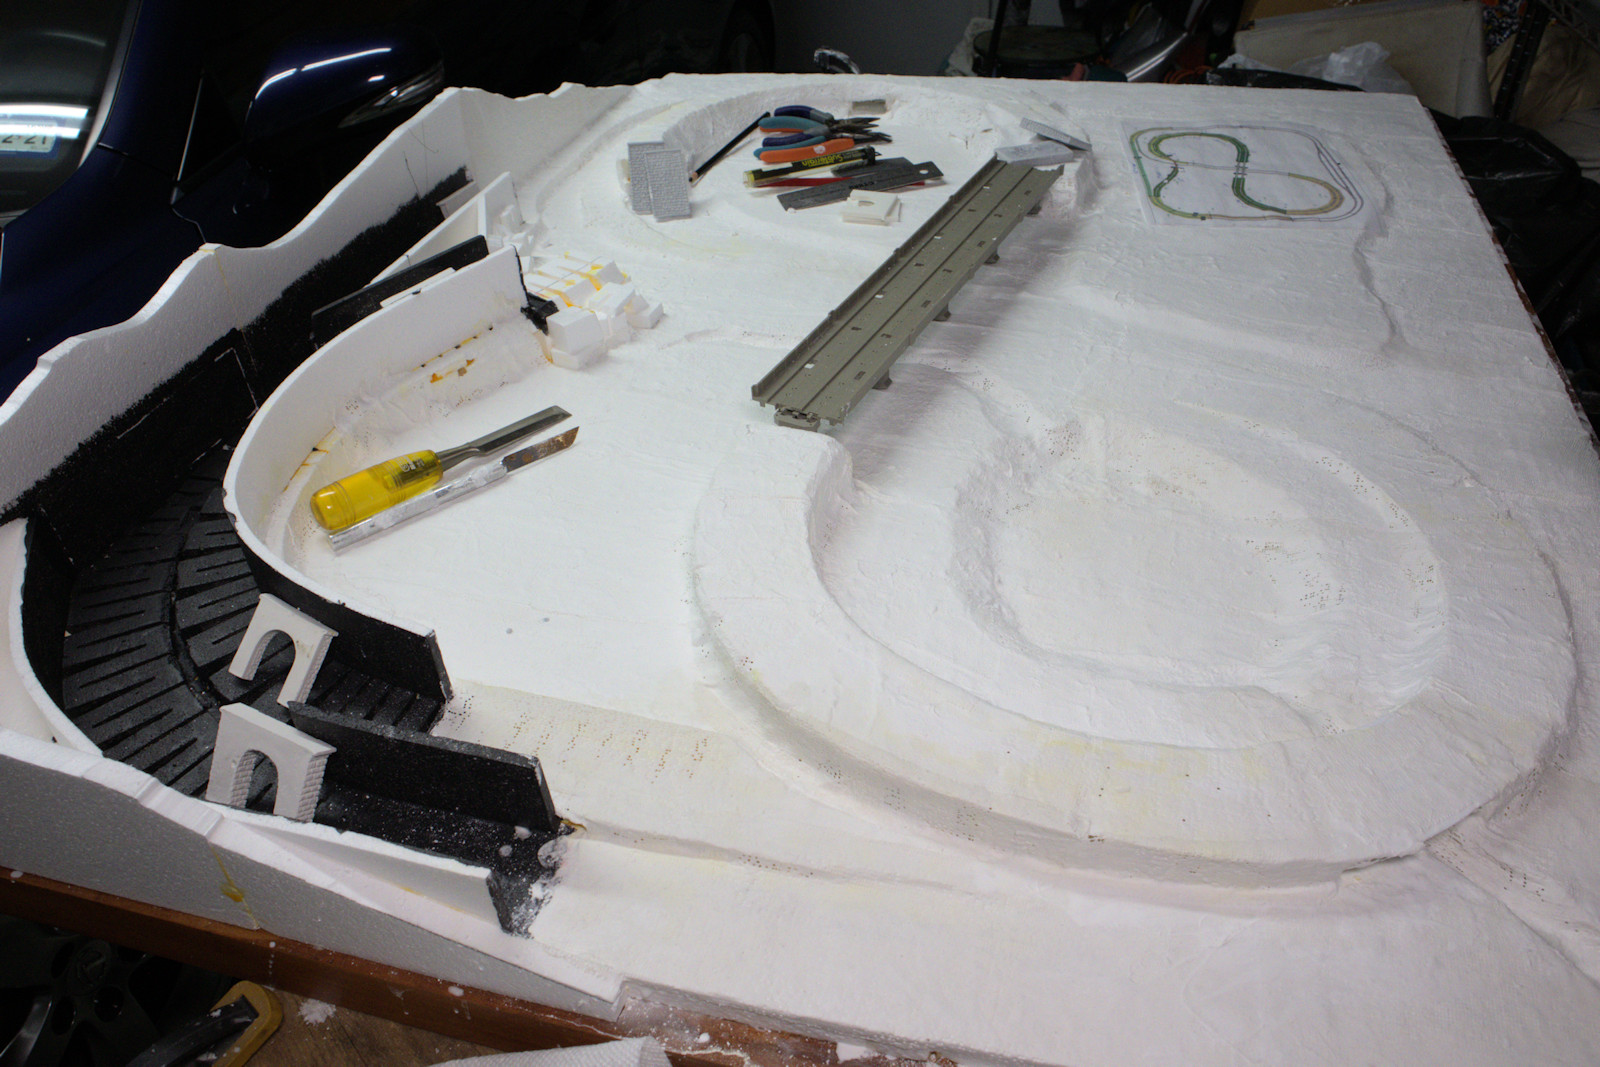
Plaster cloth completed
This photo shows the plaster cloth completed for the lower elevations of this layout.
The lake area in the foreground is nicely smoothed out by the cloth.
You can see the lake has inflow and outflow creeks.
The outflow creek will have a primitive roadway next to it to allow people
access to the recreation area.
The other areas will be mountains on the right (over the tunnels), factories in the back, and a city on the right beyond the lake.
Painted plaster cloth
This photo the under coat painting of the plaster cloth.
My test mountain is shown on the left by the tunnel.
It is just three crumpled balls of newspaper with plaster cloth over the top.
For paint I used down Woodland Scenics earth colors:
Earth (brown), Green, and Concrete (slightly-yellow gray).
These are watered down and make a natural looking wash on the mountain.
The paint is still wet in this photo.
The main color on the left near the mountains is a mix of mostly gray and a little earth brown.
The main color in the middle is mostly earth brown and a little gray.
The main color on the flat right side is mostly green with a little brown.
The paint looks a bit thick and opaque here.
Perhaps I should have watered it down a bit more to make more of a wash.
However, it might not matter. Most of the under coat is going to be hidden by static grass and trees.
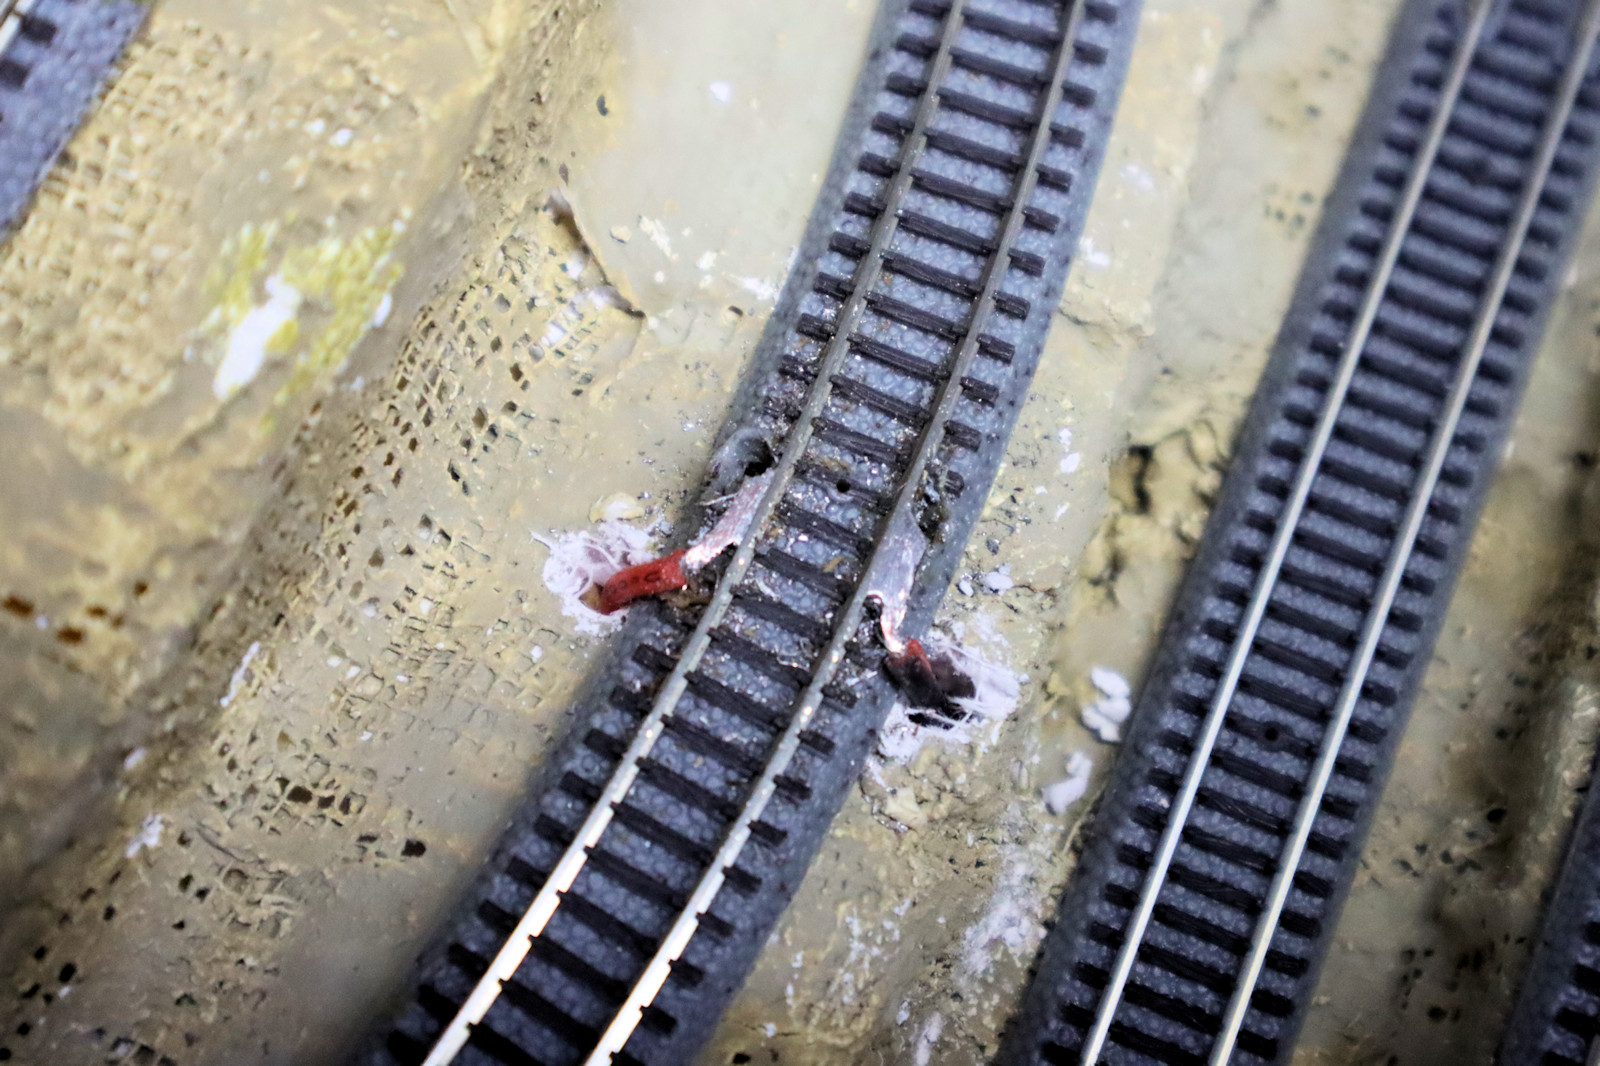
Track electrical connection
This photo shows power supply wire connections to the track.
Most track vendors provide terminal connection tracks,
but I think they look a bit noticeable and fake.
So I user a soldering gun and solder some leads through
holes in the table.
This is 22 gauge wire which is a bit large for Z scale.
It took a lot of filing to get the wires smooth with the rail heads.
I also burned a hole in one of the rail ties.
Luckily this is in an inconspicuous area of the layout.
I will also put some filler and some grass to hide the connection.
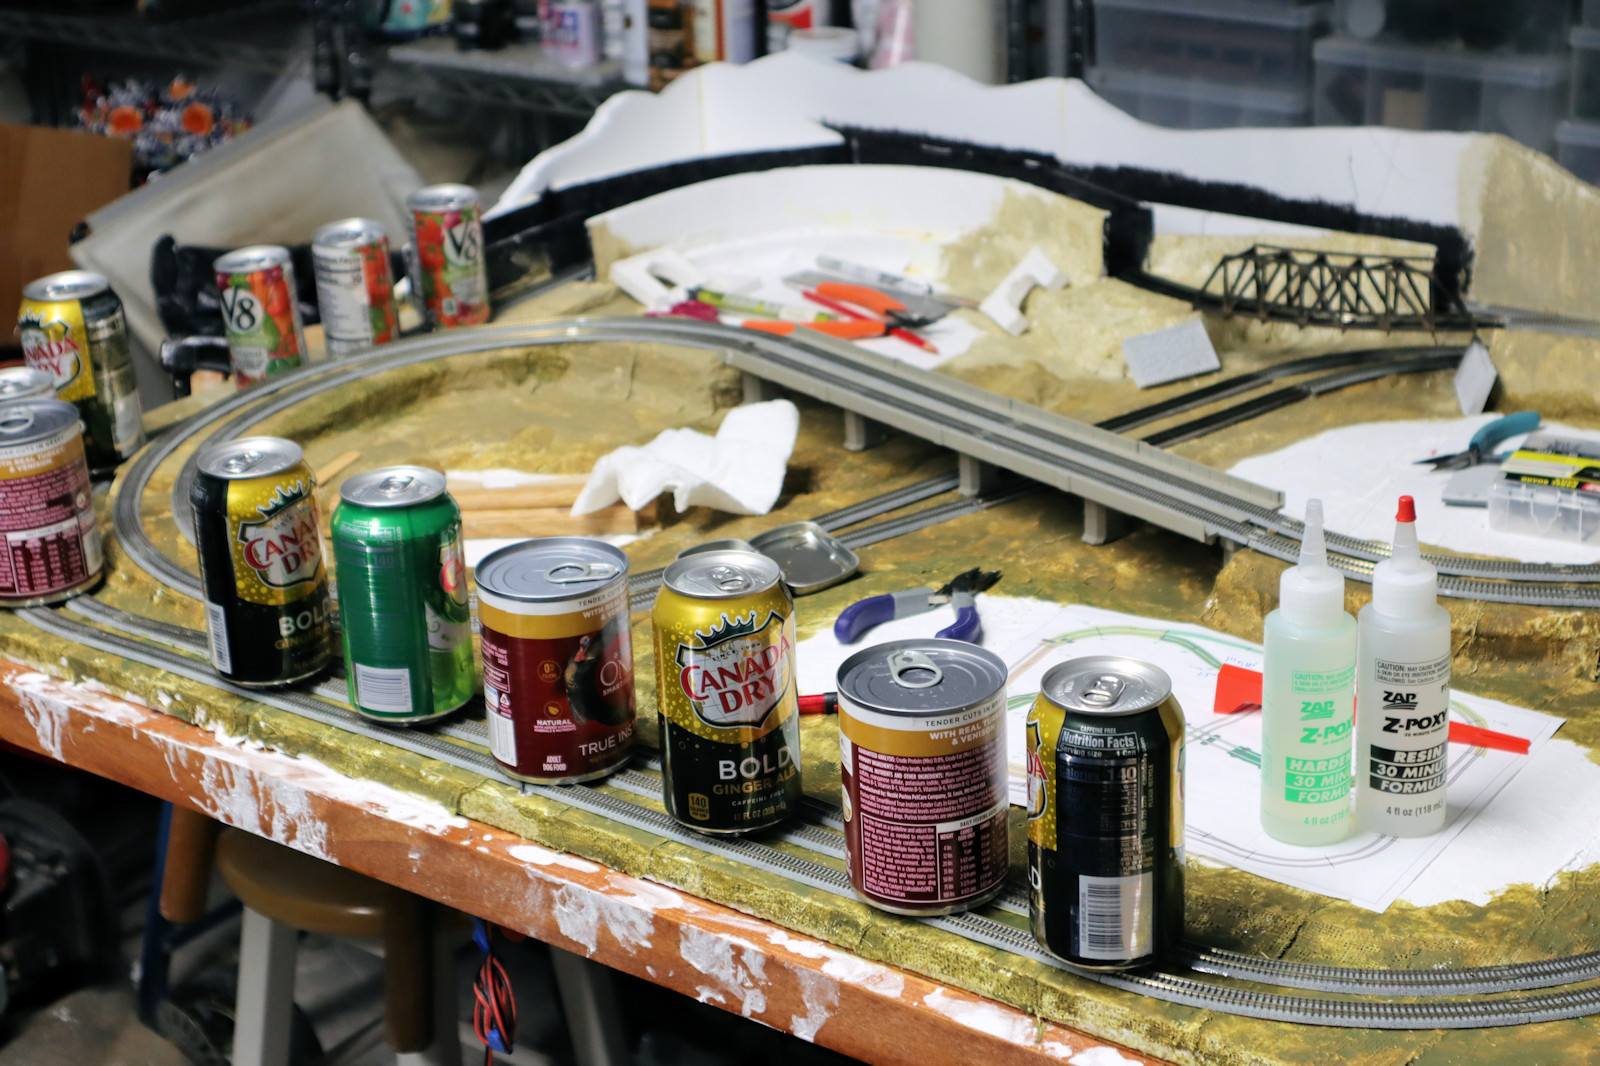
Epoxying track in place
After laying and testing the track, I am ready to permanently fix the track in place.
I epoxy the track a section at a time to ensure that the track precisely
follows the plans and leaves room for turns which are near walls.
Normally I use 5 minute epoxy, but in this case I used 30 minute epoxy to give me more
time to adjust the track and get it perfect.
My primary tool for working with epoxy is popsicle sticks.
I elevate the tracks above the table with popsicle sticks on their side.
I apply the epoxy under the elevated track with a popsicle stick.
Then I remove the supports and let the wet glue track come down to meet the table.
The cans provide weight on the track to make sure the track, the glue, and the table are
as close as possible.
Pro tip for extra weight: canned dog food is denser and heavier than canned soda.
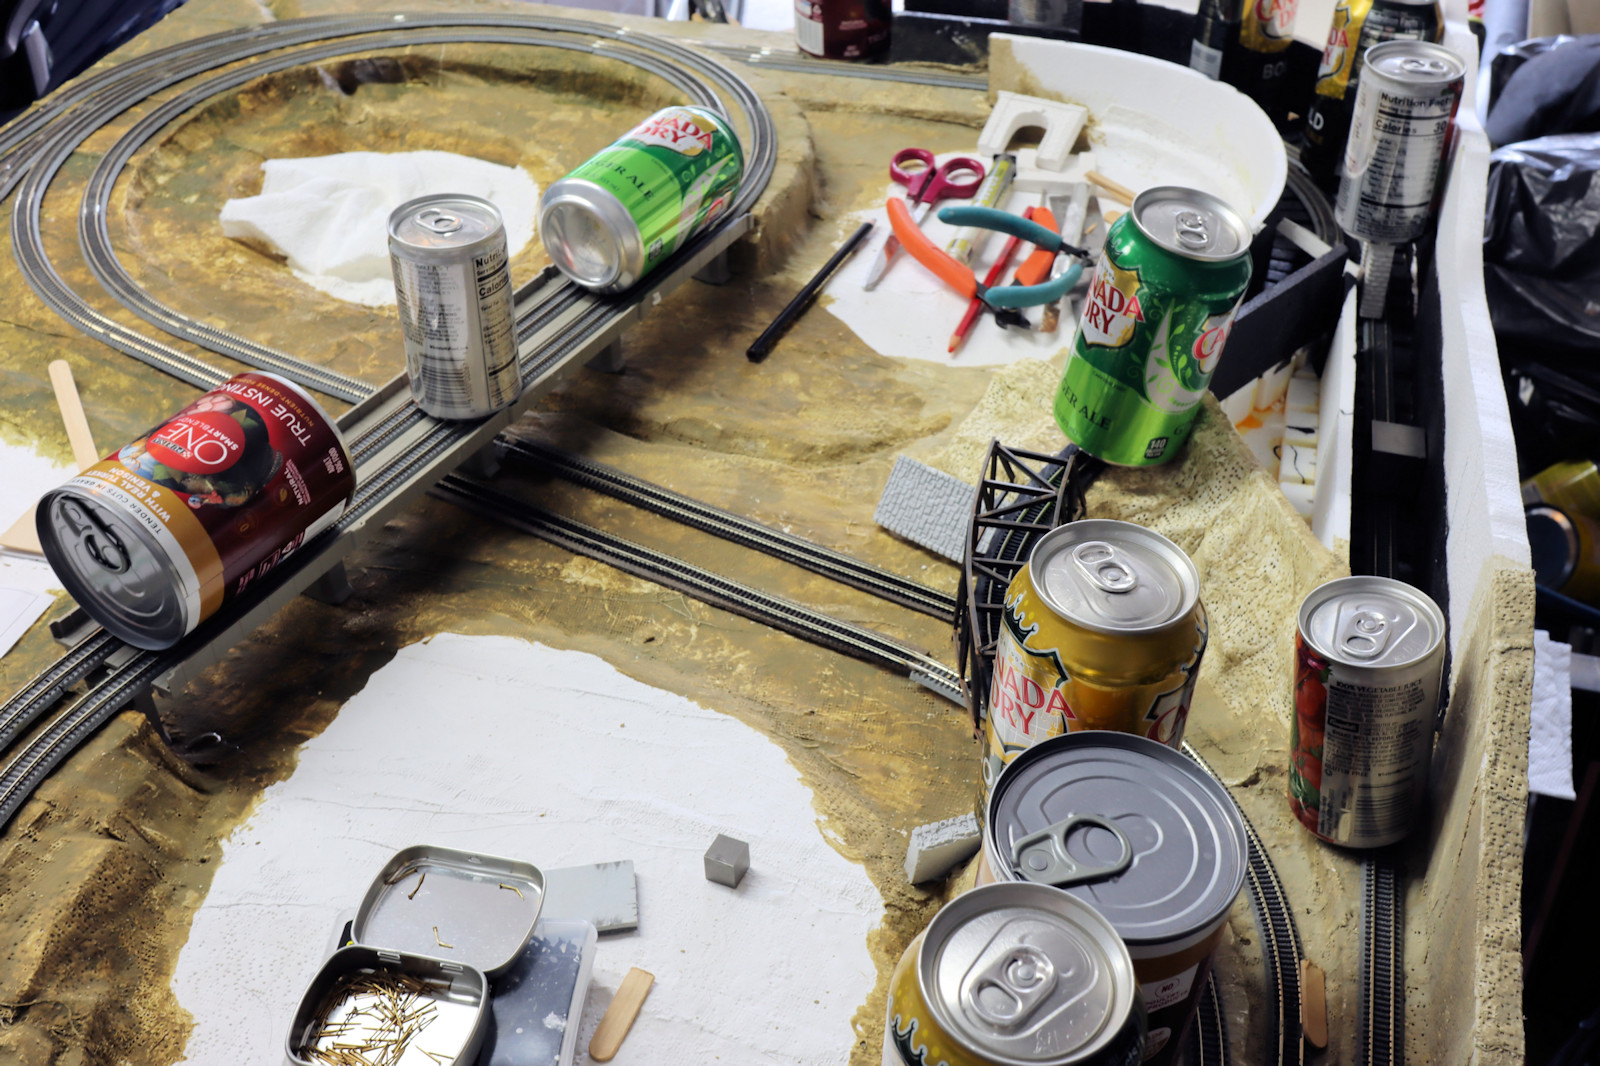
More track epoxying
This photo shows more permanent gluing of the track to the table.
I hope I don't ever have to alter or repair the track because this is
going to be tough to disassemble.
In the center of the photo, there is a very tricky area of this layout.
The two track pieces beneath the bridges are flex track
which are bendable, cuttable pieces of long track.
The stock pieces of Micro Trains track are 8 inches and 4 inches (220 and 110mm),
and I needed a longer section to connect the curves.
The flex track is 12.5 inches (318mm) and cut to fit.
The draw back is that the flex track does not have a pre-made bed,
so I cut some 1mm cork to make a bed.
Another item visible in the tin at the lower left are some brass pins from Zscale Monster Trains.
They are used primarily for sailing ship models, but they are also great for
permanently mounting the track to the subterrain, especially if you put epoxy on the pins.
This layout will be stored on its side, so I don't want anything falling off.
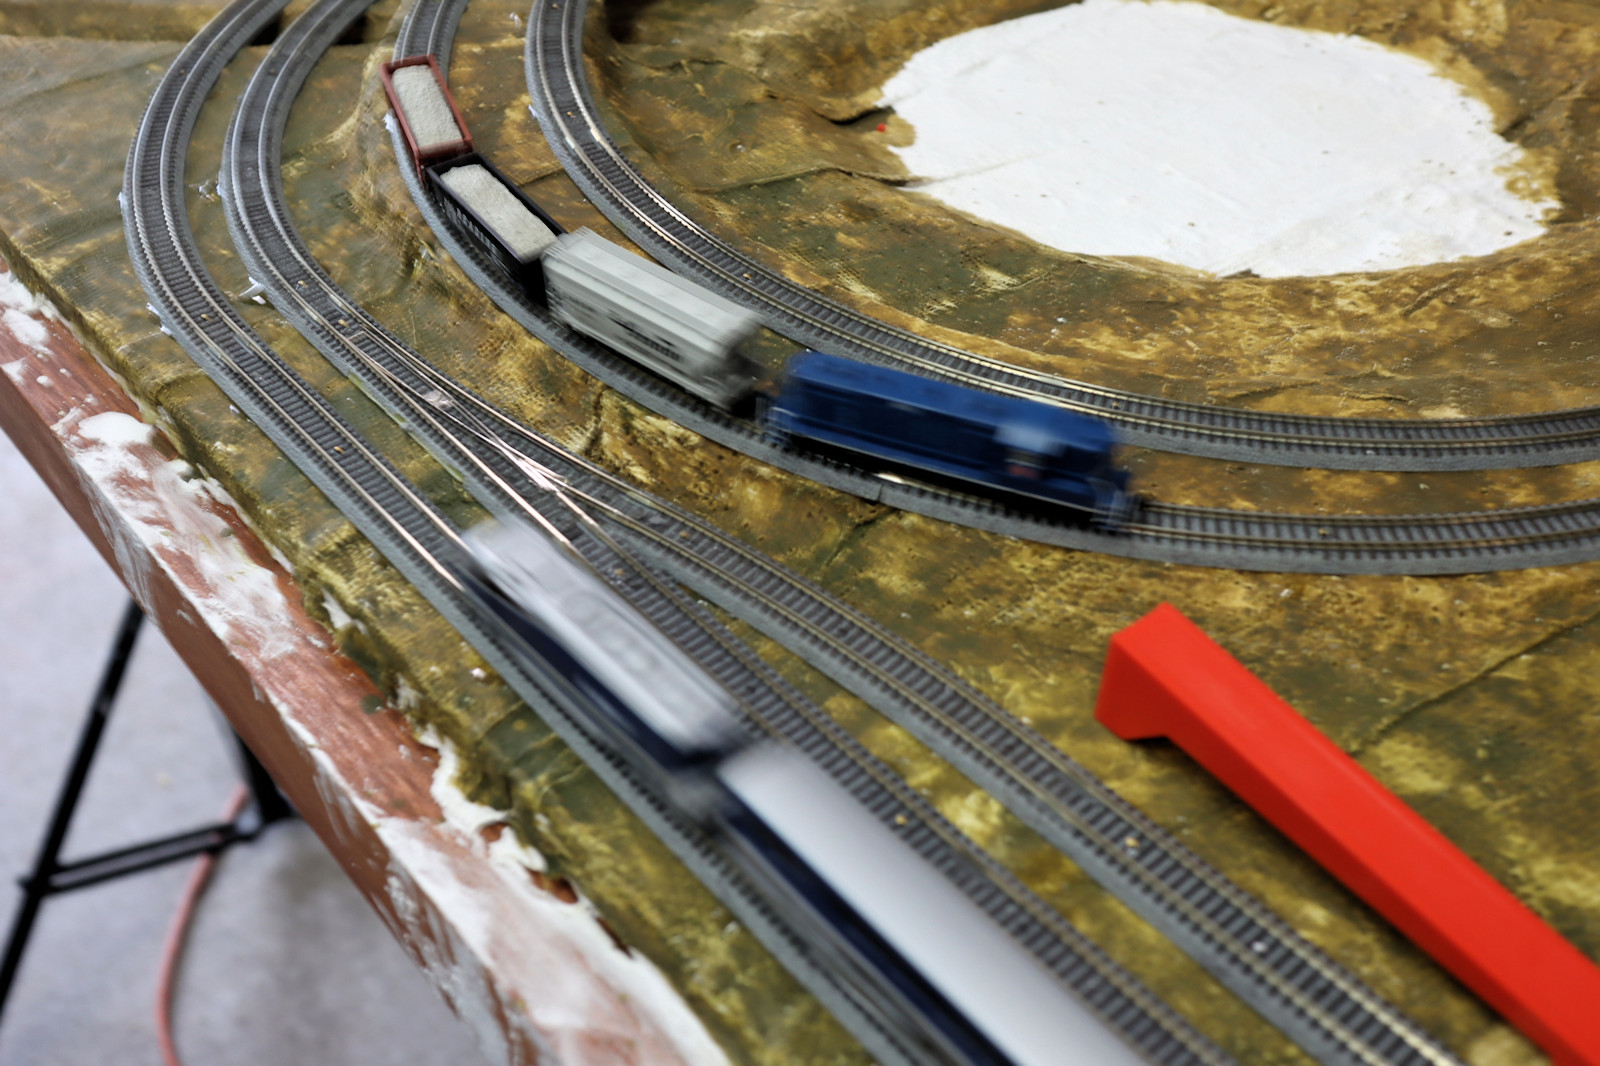
Two running trains
Finally after all this molding, painting, and gluing, I get to run some trains!
In the foreground is an F59PHI commuter train from American Z Lines
and Zscale Monster Trains.
In the background is the GP9 locomotive with some freight.
At this point they are both powered with the same analog power supply.
Perhaps in the future I will go to Digital Command Control (DCC) which will let me
run many more individually controlled locomotives.
Getting to the point of running trains was a tedious challenge
with a lot of maintenance and tender-loving care.
Every slight bit of paint, glue, dust, or corrosion on the track would stop the train.
So I had to use an abrasive track cleaner and sometimes a file to smooth things out.
The more cleaning you do, the smoother the trains run.
Here is a brief video (77 MB) of these trains running around the track.
At this point they are running fast, but as my track is improved,
I will run them more slowly like the real world prototypes.
Thanks for reading my articles. More train layout photos and articles will be posted in the near future.