
|
|
|
|
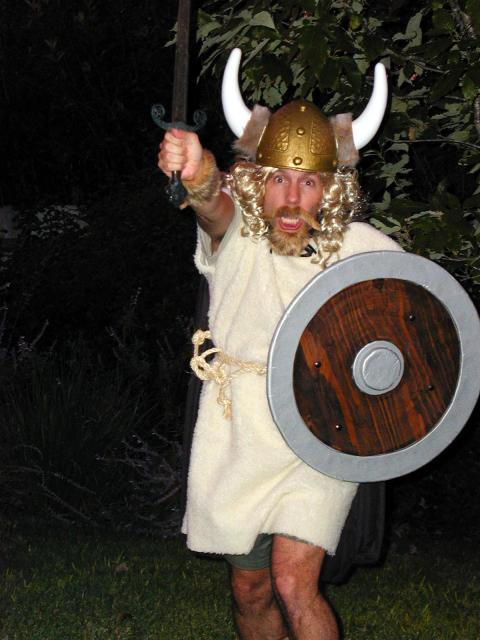
To get ready for Halloween, I decided to improve on last year's Viking beserker costume and make something a little more authentic. Since I love the ancient time period of the first millenium, I decided to become an early Anglo-Saxon warrior. The first part of the costume would be a helmet like that of an Anglo-Saxon nobleman in battle.
Chainmail is lots of fun to hold and wear, but it is tedious to make. About 1 square foot of chain mail takes me about 8 hours to make. However, if you are watching football or movies, the time is no problem. It reminds me a bit of knitting in steel. Once you get the hang of it, the rings seemingly fall together to create a beautiful sheet of flexible steel. Learning the process is not very difficult and does not involve dangerous tools. I think even 8 year olds can make their own mail provided you use a simple pattern and a light enough gauge ring.
The helmet shown is a steel Spangenhelm which was
popular with Anglos, Saxons, Jutes, and Vikings in the years
200 - 800 A.D..
Although I attempted to build my own, I eventually found it
more worth my while to purchase a basic Spangenhelm
from Joe Piela at the
Lonely Mountain Forge
in Pennsylvania.
Although the manufacturing time is long (on the order of months),
the quality of the work is excellent and the price is far less
than anything I could do on my own.
The steel helm in the picture cost $100 plus shipping.

|
|
|
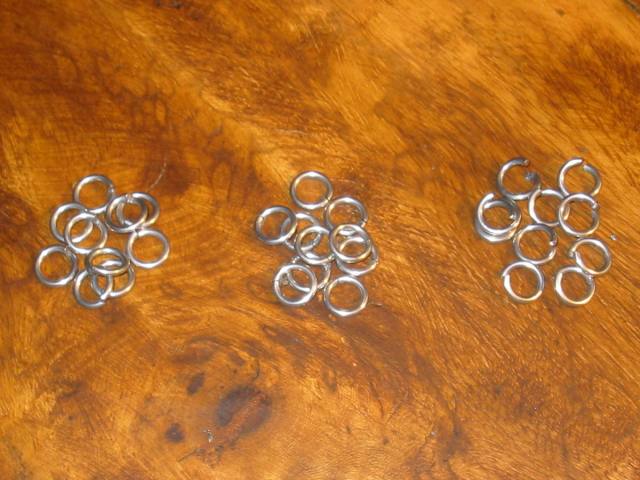
You can make your own rings or purchase them online. In the olden days, rings were made by wrapping wire around a steel pipe or mandrel and winding the wire in a helical fashion. The wire was then sawn or cut to form rings that are circular, but instead of meeting at the ends have an offset to form a slight ramp or coil.
The rings in the photo were purchased online from Miron's Mail Manufactury. They are sawn so they don't have the pinched tips that you get if you use a diagonal wire cutter. They are tumbled in a barrel to give a nice silky sheen and remove any burrs or sharp edges.
The rings shown are 1/4 inch 16 gauge galvanized steel.
You can also get larger or smaller diameters, thicker or
thinner gauge, and many materials - brass, copper, aluminum,
or nickel silver.
16 gauge requires adult strength to bend. If you have
weaker hands, or are doing this as a project with your kids or
the Boy Scouts, I suggest you use 18 or 20 gauge steel,
or the easier-to-bend copper, aluminum, or brass.
I know after 2 hours of bending I had to take a break and
rest my hands.
Also, consider larger rings. You can make larger sheets faster
with a bigger diameter.
|
|
|
When you close the rings, give a slight twist to help completely close the ends and make them touch. This will prevent the slight gap from snagging your hair. Ouch.
The open rings need only be wide enough to allow another ring to
pass.
|
|
|
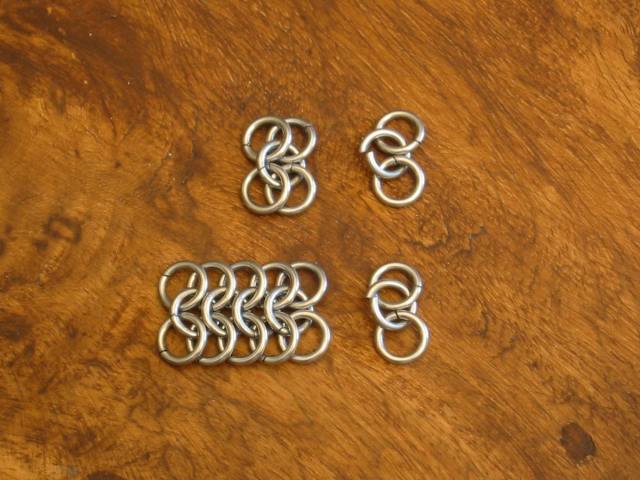
My method is to make long "ropes" of rings that are 3 rings high and then join these "ropes" to the completed work. You start a rope by taking one open ring and four closed rings as shown in the upper left of the photo. Lengthen the rope by grabbing one open ring and two closed rings as shown in the upper right of the photo. Push the end of the open ring through the two rings on the end of the rope. Use the pliers to twist the open ring shut.
At the bottom of the photo is a rope of rings with another
open ring about to be added.
Notice that the rings lay flat in herringbone pattern.
The odd rows lay with the left edge of the rings touching the table
and the right edge resting on the next ring.
The even rows lay with the left edge of the rings resting
on the previous ring and the right edge resting on the table.
Laying your work out on a flat table or table cloth will help
you maintain the pattern.
Be patient. Starting a rope is always the hardest part.
|
|
|
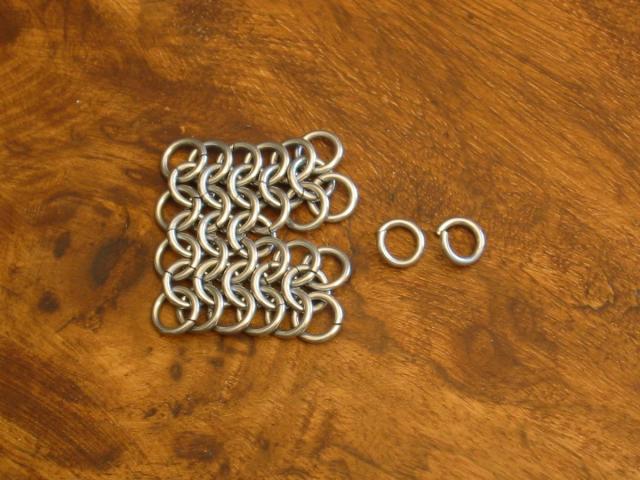
As shown in the photo, lay your newest rope below your previously completed work. Take open rings and join two rings from the top rope to two rings in the bottom rope.
The joining ring should lay opposite to the fashion of the two rows that are being joined. For instance, in the photo the top and bottom rope have an edge of rings that have their left edge touching the table. The rings that join these ropes will have their right edge touching the table. The photo shows three rings joining the two ropes and two more open rings about to be added.
And there you have it!
That is all it takes to create a sheet of chain mail.
Of course you will want a wider and taller sheet if you
are going to protect make a shirt or coif,
but sheeting is the first step to fashioning something bigger.
If you want to learn how to expand or contract rows,
I suggest you read the advanced articles on The Armour Archive site.

|
|
|
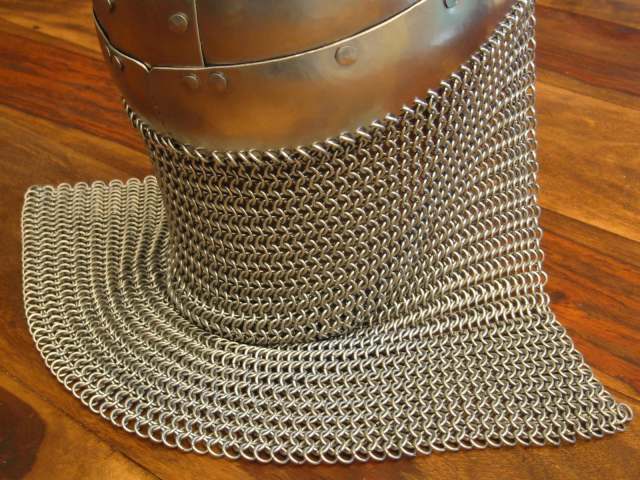
The chain mail sheet is about 2 feet wide (80 rings) and 16 inches tall.
Most Vikings and Anglo-Saxons did not have this curtain, instead
going with the more basic helm without a curtain.
Others wore a coif underneath the helm.
I went with the curtain because I saw some artwork with this helmet,
and then a photo on a renactor's site, and then I was hooked on the design.

|
|
|
I did not measure the distance of the holes, but rather
started with the middle of the sheet at the back of the helm,
and held the chain mail sheet to the helmet to eyeball the next 3 or 4 holes.
|
|
|
Steel is heavy! I would say it all weighs about 14 pounds, about the weight of a bowling ball. Since the inside of the helmet is unfinished, I will wear it with an arming cap or knit watch cap.
Viola, the helmet is done. It is time to move onto other parts of the costume. If you liked this article you might also like my other articles:
Thanks for reading, but check back in a few weeks.
I hope to have more of my Anglo Saxon costume done.