Making Your Own Scale Armor
|
|
Osprey Publishing's Arthur and the Anglo-Saxon Wars
|
In this article I discuss how to make a shirt of scale armor.
Scale armor is made by sewing small plates of metal such as bronze
or steel to a shirt, usually made of thick leather or hardened canvas.
The resulting armor looks similar to fish or lizard scales.
This type of armor was in use from 200 B.C. to about 800 A.D.
and was effective against all sorts of attacks: swords, bludgeons,
spears, and arrows.
It's one weakness was that in close combat an upward thrust could
get under the scales and reduce the effectiveness of the armor.
Eventually scale armor was supplanted by chainmail which was a
bit more flexible and equally impervious to attacks from all directions.
My primary reference to this type of armor was the
Osprey Publishing
Arthur and the Anglo-Saxon Wars book which
is available at
Amazon.com.
This book was written by David Nicolle and first published in 1984.
Due to its popularity, the book has had many reprintings.
However, what really set my imagination on fire were the excellent
paintings and illustrations by Angus McBride.
Some of his beautiful historical interpretations are shown here.
|
|
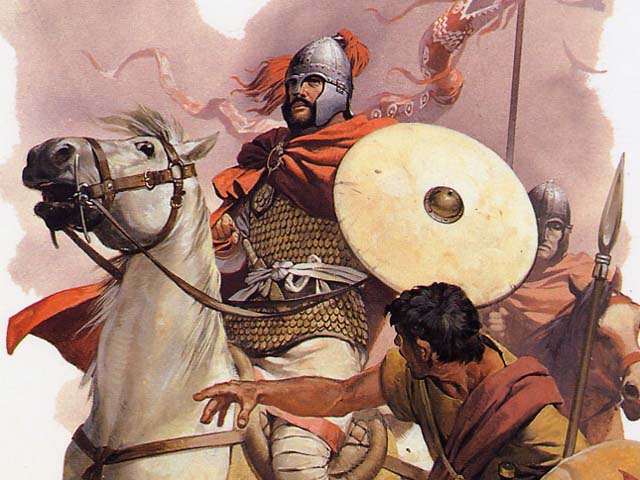
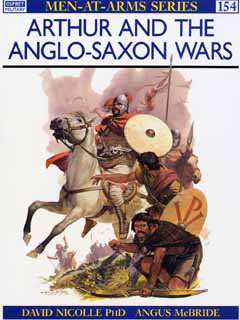
Roman Cavalry 400 A.D.
|
Featured on the cover of the book is a 7th century Romano-British cavalry officer wearing
scale armor
and riding roughshod over British and Welsh militia men.
Although our modern views of King Arthur are myths, the myths are based
on one or more noblemen of Wales who lived and fought the Anglo-Saxons
after the Romans left Britain in 410 A.D.
This beautiful illustration certainly fits my vision of King Arthur on horseback.
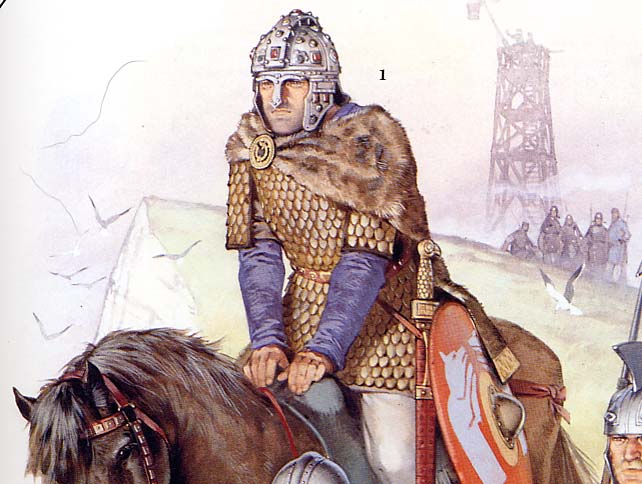
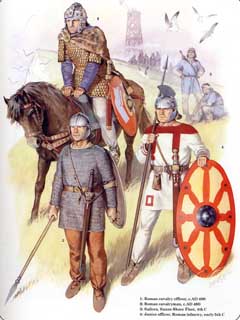
Inside the book are many more fantastic historical illustrations.
The 5th century Roman cavalry officer pictured here is also wearing scale armor.
Notice how these earlier British isle inhabitants look very Roman
in their tunics and armor.
Also notice the tall siege engine in the background.
Great stuff!
These fantastic paintings made me excited enough to try to make my own scale armor.
I was mainly interested in having a good look such as that in the paintings.
I was not so much interested in historically accurate manufacturing techniques,
tooling, or materials.
My design uses modern materials and would not be very effective in combat.
|
|
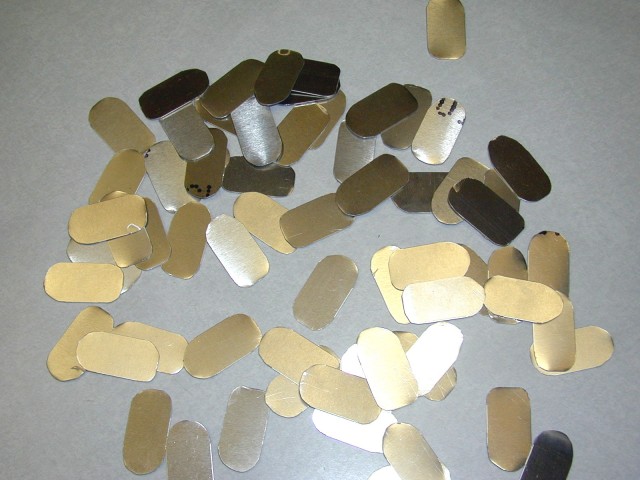
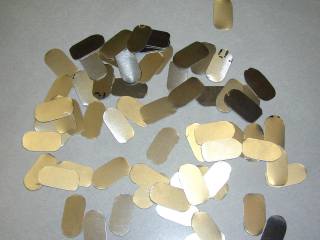
Loose Aluminum Scales
|
I started with aluminum sheet material from
Online Metals.
I bought a metals sample pack from them and from these
samples choose 24 gauge 6061 T6 aluminum.
The aluminum looks similar, but thicker, than
that used in beverage cans.
It takes two hands and a bit of strength to bend the material.
I chose aluminum because it was shiny, and I
knew it would not rust.
It would also be lighter weight than steel.
I liked ordering from Online Metals because they
cut the aluminum sheet to any size, free of charge.
So I ordered four 1 inch (2.54 cm) strips 48 inches (122 cm) long -
a total of 16 feet (5 meters).
This cost a whopping $12 (plus shipping).
I took tin snips and cut these strips into scales.
The edges were a little rough so I filed these edges with
a motorized hand tool and an abrasive bit.
Unfortunately the fast bit melted the aluminum and coated
the abrasive material, so it took a bit of effort.
The cutting and filing took about 3 hours.
The scales look a bit like dog tags that soldiers wear.
I imagine a cheap source of dog tags would also make
good scale armor.
|
|
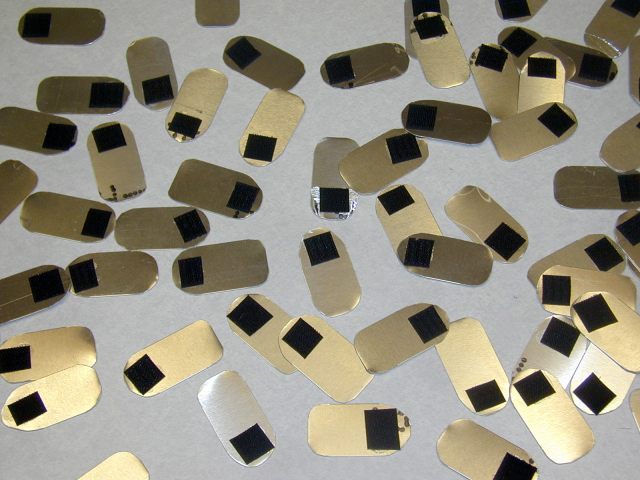
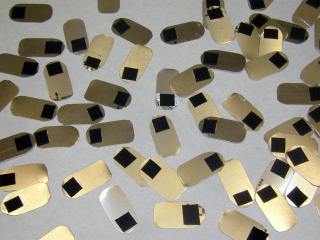
Gluing Velcro to the Scales
|
Once I had a coffee can full of scales, I wondered how to fix them to a shirt.
In the olden days they were hand-sewn to leather of reinforced canvas.
One interesting site is
this Roman reenactors site.
Since I am not a good hand-sewer, I decided to take a shortcut.
I thought self adhesive Velcro (hook and loop) cloth would be a good
material to affix the scales to a shirt.
However, since adhesive-back Velcro is expensive I opted for glue and
non adhesive Velcro strips.
Half inch (1 cm) wide strips are still expensive - about
$3 a yard. I bought 10 yards for $30.
Small squares of the less flexible hook side is glued to each scale.
The more flexible loop side is then sewn to the shirt.
I know Velcro is not very historically accurate.
However, being a novice, this would give me the luxury of
experimenting with different scale patterns.
It also allows one to remove all the scales in case you want to wash
the shirt.
|
|
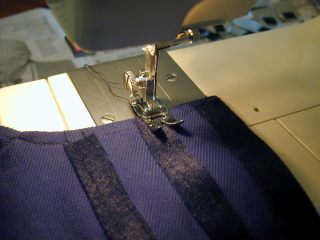
Sewing Velcro to a Shirt
|
Sewing machines are fascinating instruments!
I have not sewn much in my life, but I find these machines
to be wonderous, and I look at their design
with the same awe and introspection I give to
a camera, a car engine, or a bicycle derailleur.
The path of the thread through all those finely machined
parts simply amazes me.
If you are at all interested in mechanics, I urge you
to find a sewing machine and watch how the
needle interacts with the bobbin and the shuttle below
the platform.
It is truly a modern marvel.
Since I am a sewing novice, it took two demonstrations
from my wife and about 30 minutes with the owner's
manual to set up the sewing machine.
Once everything was ready it took less than a minute
to put two stitches down the length of each of these
Velcro strips across the breadth of the shirt.
I love putting my foot on the accelerator pedal and
letting 'er rip!

|
|
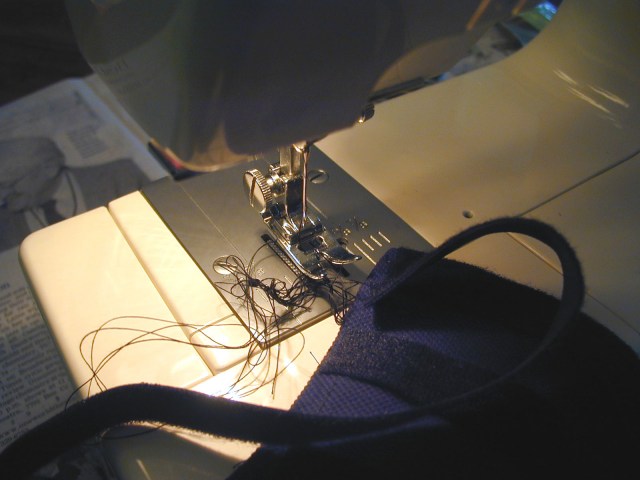
A Jammed Sewing Machine
|
And here is what you get when you don't set up the sewing
machine correctly.
It makes funny hammering noises and
spews tangles of thread in odd directions.
It's curious how much thread can get jammed in that machine.
The shirt is an ordinary black cotton polo shirt.
Originally I spaced the 1/2 inch Velcro strips 3/4 inch apart.
However, sometimes there was not enough contact with the opposing
material glued to the scale.
Eventually I filled in nearly the entire area with Velcro cloth.
Sewing 8 or so strips across the shirt took about 3 hours, but since
I like to try different arts,
I found the sewing to be quite enjoyable.
I imagine an experienced tailor could Velcro up an entire shirt in about
4 hours.
|
|
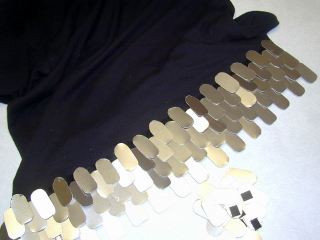
Apply the scales to the shirt
|
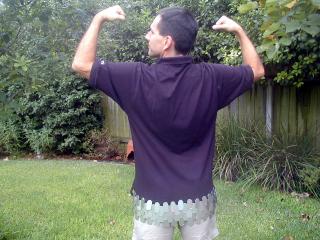
This photo shows the scales applied to the shirt.
The staggered pattern worked well at covering lots of area.
It was very flexible and beautifully shiny.
Unfortunately, this photo shows the sum total of this incredible labor:
- 16 feet of 1 inch wide aluminum (approx $15)
- 3 hours of cutting and filing
- 8 feet of 1/2 inch wide Velcro (approx. $10)
- 3 hours of sewing
All this equals 5 rows of scale and approximately 1/16 of
the shirt complete.
At this rate the shirt will require $400
of materials and 96 hours of labor to complete.
|
|
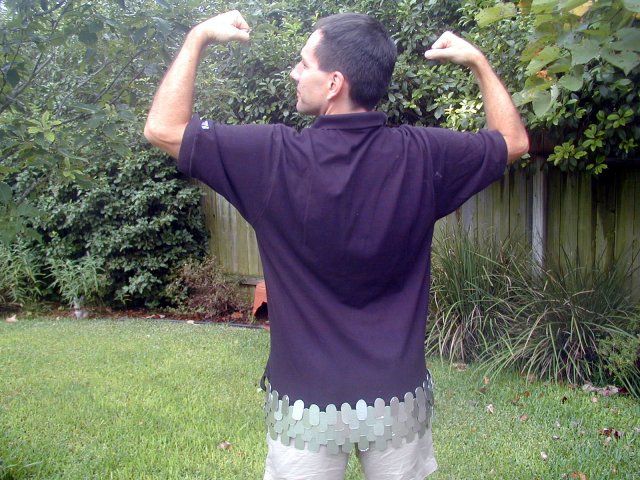
Modelling the armor
|
The material and labor requirements have me a bit daunted at this
point.
While the shirt looks great, moves well, and feels fine,
I am not prepared to put so much work into completing it.
I decided to put the rest of the shirt on hold.
Actually the price is not that bad. I've seen
shirts of scale armor go for $800 to $900.
However, the labor would soak up too much of my free time.
I have had a few labor saving ideas. For instance, perhaps
there is a source of dog tags or blanks which would eliminate
the cutting and filing labor in making the scales.
And perhaps I can use rivets like the ones used in footwear
to affix the scales instead of sewing Velcro.
That would also save labor.
In fact if any readers have ideas, feel free to contact me
at my email address on my home page.
Despite the labor costs,
I enjoyed exploring the construction of a scale armor
shirt. I learned a lot about sewing and materials, and
I had fun coming up with a design that would be functional
and easy to manufacture for someone with little
armoring skills.
Perhaps someday I will finish the shirt. If so, I will
be sure to update the article here. Thanks for visiting.