Making Textured Resin Bases for 28 mm Figures
 |
| Carve base blanks |
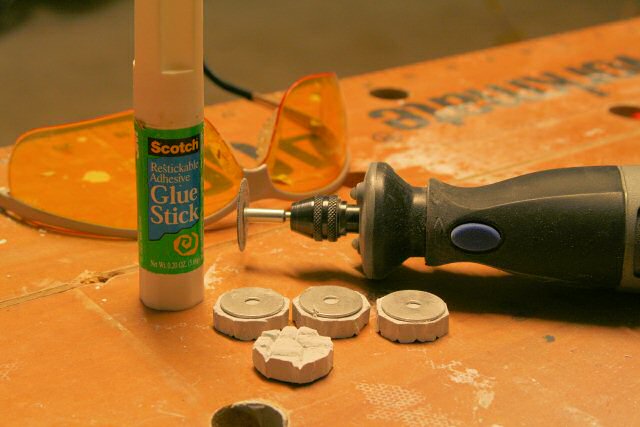
This article shows how you can make textured and sculpted bases for 28 mmminiature figures. Skip to the end if you want to see the final results orelse read on to get the detailed process.Normally I base my 28 mm miniatures on a 3/4 or 1 inch (20 or 25 mm) washer,and on the washer I glue gravel, mud, and static grass.These normal bases look good for outdoor miniatures, but what do you dowhen your figure spends most of its time indoors, say in a dungeon or tavern?In these cases, a sculpted base is useful so the figure's basenearly matches and disappears into the terrain.Many companies sell miniature bases with fieldstone or pavement impressions.However, I thought it would be worthwhile to make my own.As I have limited sculpting skills, I replicated the fieldstonepattern directly from the Hirst Artsfloor tiles I use to make my 28 mm scale buildings.
The photo at right shows four plaster tiles that have been glued to 3/4 inch (20 mm) washerswith tacky temporary adhesive.A hand held Dremel tool or sanding block is used to carve the plaster tiles down to the 3/4 inchdiameter of the washer.Use eye protection as plaster tiles always cause lots of dry irritating dust when sanded or drilled.I made four different tile blanks to create a bit of variety in the bases.
 |
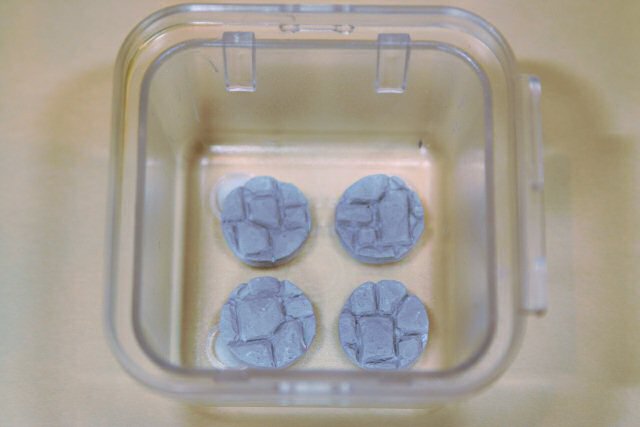
| Base blanks in the mold form |
This photo shows the preparations for making a silicone mold.Once you carve your base blanks, glue them into a form into which you will make your mold.This mold form is a small plastic tray with a smooth and rounded interior.The glue should hold them in place but allow them to detach so you can reuse the form.I use plain white glue.Spray the mold form and the blanks with a mold release. I use the cheap cooking spray PAM.Pour silicone over the blanks and let the silicone set for 24 hours.I use one of the G.E. silicones and Beta 16 silicone catalyst. It is very strong, pliable,and tear resistant.
 |
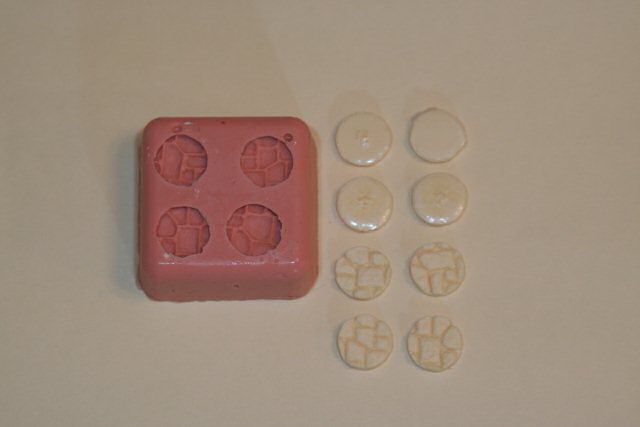
| Silicone mold and cast resin bases |
This photo shows the completed silicone mold, and a few of the resin castings to the right.Note that the silicone is not perfect and has a few air bubbles in it despite my carefulpouring and vigorous shaking of the mold.The resin is one of the simple A:B resins from the hobby shop that sets up in about 3 minutes,and cures in about 15 minutes.The tops of the resin bases look just like the fieldstone plaster pieces.The bottoms of the resin bases are slightly convex and will be sanded smooth.Since resin is lightweight, I glue these pieces to a metal washer or magnetto give the base some heft and keep the miniatures upright.Also, since I like thin bases, I will sand the resin pieces until the cracks between the fieldstones nearlyreach the bottom of the piece.Even if you sand through the cracks to the bottom, the washer will hold the resin together.
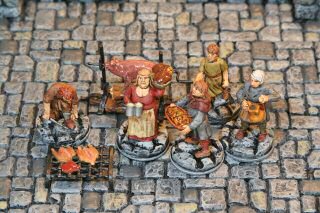 |
| Finished bases |
Here are the finished bases glued to the bottom of some Mirliton miniature tavern workers.Notice how the miniature bases go very well with the fieldstone floor from Hirst Arts.The bases have been painted black and dry brushed with some medium gray highlights.Since the Mirliton figures have no base of their own, their delicate shoesare epoxied to the base. Epoxy is much stronger thancyano acrylate or P.V.A. glues to ensure that the figures don't come off.And now the tavern workers must tend to their work and serve the ales and meats to the customers.
I hope you enjoyed reading the details of making and paintedtextured and sculpted bases for 28 mm miniature figures.More miniatures-related articles are atDan Becker's Miniatures and Models site.Thanks for stopping by and reading about my miniatures.