|
Hardrada and the Norse invaded near York.Harold raced north from Wessex.The two met at Stamford Bridge.At this chokepoint Harold and the Anglo-Saxons repulsed the Norsecausing major casualties.It is said the Norse arrived in England with 500 ships and left with 20.But celebration was short.Word came that William was invading in the south.
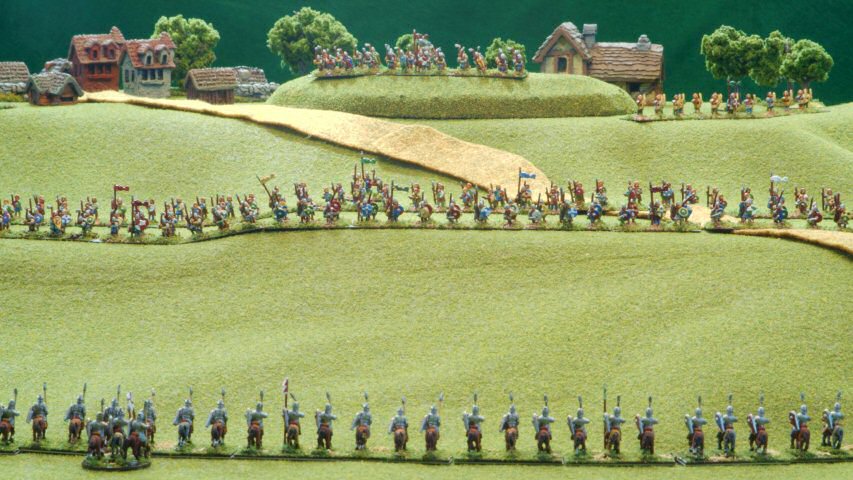
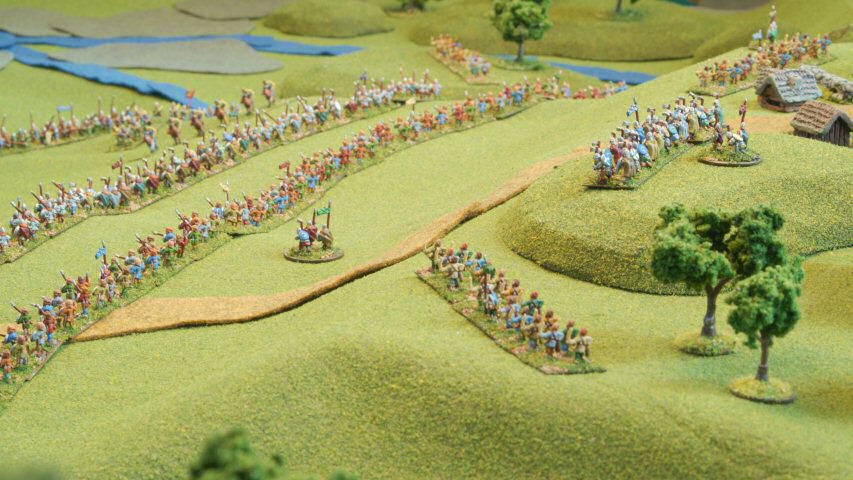
Immediately Harold raced south.Rather than wait in London or build a large army in a defensive position,Harold attacked near Hastings.William and the Normans formed up on the south side of the battle fieldin a long single line with knights in armor in the center,Breton infantry on the left, and the French infantry on the right.Harold and the Saxons took the hill on the north side in a long double line,armored fyrd in front and unarmored farmers, the Greater Fyrd, in back.Huscarls, the elite body guard of Harold, swung their two handed battle axesand protected their king.
 |
In the case of the Battle of Hastings, the Normans won.The Saxons never recovered.Some locals submitted to the invaders. Other attempted to fight.The Normans built castles and brought all opposition to heel.In the end, most of England was subdued.The Normans brought both their language and their ways to England.An immense census of the country, the Domesday Book, was createdand all English inhabitants were now feudal subjects of the Normans.
 |
According to accounts the Saxon shield wall held and repulsed the Breton infantry.As the Bretons retreated, the Saxons broke ranks, chased the enemy downhill,and were cut down.The Normans seeing this baiting tactic work, repeated the tacticseveral times and depleted the effectiveness of the shield wall.
 |
Note that hobby stores sell felt cloth cheaply. For about $1, you can get patchesof felt to make roads, streams, woods, marsh, and whatever scenery you like.Of course three dimensional models are best, but felt is inexpensive and easyto play games with.
 |
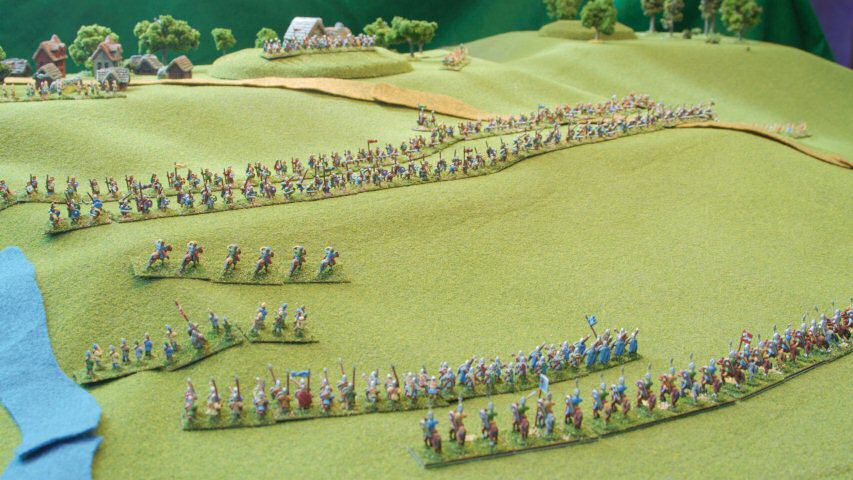
In Warmaster rules, the leaders are based individually and may attach ordetach from fighting units.They may even lead while detached.As long as they keep making their leadership role (e.g. 2D6 <= 8 for most leaders),they can continue directing units.As is common, I base my leaders on round bases to distinguish them from the fighting units.
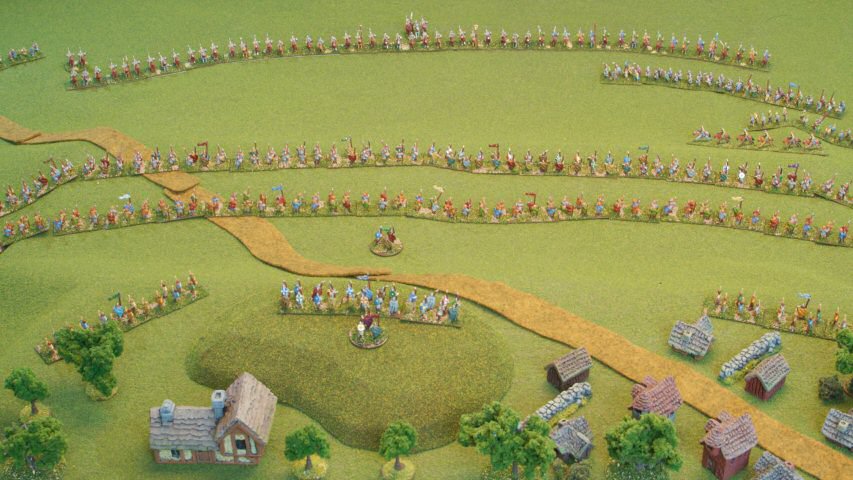 |
The village at the Saxon rear is somewhat hypothetical.It was likely built up after the battle.The hill is somewhat invisible from this vantage point.
 |
I modified the DBA and DBM basing for 15 mm figures.As with 15 mm, I placed 3 to 4 mounted units to base.However with infantry I doubled the typical 15 mm figure requirements:2 light infantry/psilois were doubled to 4,3 normal infantry were doubled to 6,and 4 heavy infantry were doubled to 8.Some people even put 10 or more on the heavy infantry bases.
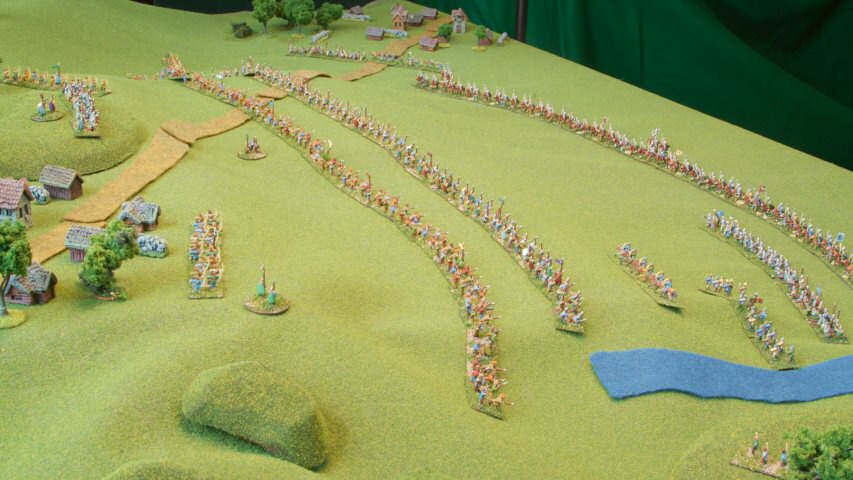 |
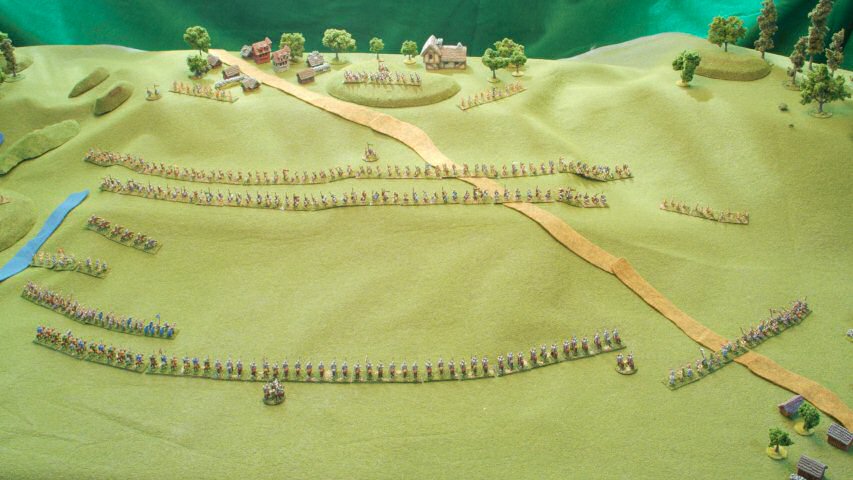
This view illustrates the value of smaller 10 mm figures.It is easier to field larger, more strategic level armieswith smaller figures.You can see that the figures look fine from this level.I found, however, that 10 mm figures did not save me much painting timefrom the 15 mm I usually do.I guess I am too detail-oriented, but if a figure had a belt,I had to paint it, if there was a scabbard, it was painted as well.The details of a 10 mm figure a somewhat more indistinct than15 mm figures, but they were still there, and hence they hadto be painted.
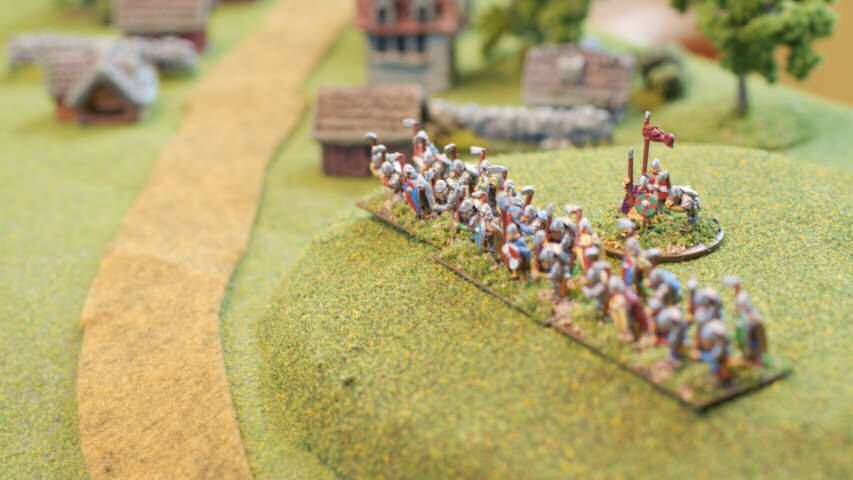 |
The Warmaster army list for Saxons is a bit light on Huscarls.They limit the maximum to 1 unit (from memory - I don't have my rules as I write this).I think this limits the Saxon army too much.Many scholars think there were many Huscarls fighting for the Saxons.Yes, they were elite and expensive, but some argue thatwith the rush to battle, the elites comprised much of theSaxon fighting force.I don't mind the Huscarls being expensive, but I think thearmy list artificially limits the number appearing on the battle field.
I hope you enjoyed reading the details of the Battle of Hastings in 10 mm,and the variables and thoughts that go into playing the battle withthe Warmaster rule set.More miniatures-related articles are atDan Becker's Miniatures and Models site.Thanks for stopping by and reading about my miniatures.