

The figures primarily are 28 mm plastic figures by Perry Miniatures with some 28 mm white metal artillery figures by Sash and Saber Castings. As I typically do smaller armies in smaller scales, this certainly has been my largest miniatures project, in terms of the number of figures and time spent. Click on any image to get a larger view.
To the right are the Confederate generals. These are some of the few white metal figures in my armies, these being set ACW4 from Perry Miniatures. The generals and their horses are all unique sculpts and nicely proportioned and detailed. They fit in quite well with the Perry plastics.
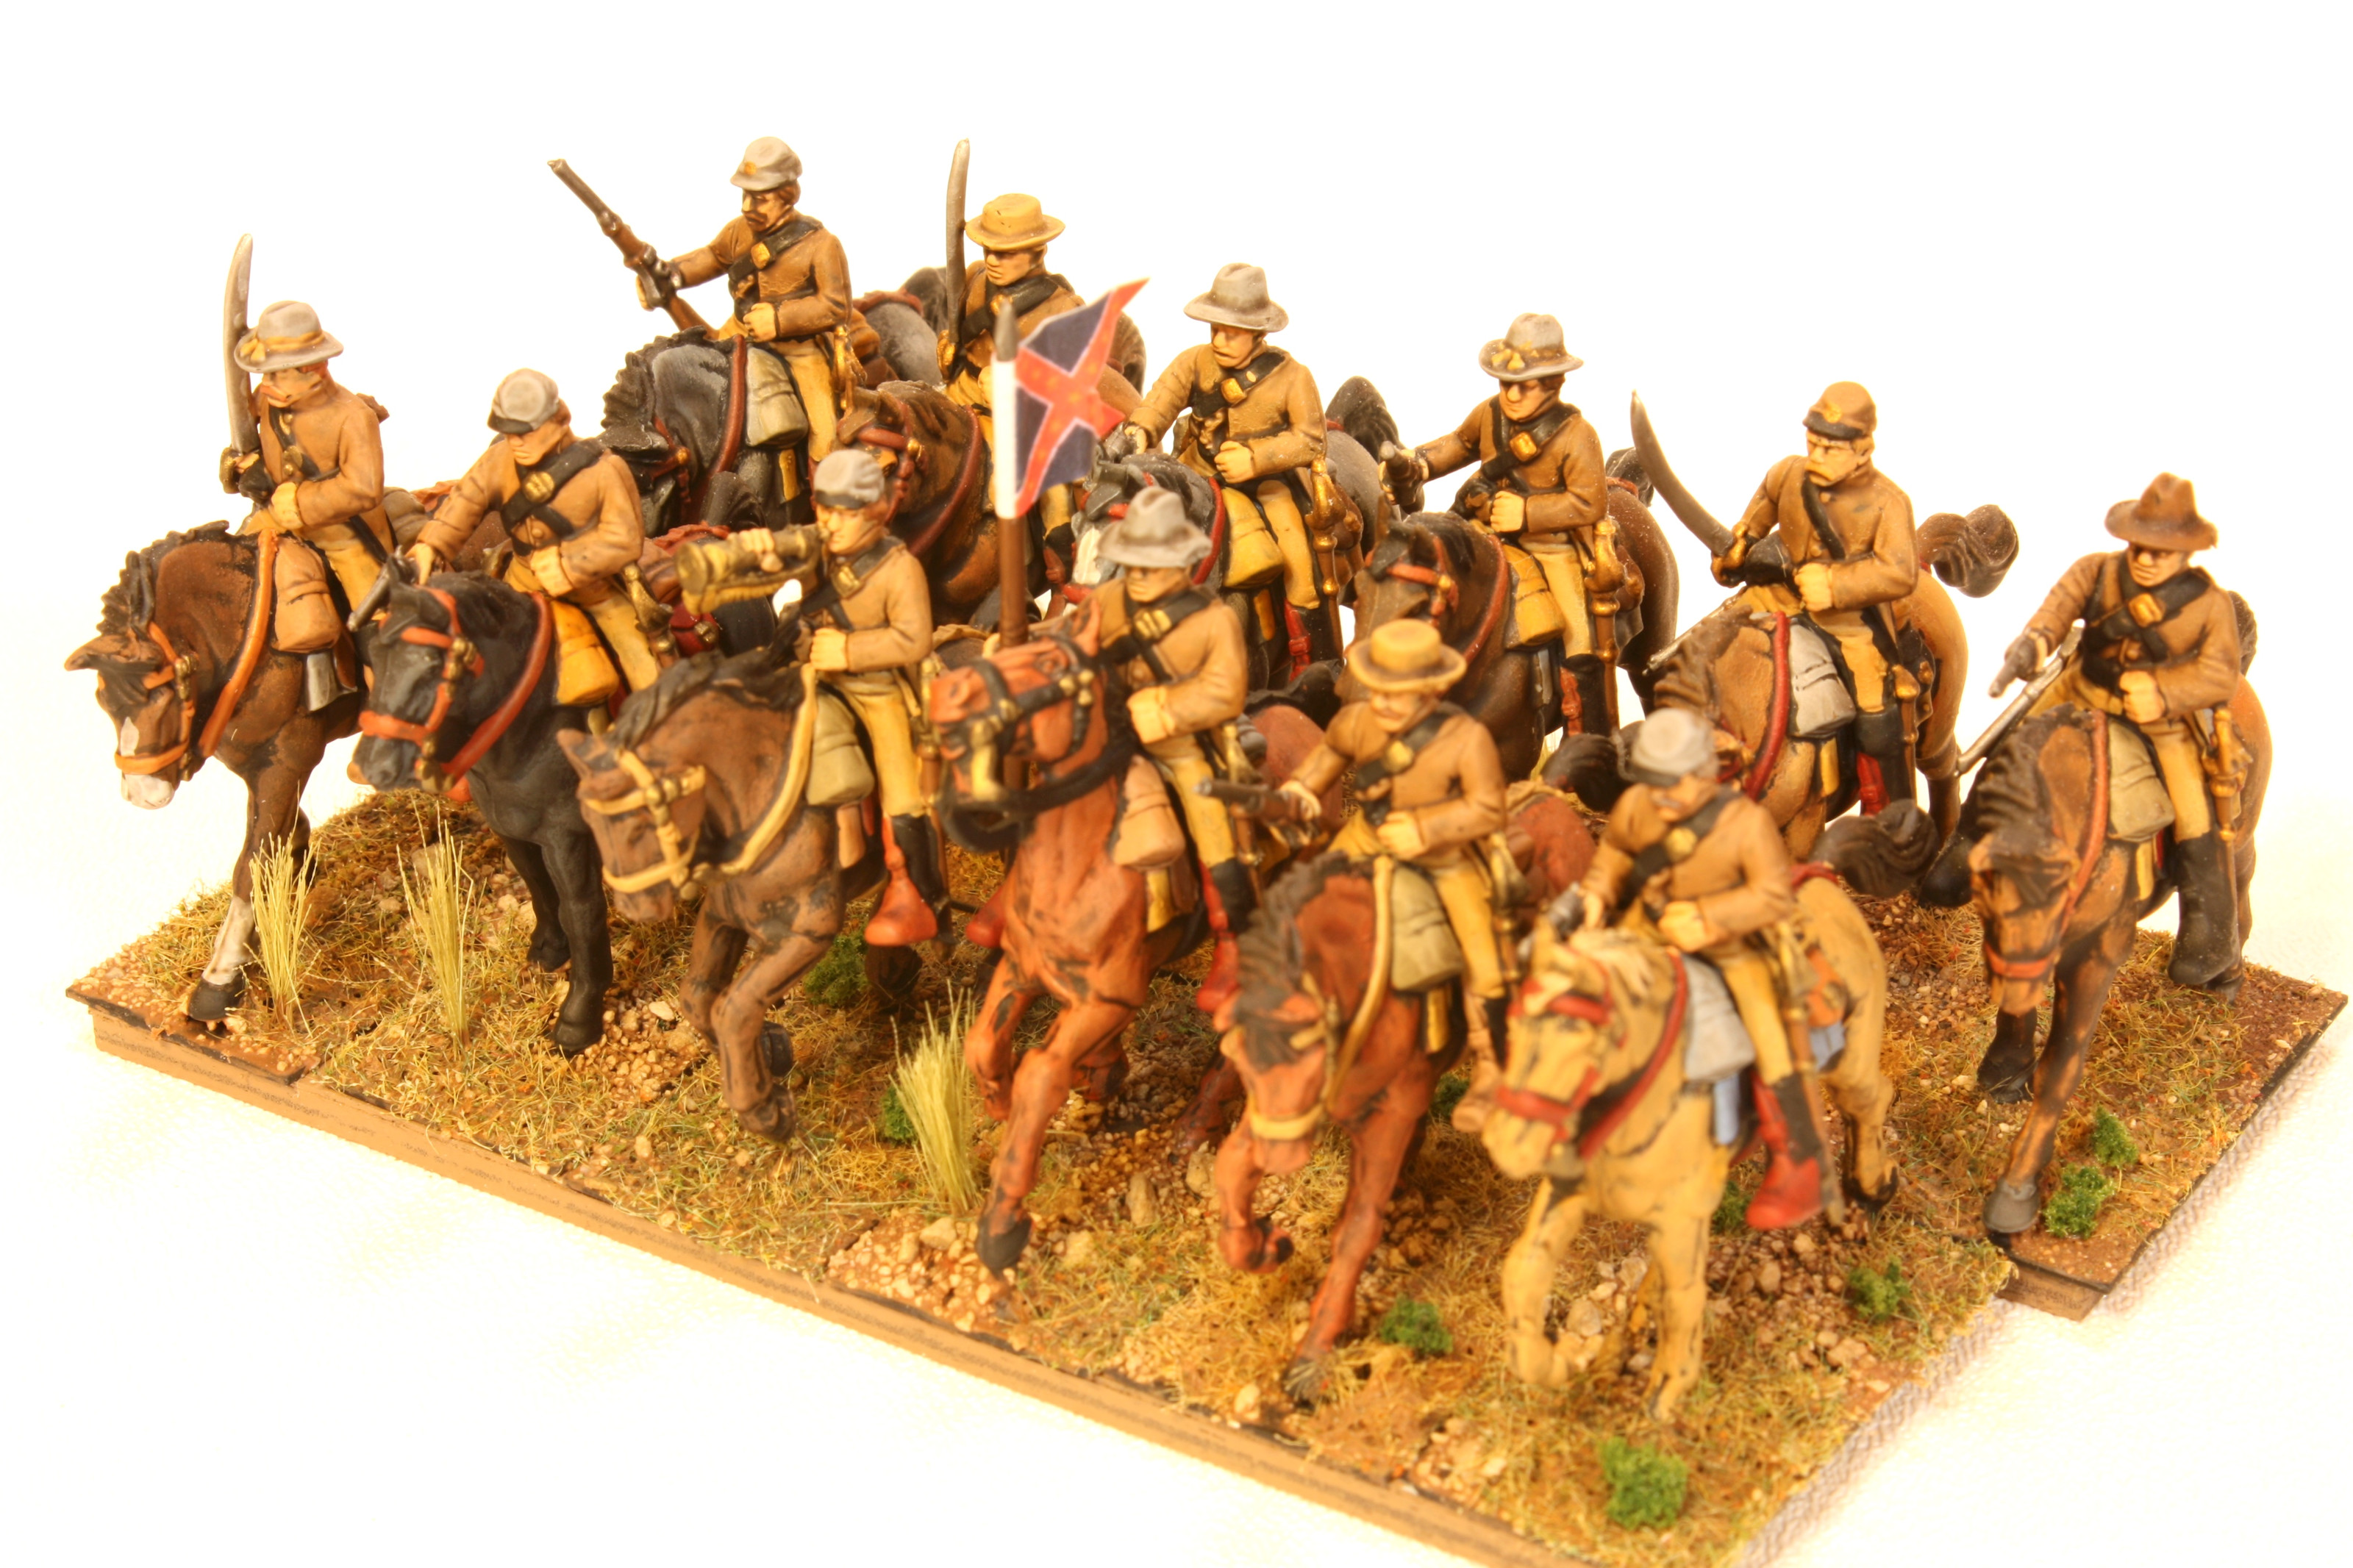
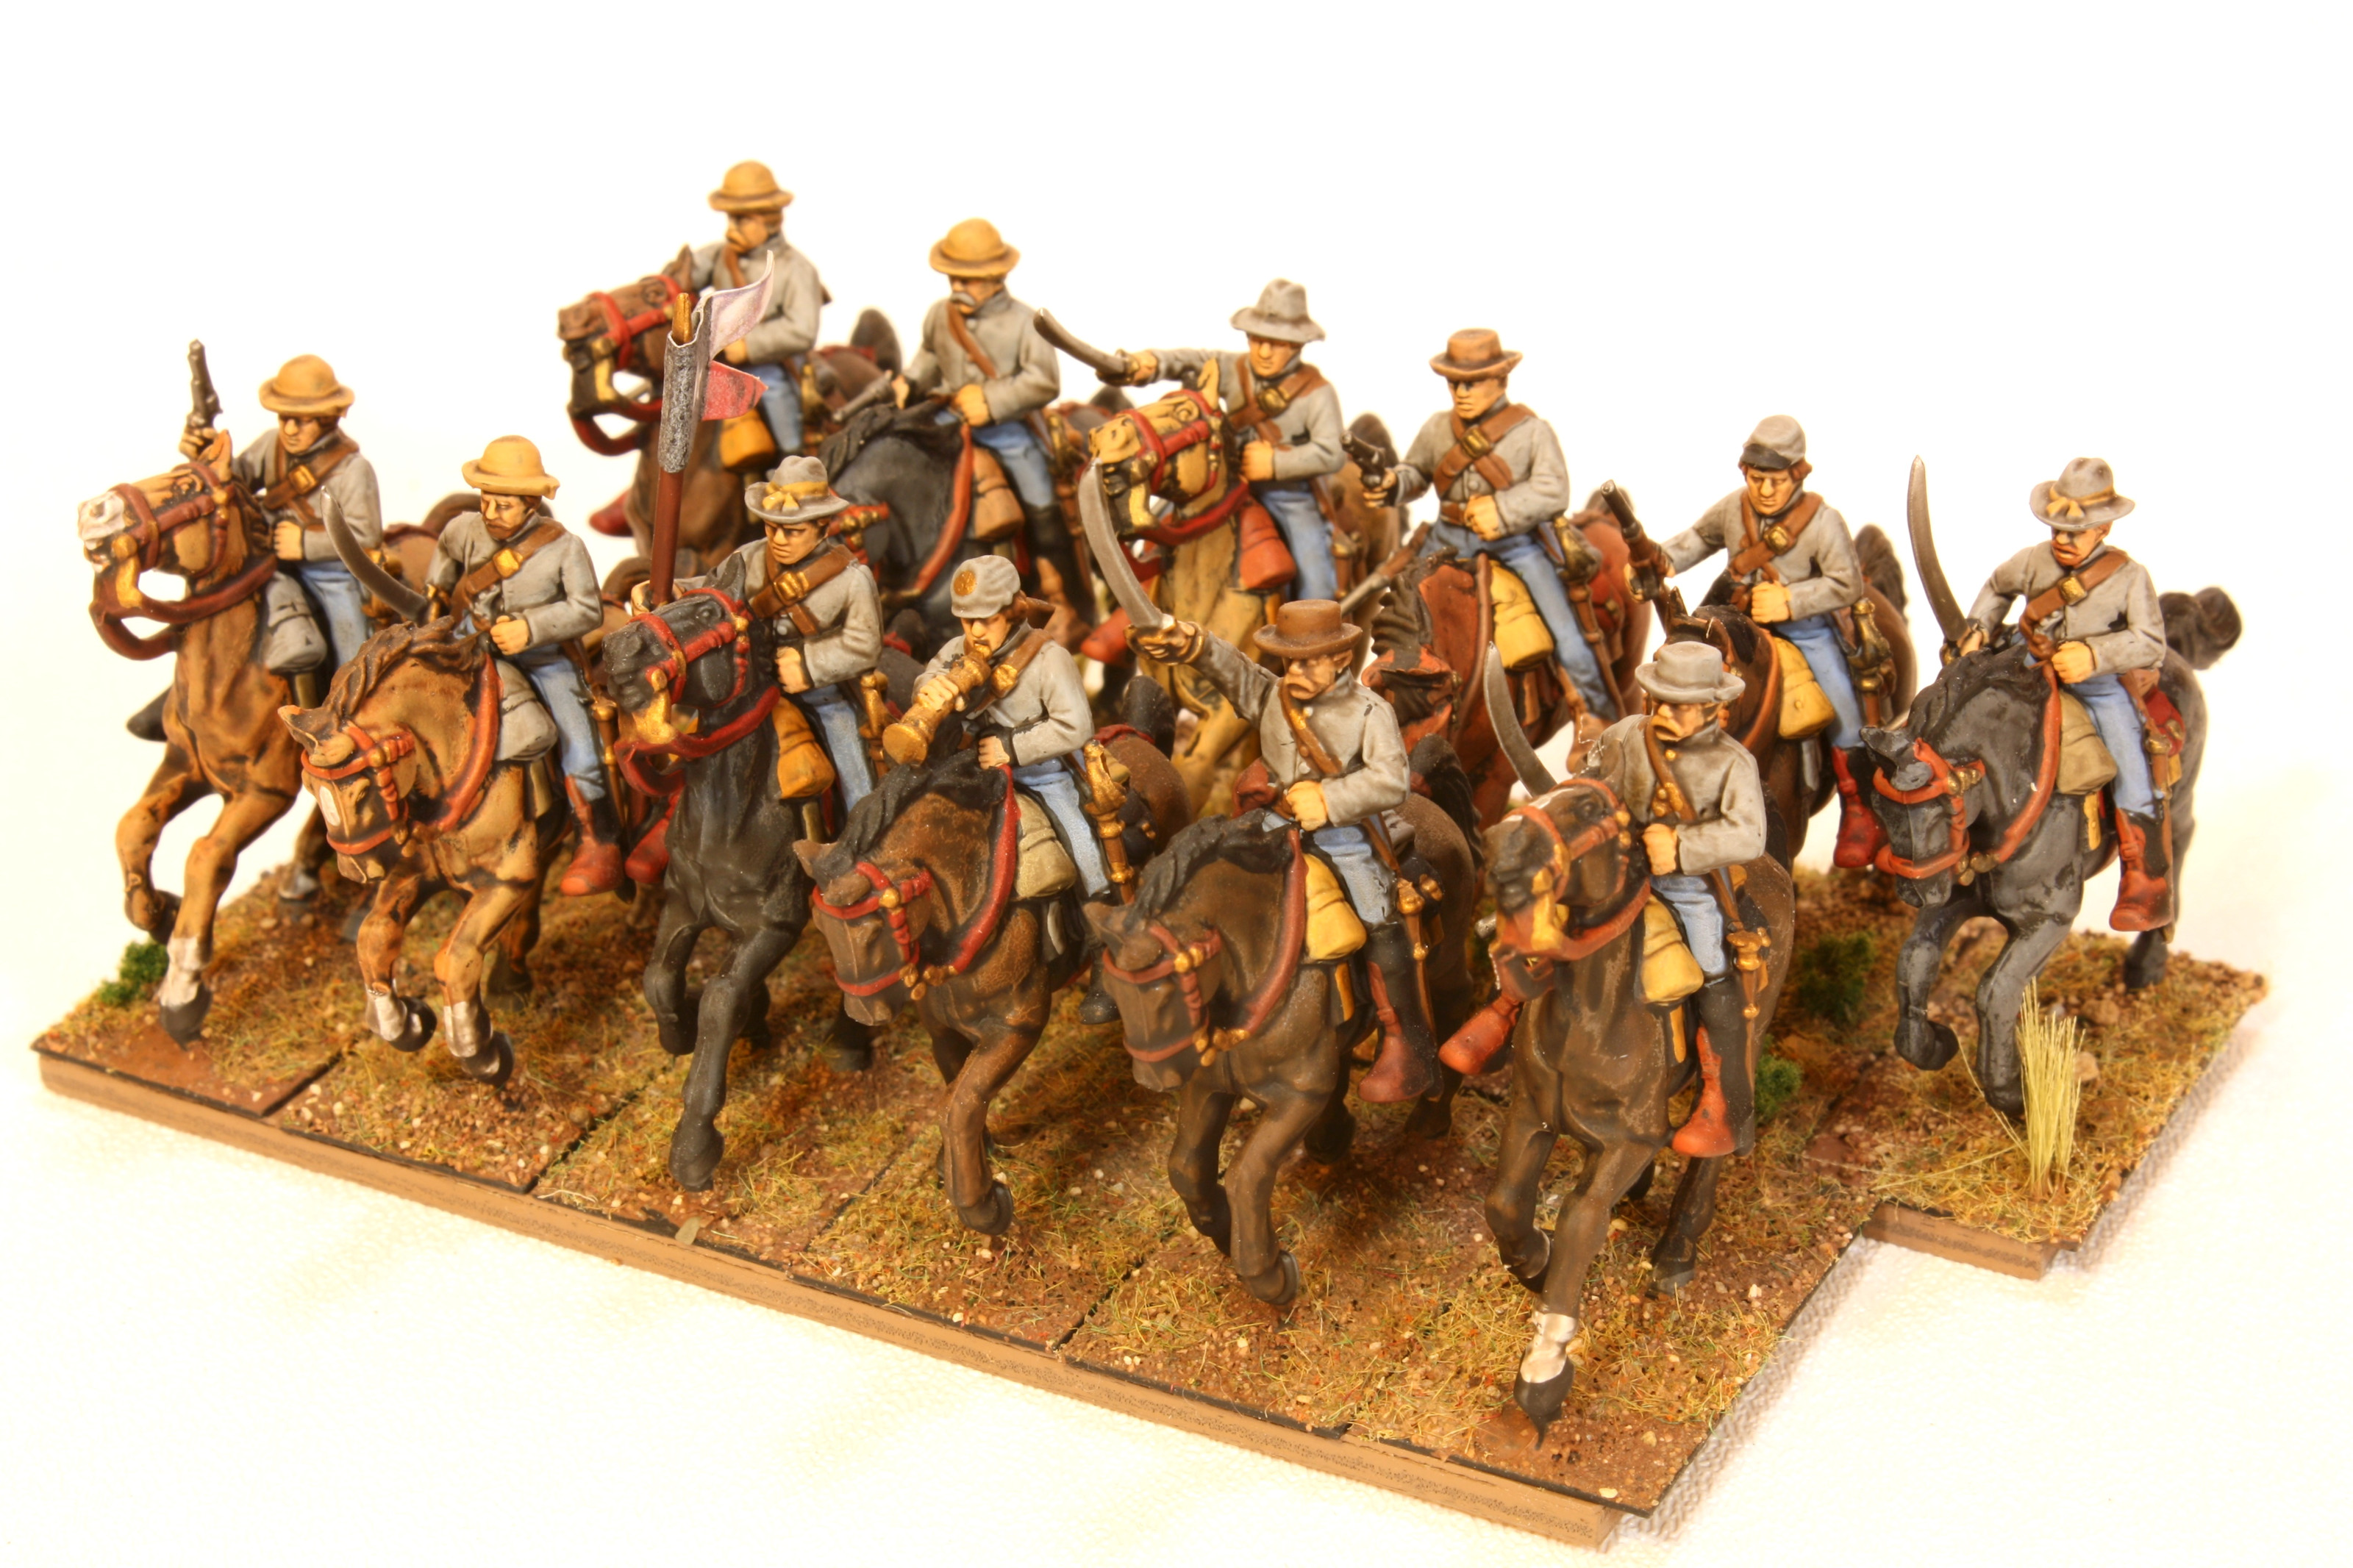
To the right is one box (12 horses) of Perry Miniatures plastic cavalry set ACW 2. The Perry plastic cavalry have interchangeable horse halves, arms, and head gear, and while the pieces are repeated, the unit has a varied look to it.
I've painted these a butternut brown as suggested on the box packaging. I am no Civil War historian so all my color schemes might be ahistorical. The flag on this unit and all units are from the Brady Severns flag graphics that he contributed to the John Foley Battle Cry fan site.

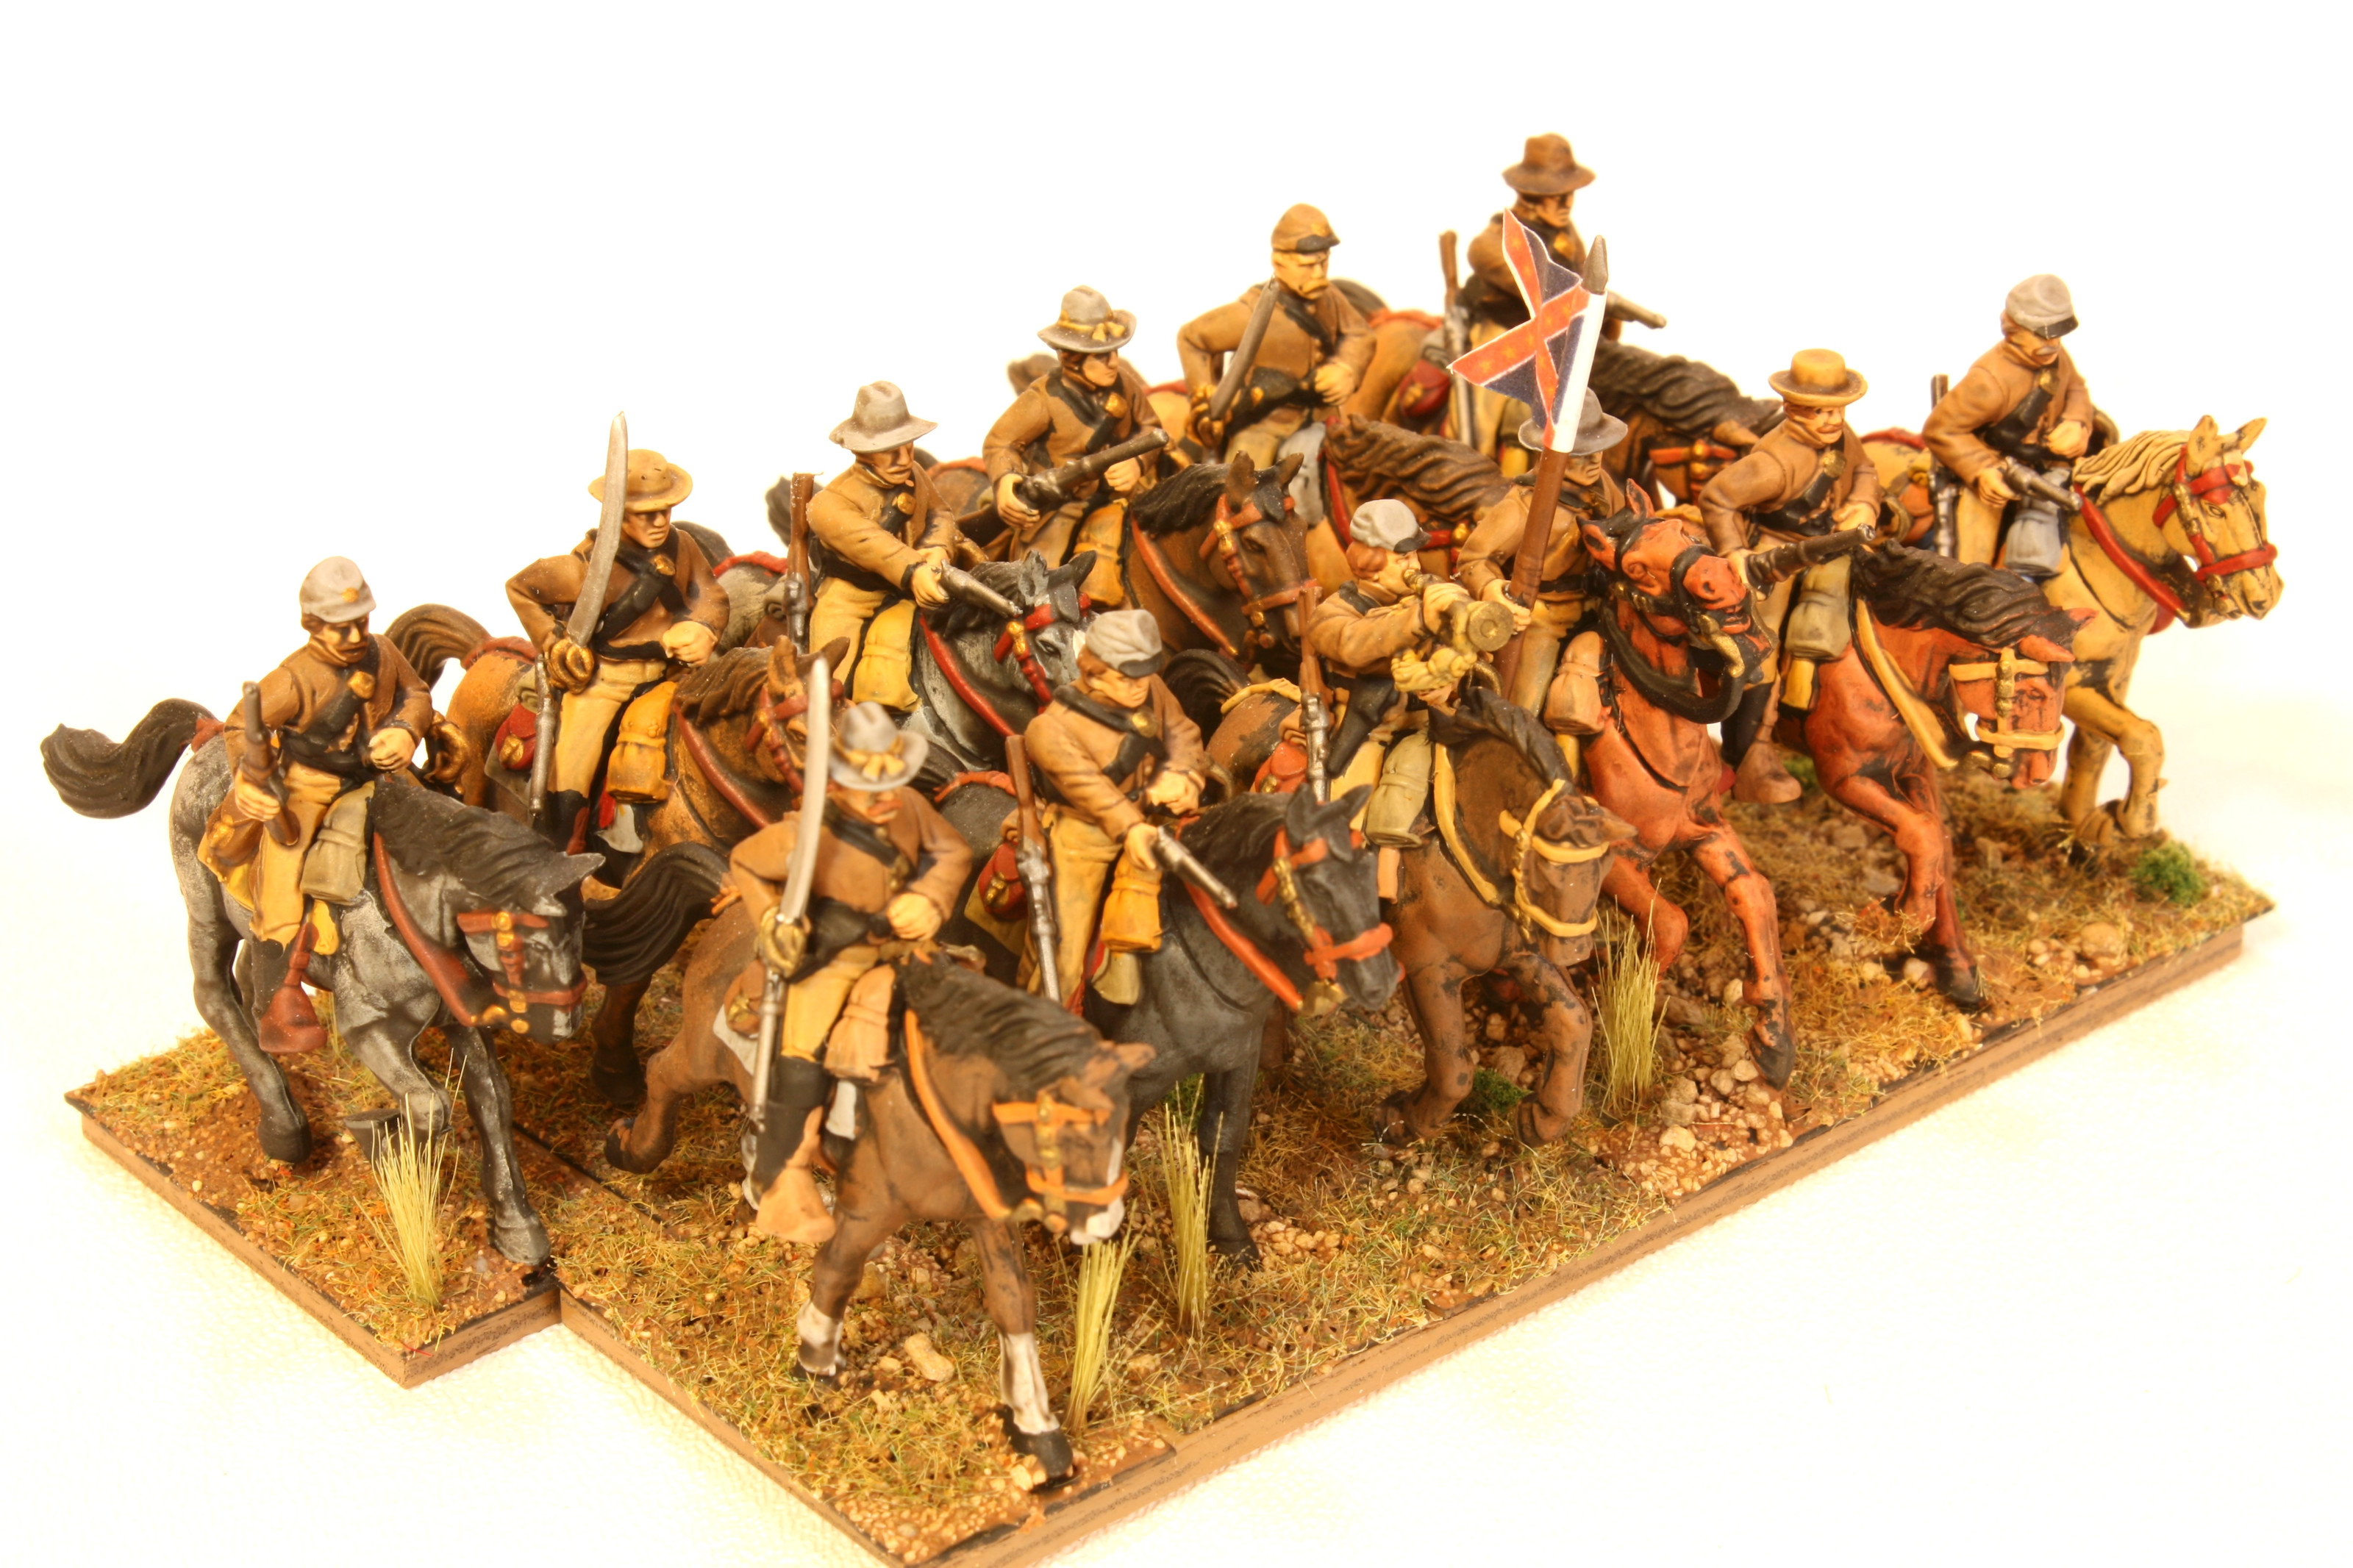
Here's another box of 12 Perry plastic cavalry. These are painted with blue and gray uniform as suggested on the box.
Like all the other miniatures, the process is to:
- Assemble with styrene glue.
- Mount on metal base.
- Prime with black spray paint.
- Block in colors with Vallejo acrylic paint.
- Wash in crevasses with MinWax Polyshades Tudor varnish.
- Decorate base with Woodland Scenics scenery bits.
- Varnish with Testors Dullcote lacquer.
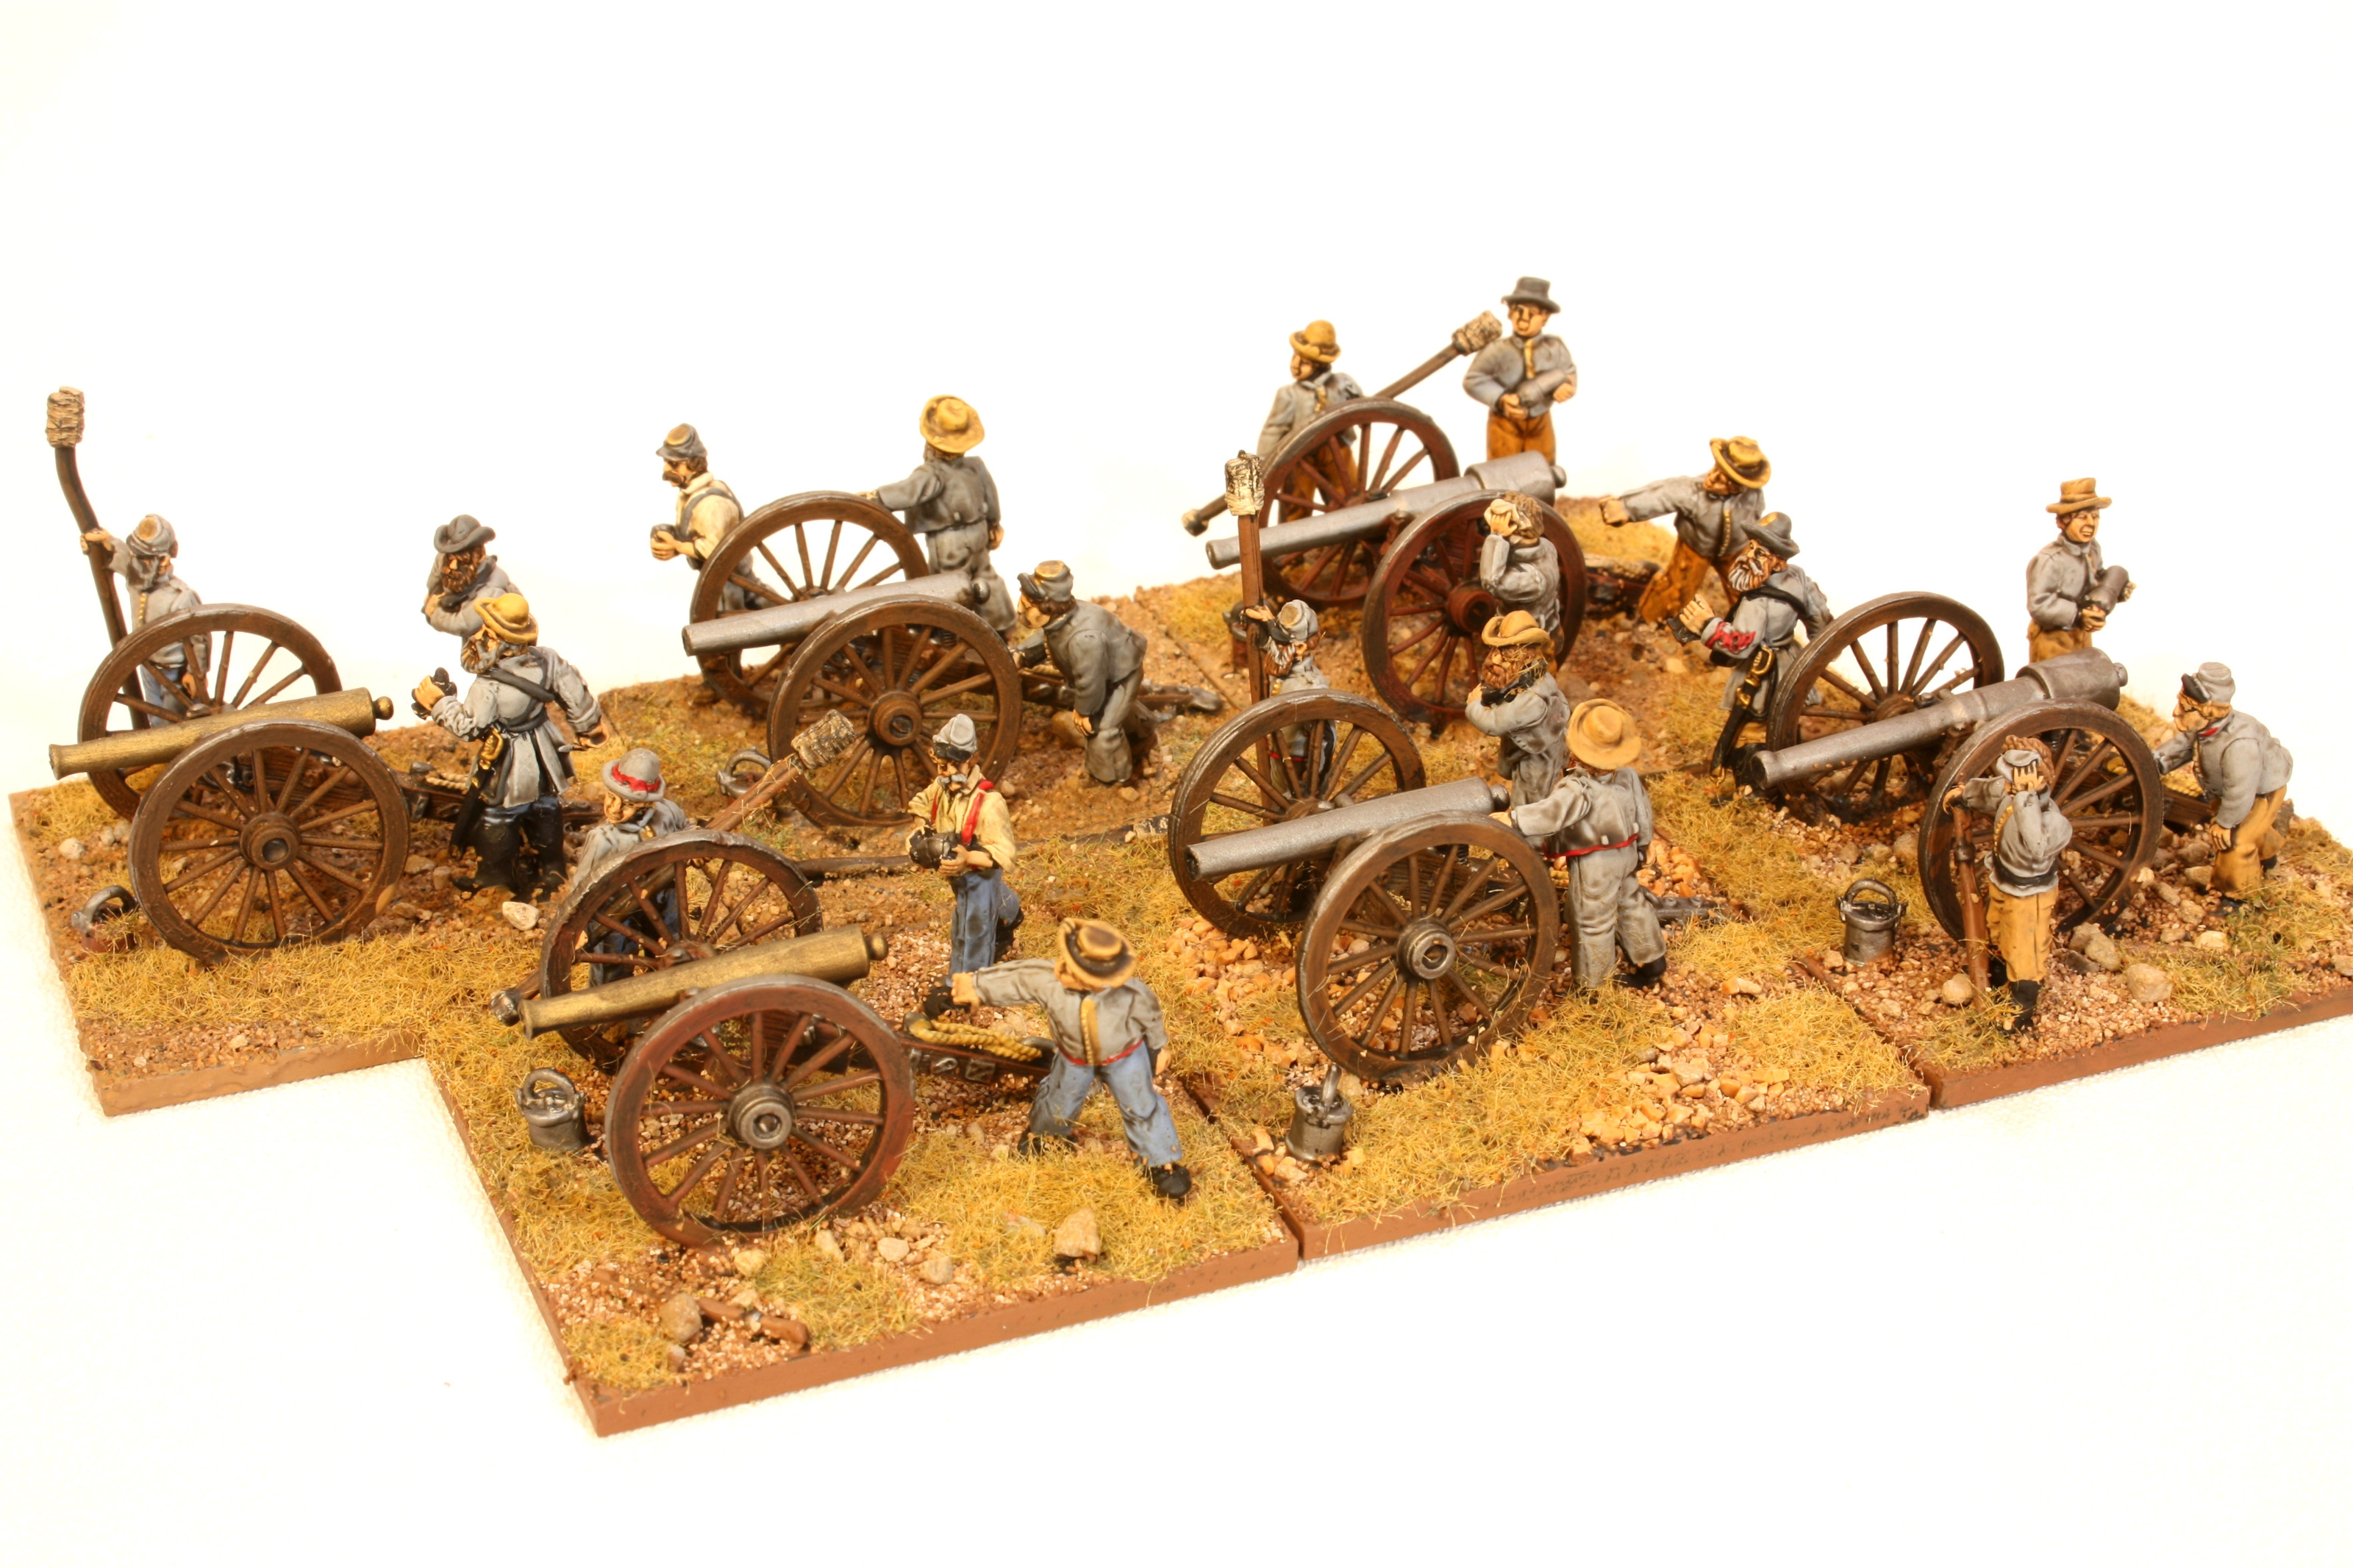

Here are six units of artillery from Sash and Saber Castings. The guns and the troops come separately. I've mocked up three types of guns here, a 12 pound flared Napoleon in bronze, a 12 pound straight Napoleon in steel, and a 10 pound Parrott in steel. They are done in sets of 2, in order to be useful with Hasbro's Battle Cry game.
The Sash and Saber figures are a little more animated and a little less formal than the Perry figures. The beards tend to be bigger, the clothes baggier, and more wrinkled. From a height and scale perspective, they match well with the Perry miniatures.

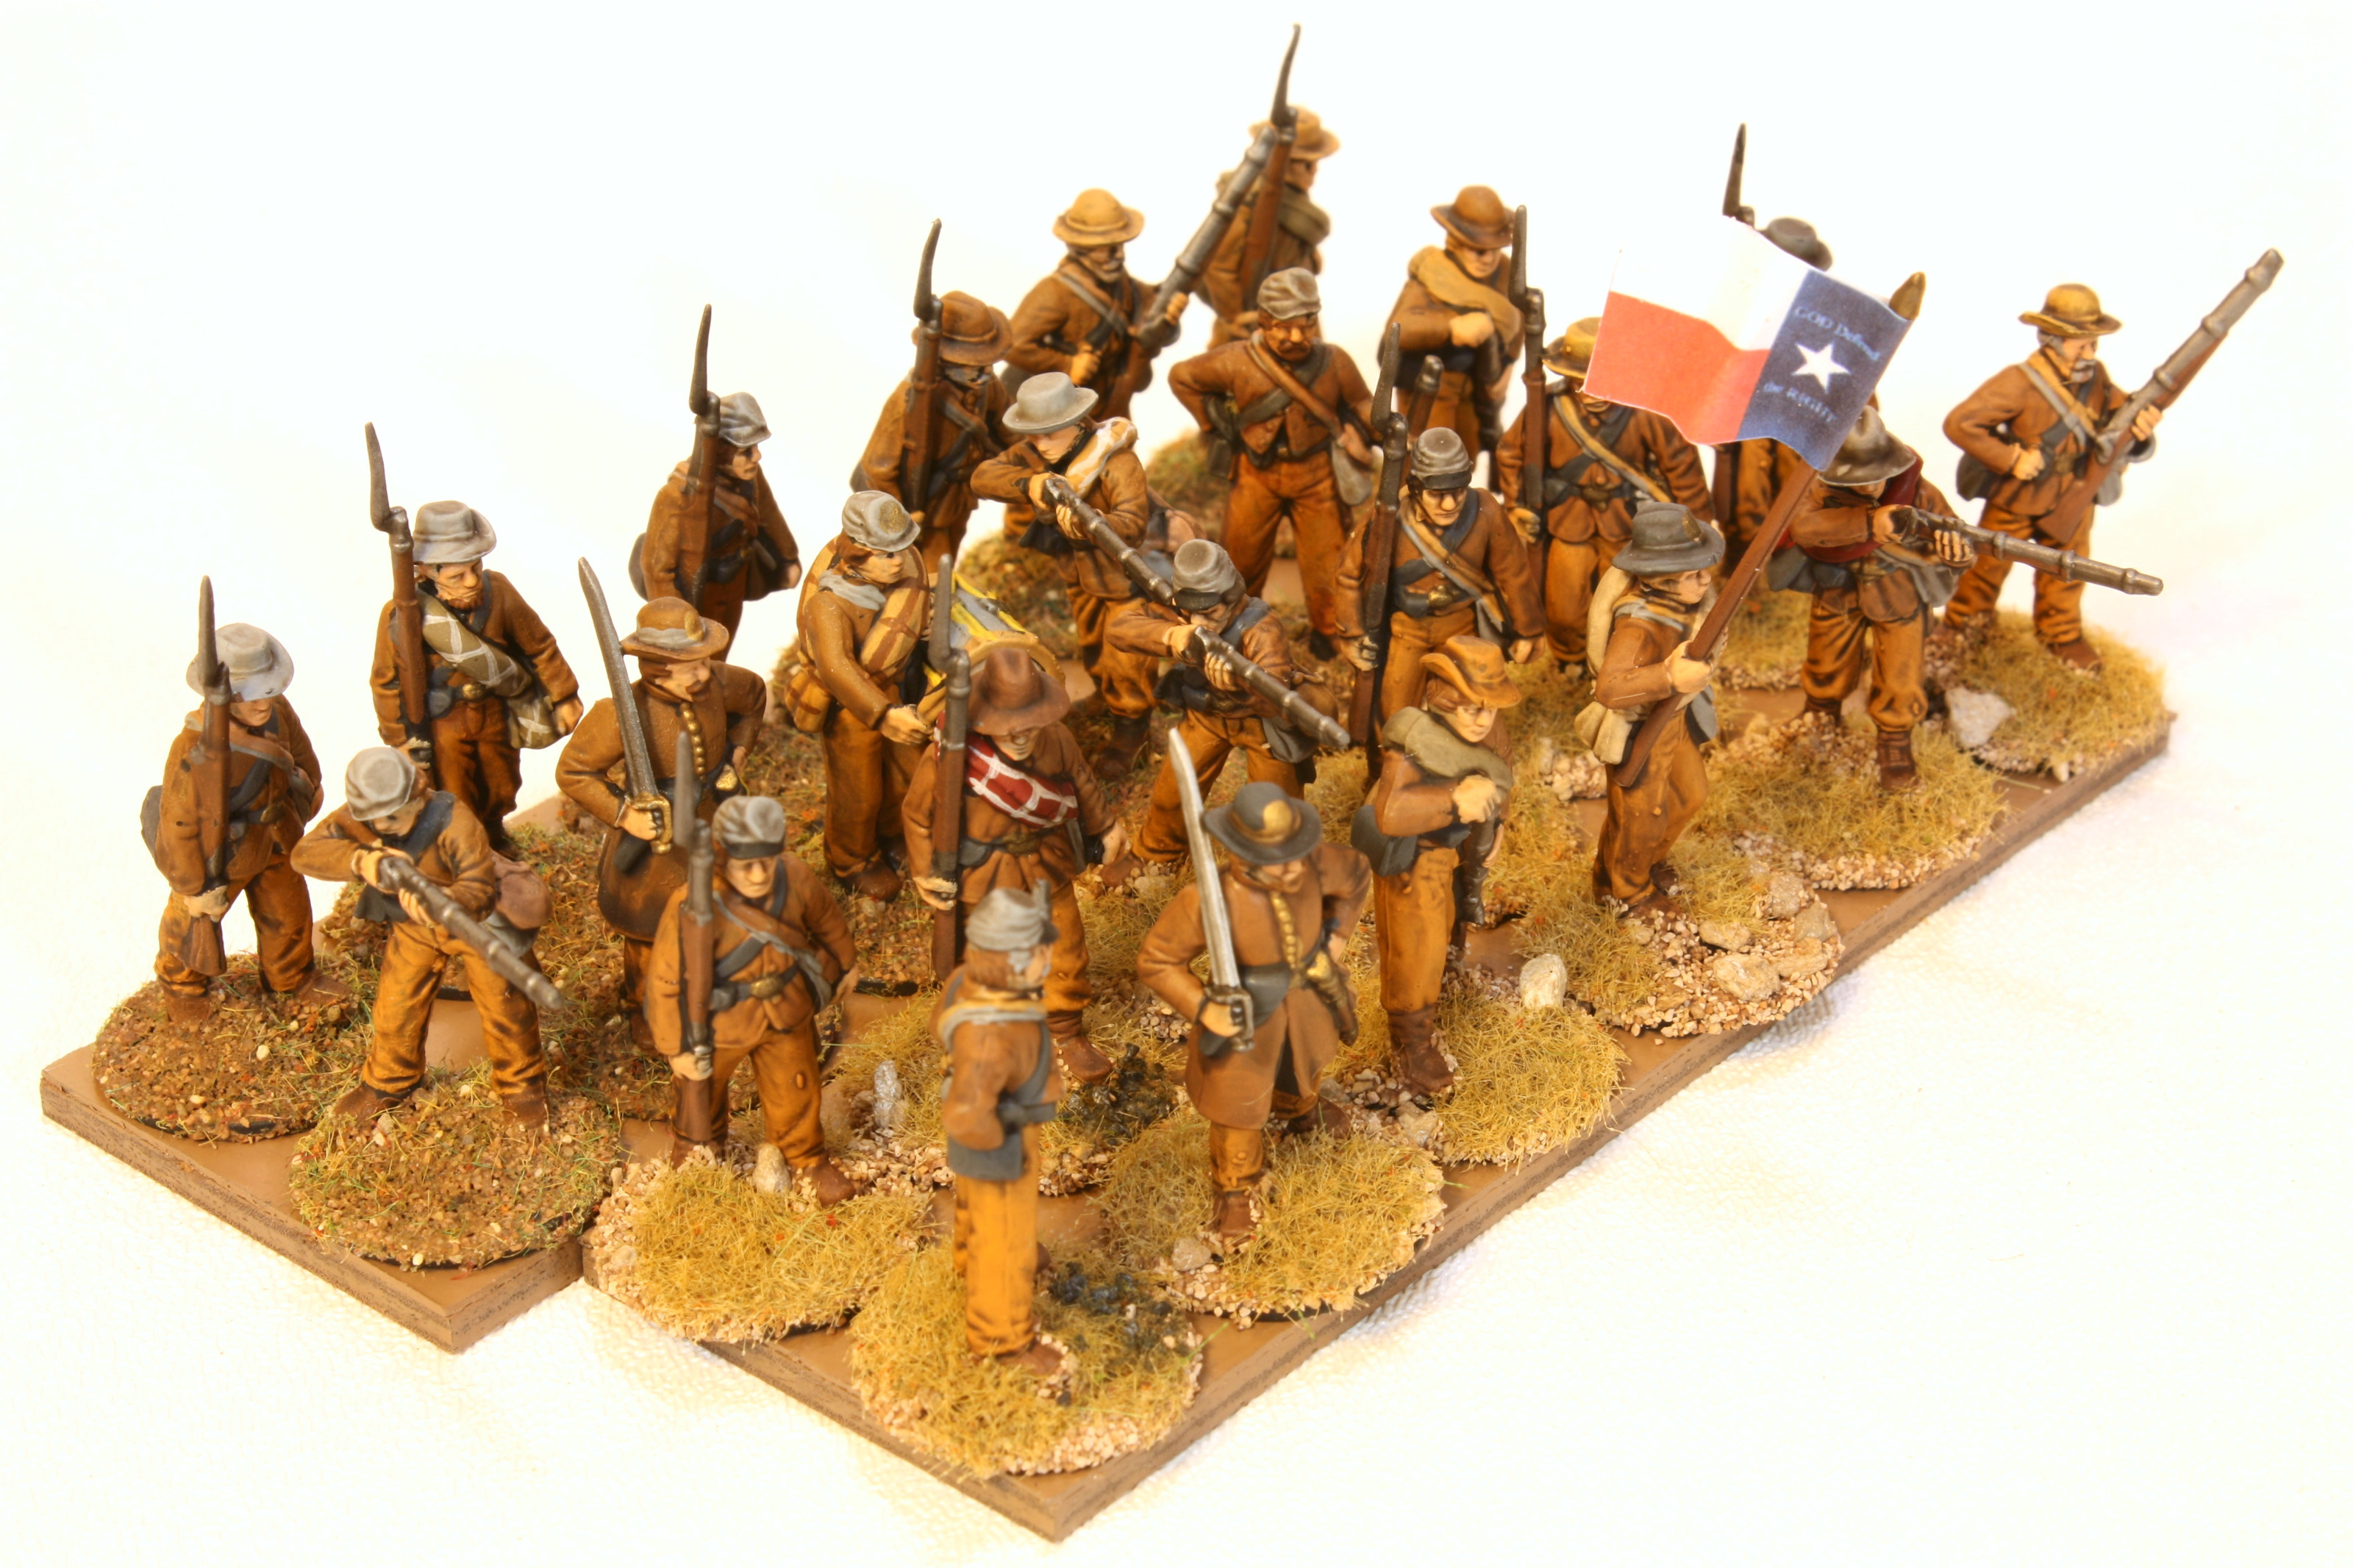
Here is a partial box of Perry plastic infantry miniatures painted in butter nut brown. A full box (ACW1) contains 36 foot soldiers, 3 identical sprues of 12 figures each. I've made my units 24 figures on 2 bases 120 mm wide by 40 mm deep. I think a base of 12 figures is easy to divide for many games. For example, for Battle Cry with its 4 steps of casualties, you would remove 3 figures for each wound.
As with the cavalry, there is variation for the sprue of 12 figures, primarily in head gear, but also in the officer's arm, flag bearer/drummer arms, and a few of the rifle men. For Confederates, I used mostly brimmed hats rather than the kepis and forage caps. Some detail-oriented historians might decry the mix of headgear, the various coats, backpacks, and equipment, but it looks fine to me. With an army this size it is possible to sort units via equipment, but rather I went for the disunified varied look.


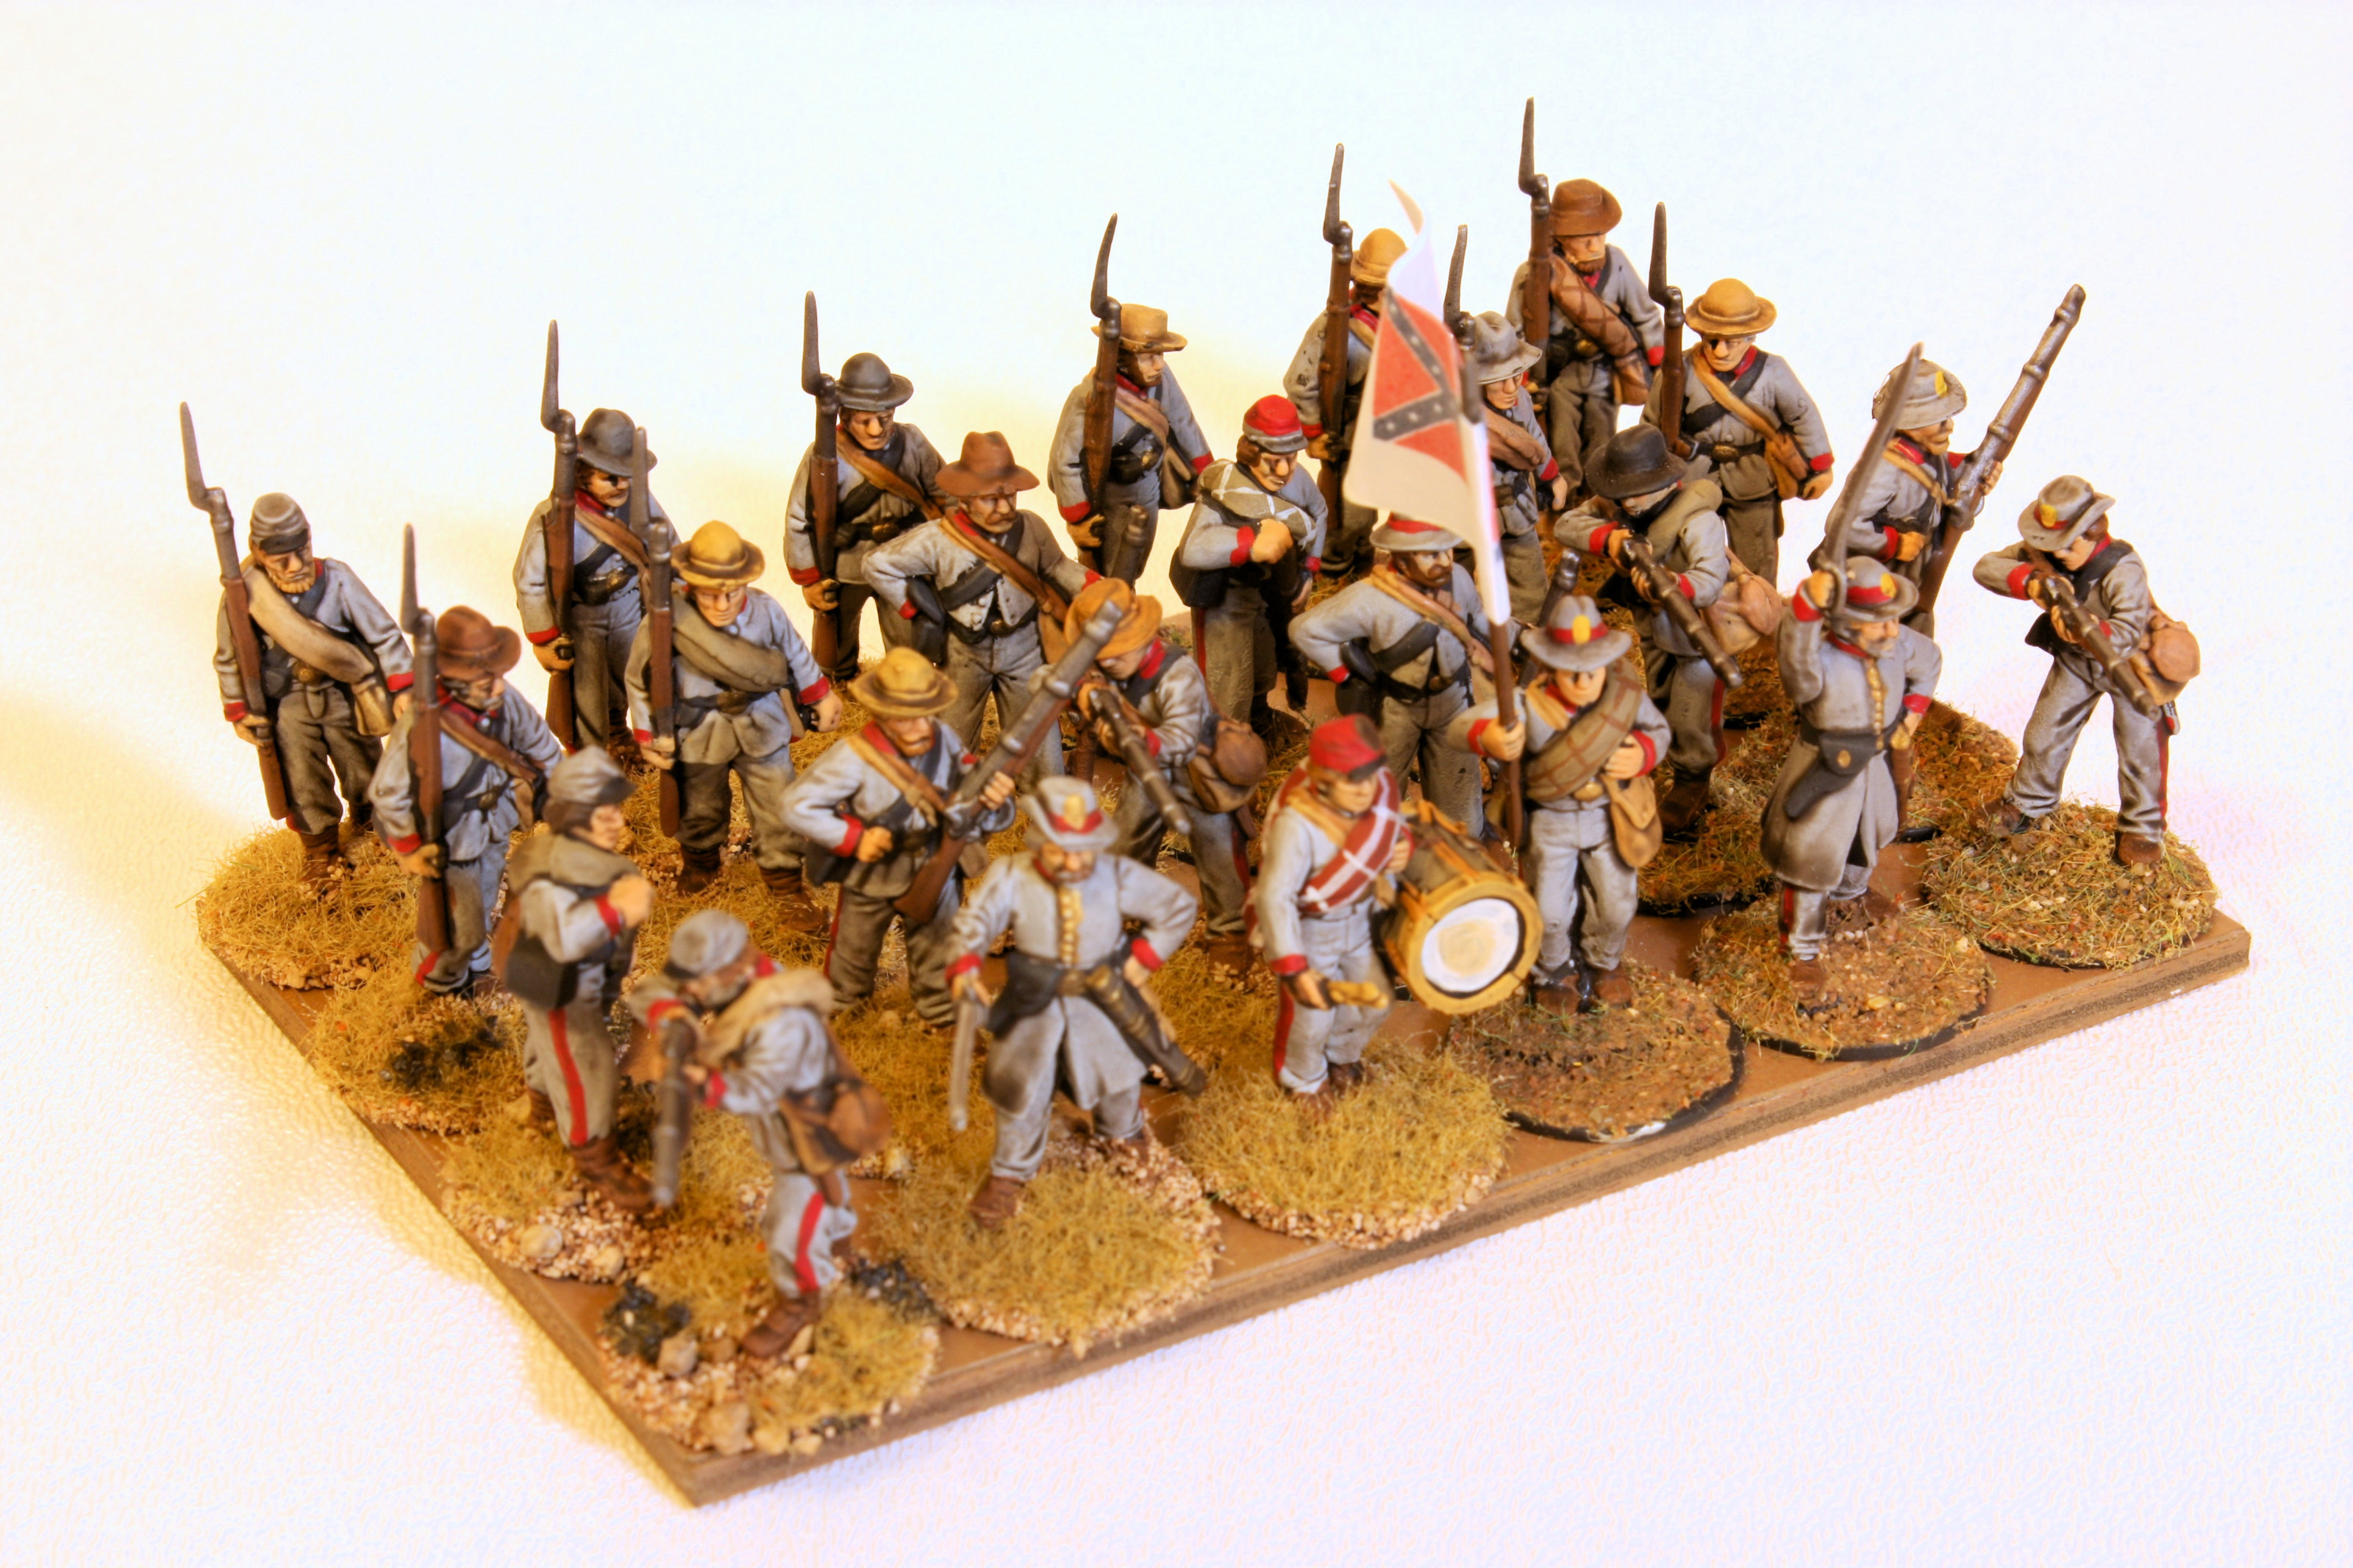
Here is a second unit of Confederate infantry painted with blue pants and gray coats. Coincidentally, there are 6 Confederate painting suggestions on the box, and for the most part, I've followed all 6.
Once I have glued the figures together with styrene glue, I mount the figures to a metal base. For my cavalry I use a 20 mm by 40 mm rectangular base. This is quite tight for this scale and sometimes the horses need to be positioned to make a good fit. Some might prefer 25 mm by 50 mm bases for 28 mm cavalry.
For infantry I use 20 mm fender washes which is quite unusual, as many people tend to use 20 or 25 mm squares. I'm ambivalent about my choice. I like the round base because it lets you pose the figures a bit to the left or right, and it useful for skirmish games as well, but it does let a bit of the undecorated unit base to show through. Squared offer fixed rotational positioning, but cover up the unit base better.
With both cavalry and infantry, the figure base is ferrous steel, and the unit base is a bit of basswood plywood (from Litko Aerosystems) with a layer of magnetic sheeting attached. I got the rectangular metal bases from Wargames Accessories and the round metal bases from an auto parts store.

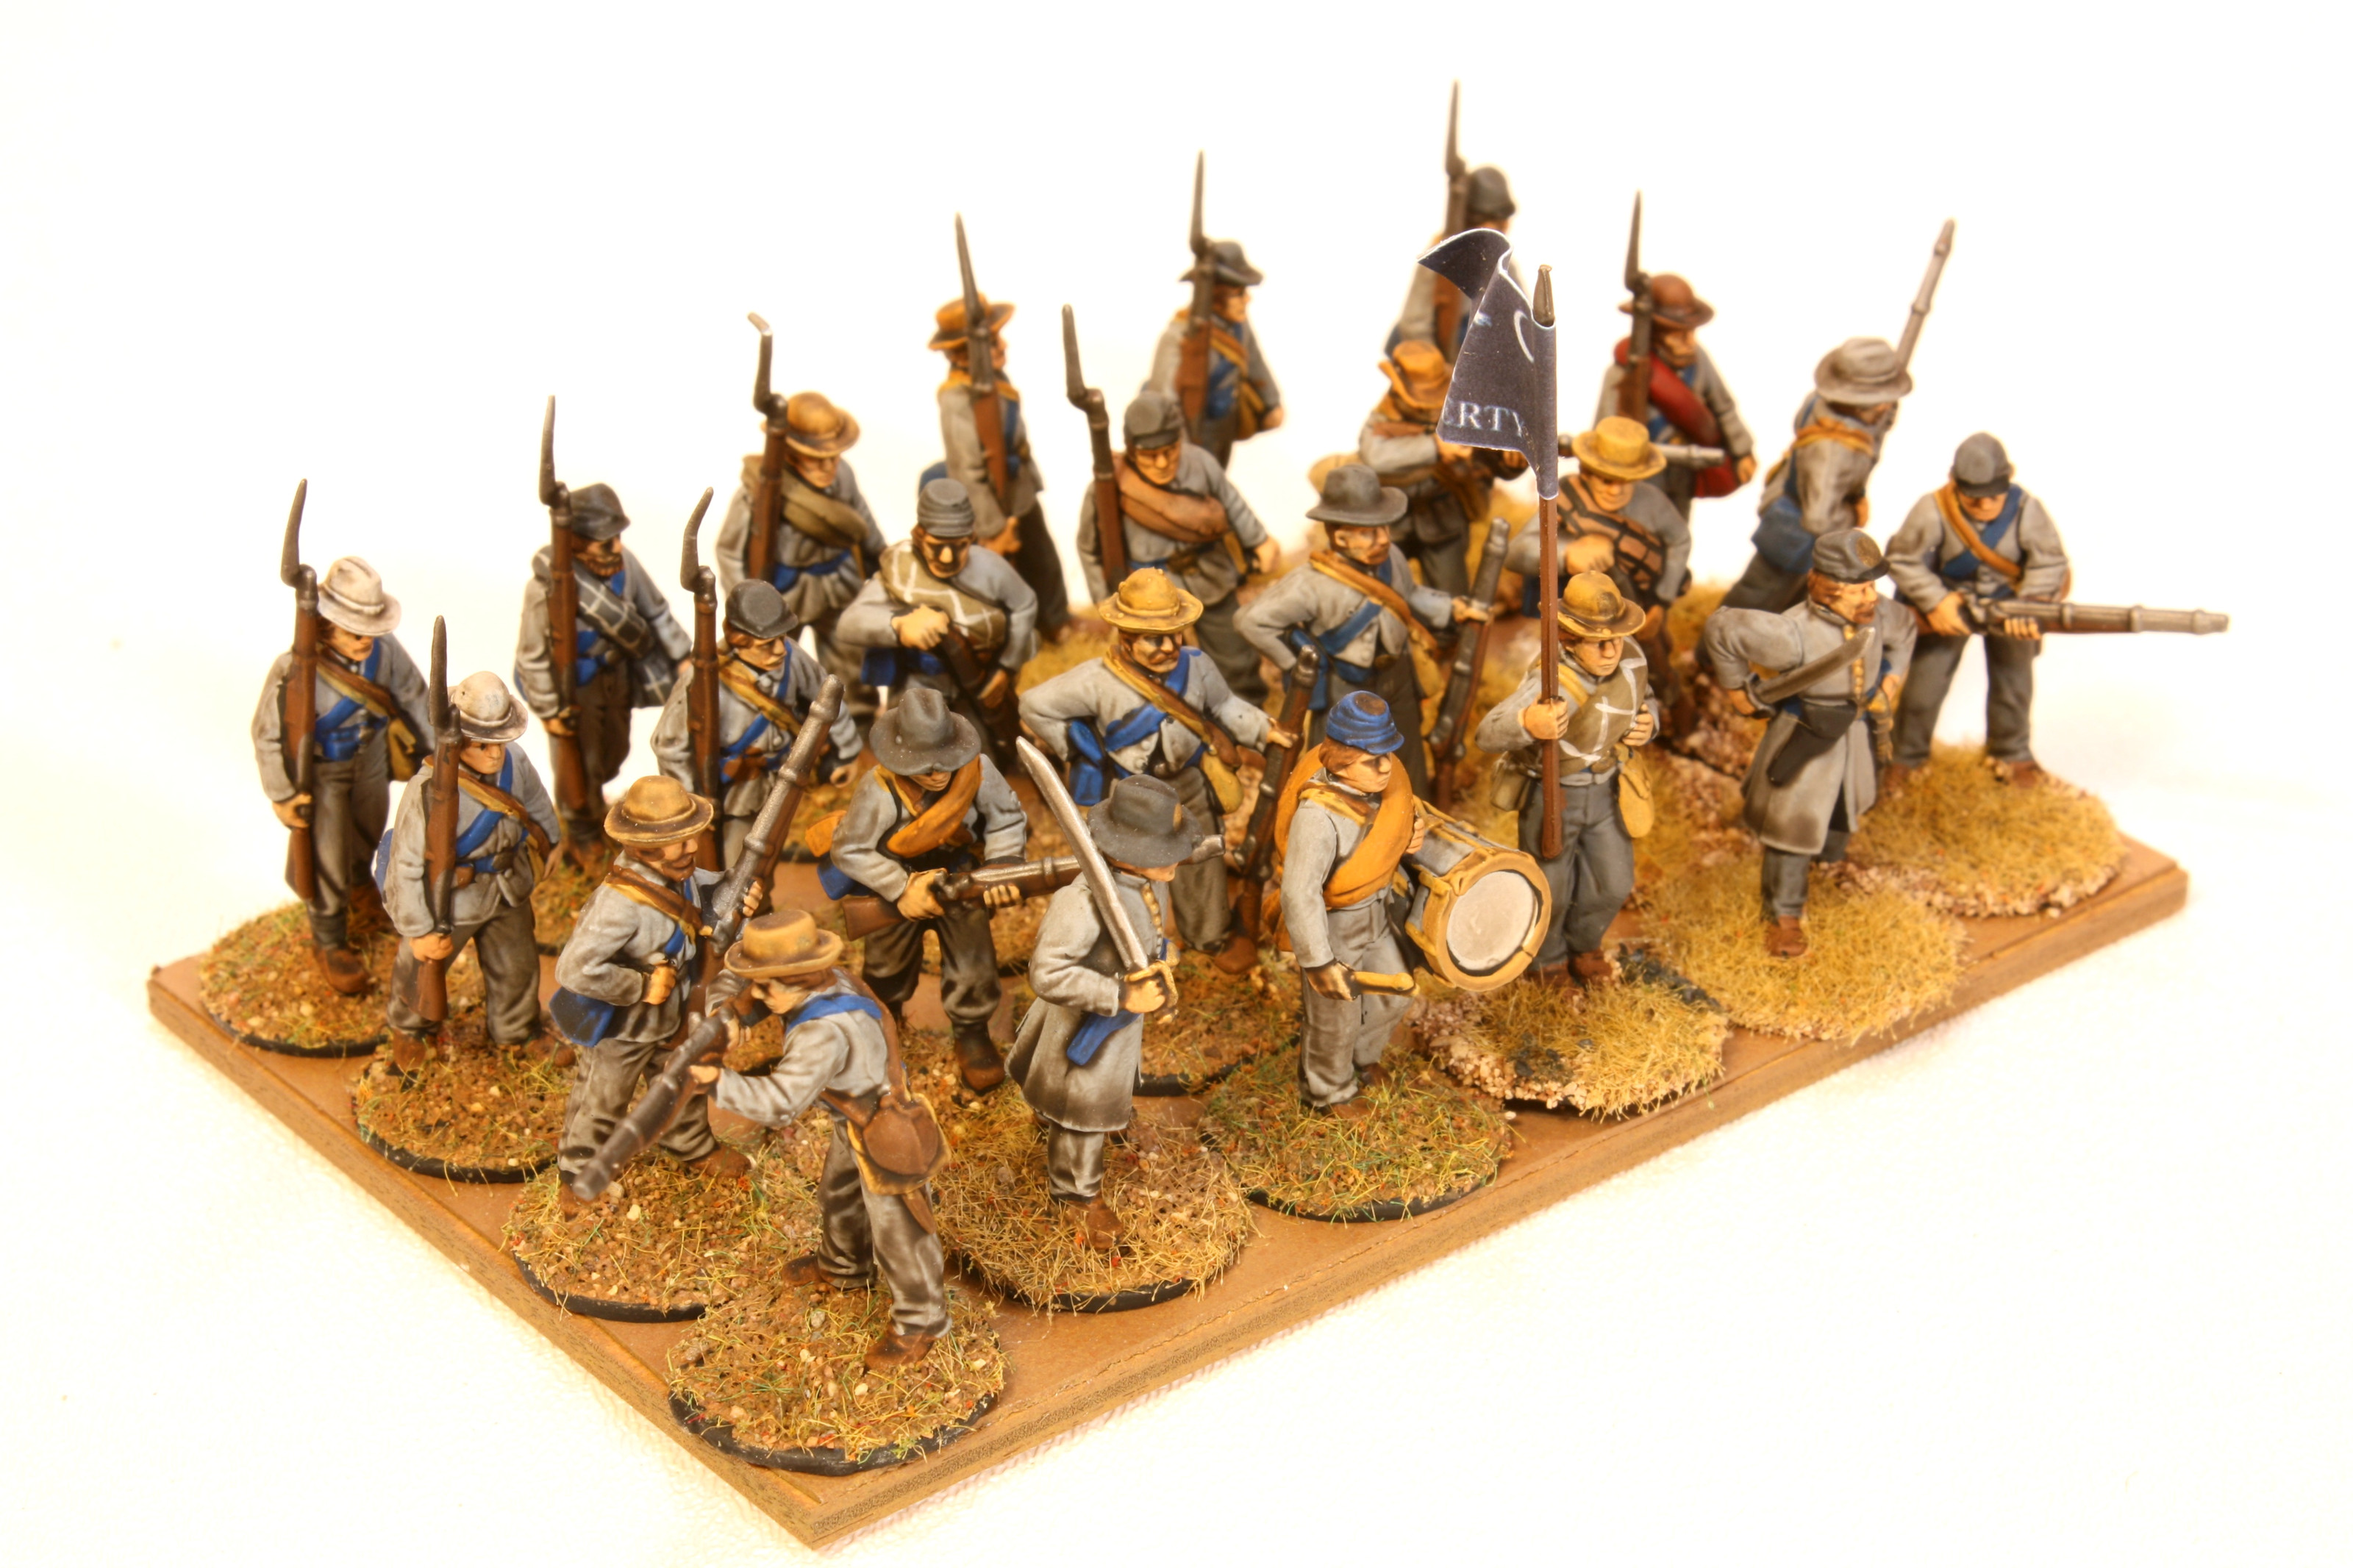
Here's another Confederate infantry unit painted in gray with a bit of red bordering. Not quite a Zouave unit, but a little dressed up. I don't think it is truly historical, but I call these guys the Zouaves.
I prime all figures with black. I try to not fully block in the basic colors, and I try to let the black primer show at the edges and crevasses. However, I am not so aggressive as many of the Kevin Dallimore students tend to be with color variation.


Here's a unit with butternut pants and light gray coats. As with all these figures, I use Vallejo acrylics. What was fun about these armies is the paint palette was limited compared to the Dark Ages armies I usually paint. Dark Ages figures have a palette limited to earth and natural colors of the times, but each figure is varied. These figures have a palette limited to the blues and grays of the Civil war, but each unit is painted similarly.

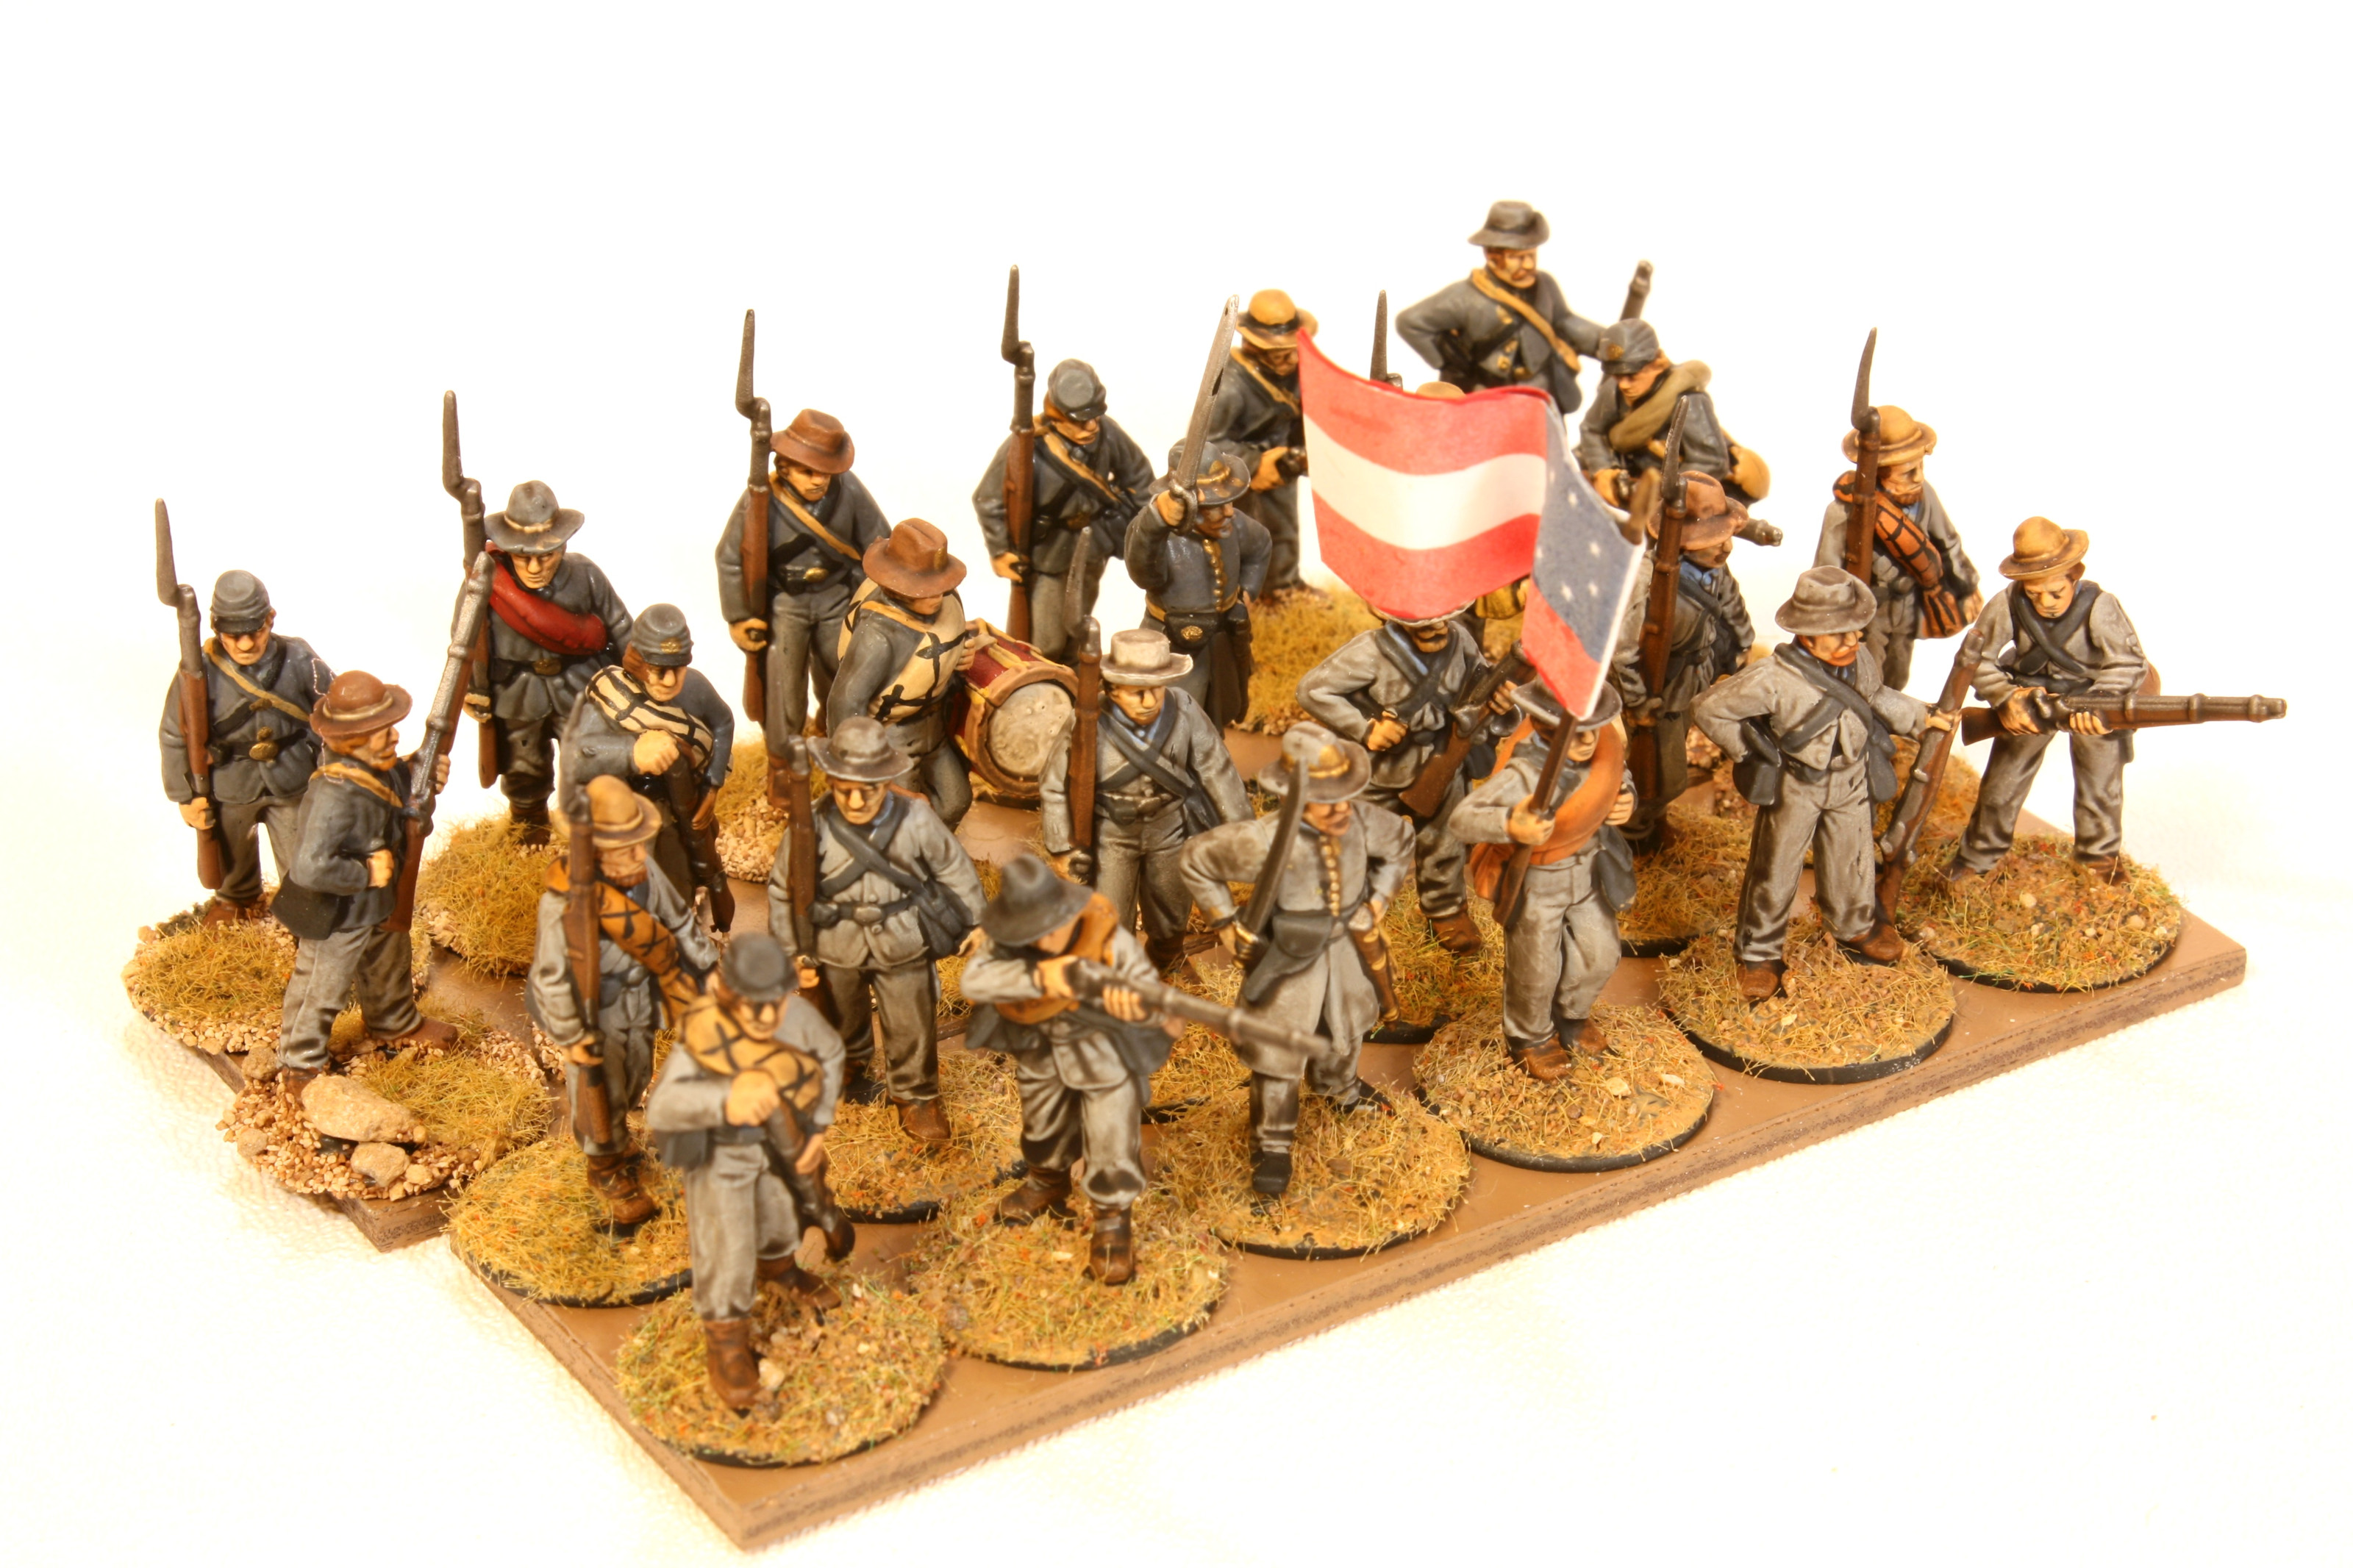
Here is another all gray unit with some blue cartridge boxes and belts. I think that is the South Carolina state flag along with the unit.
Like the other figures, I have washed these with MinWax Polyshades Tudor varnish. Polyshades is the Minwax product name for pigment and polyurethane in one product. The Tudor shade is a very dark almost black shade of brown, but it is hard to find and not usually stocked at Lowe's or Home Depot. They also have black and walnut shades that are close, but the black is too contrasty for me. The walnut has the slightest tint of red in there. You can also use the classic oak or mission oak on lighter color figures for a lighter effect.
The reason I like poly varnish, with its smell and noxious cleanup, rather than water-based acrylic wash, is that the varnish is very consistent and does not tend to react with the underlying paint coat. Acrylic inks and washes can pool or run off, resulting in inconsistency, but the varnish coats everything with similar effect. I used to dunk figures in the paint can, and let them drip, and dab them until they were good, but I found that very messy. That is why some people call this the dip, dunk, or the magic dip method. I found a new technique with these figures. I use a big brush and slobber on as much varnish as I need and then dab off excess pooling with a cotton swab.
At the end of the session I clean the brush. Wood spirits, turpentine, and paint thinner (i.e. mineral spirits) all can clean this up, but be careful to use in a well ventilated area and keep it off your skin.

Here is the last of the infantry units, done in all gray. The bases are done with Woodland Scenics scenery bits. Notice the two rows in front have a one-step, quick-and-dirty technique which is to paint the base with white glue with brown paint mixed in, then throw on a mix of ballast sand and static grass. Done. The two rear rows have the two-step technique which has the ballast sand thrown on, let dry, and a second step with occasional grass here and there. You will see my bases all have this disparity, as I initially started with the one-step, and then found I like the two-step technique better.
Also notice that the Confederates have brown unit bases, and dry straw-colored grass and that the Unions have green bases, and green-colored grass. This helps distinguish units on the game table, and tries to evoke the national environment a little more.
Once the painting, varnishing, and bases are done, I seal everything with Testors Dullcote lacquer. I like the drop dead matte finish. It evens out the colors and makes everything blend together nicely.

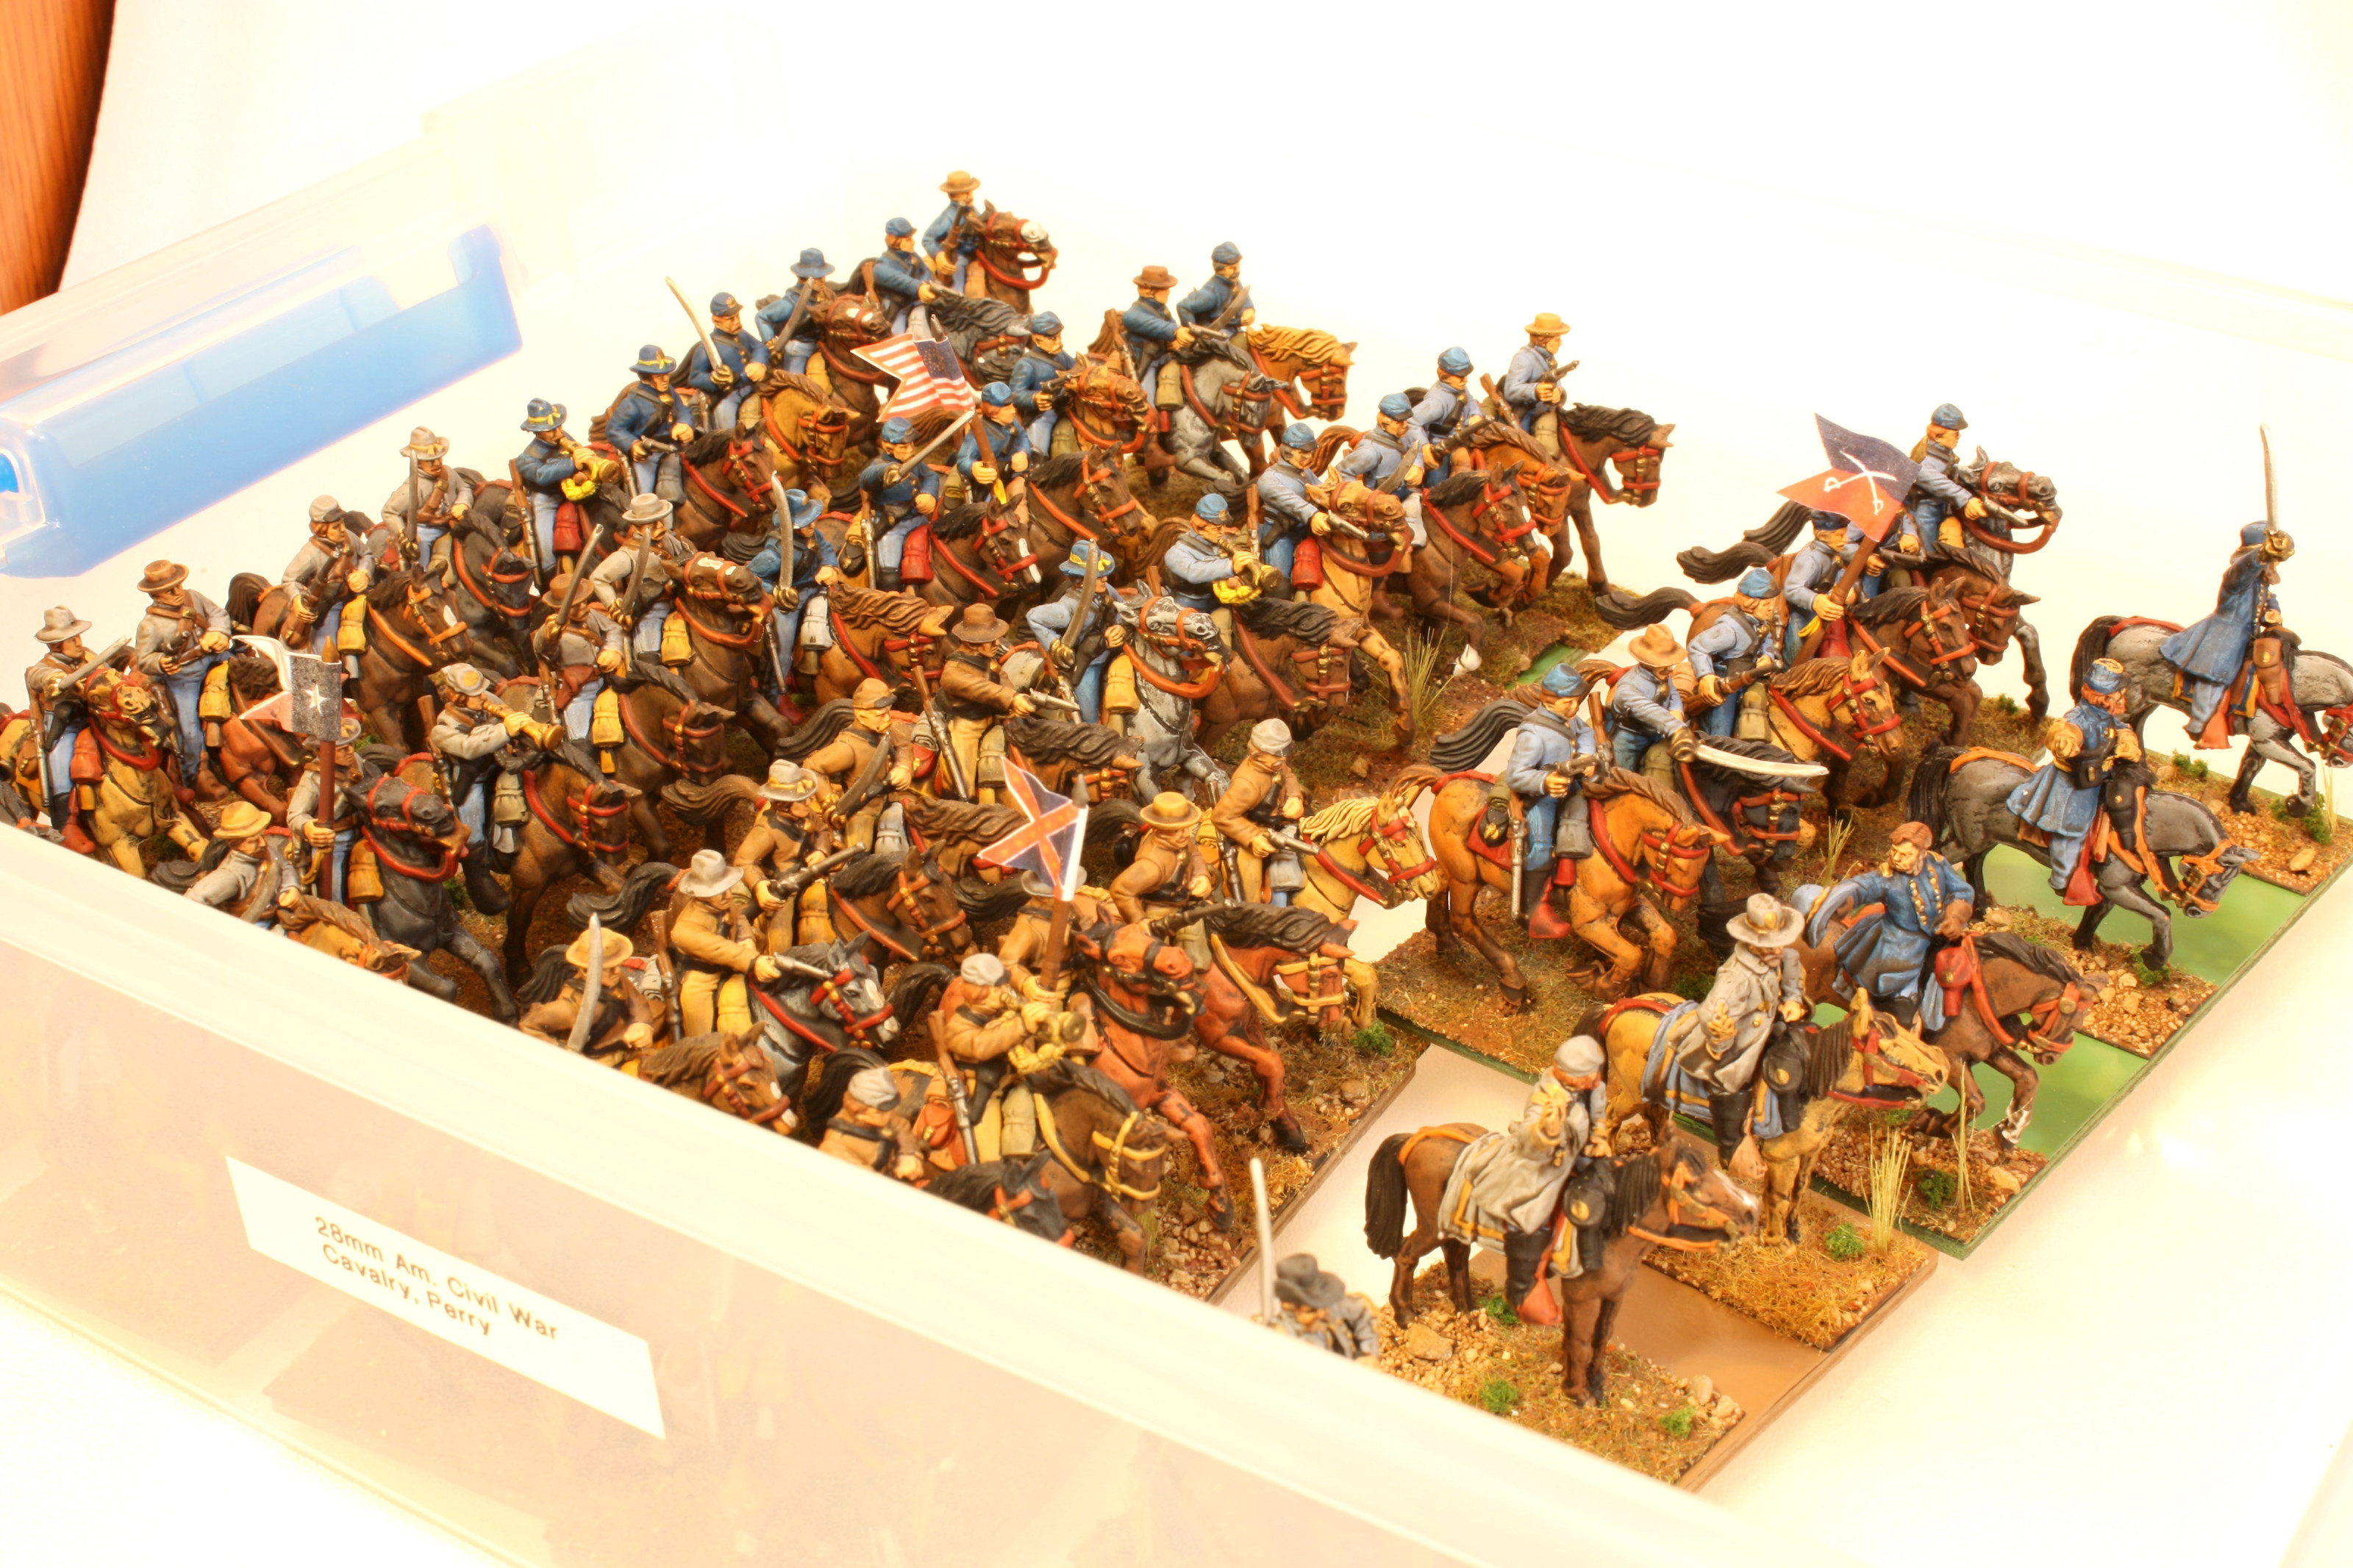
One last pair of photos shows how I store these figures. I place all the units in some Sterilite clip boxes. They also have latch boxes that are similar but larger. My usual Plano fishing tackle boxes were too shallow to handle cavalry, the tall flags, or the cannon tools. These Sterilite boxes are nice as you can easily see the units through the plastic sides.
A quick photography note.As with most of my minis I shot these photos with a 3 unit flash set up, small apertures (1/16 and 1/32) to get big depth of field, and long exposure times (3 to 30 seconds). However, I did notice trouble with white balance on my photos, and thus some of these photos might appear slightly yellow. You can also see some yellow in the shadows. The reason for the issue is that the custom white balance that worked for a near white flash lighting and short exposure times did not also work with very yellow incandescent lighting and long exposure times.
The camera automation did not allow me to rapidly do two photos with different apertures and white balances. And I am too lazy to manually balance each photo. Maybe I need to get different white ambient lighting or shut the room lighting off. Please let me know if you know another solution.