WAB Battle Report - Saxons versus Arthurians
 |
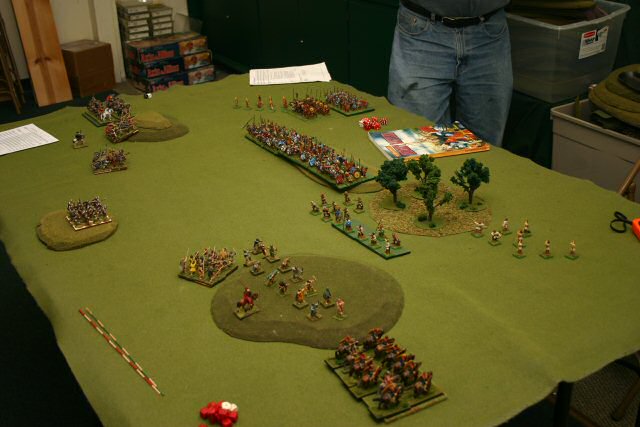
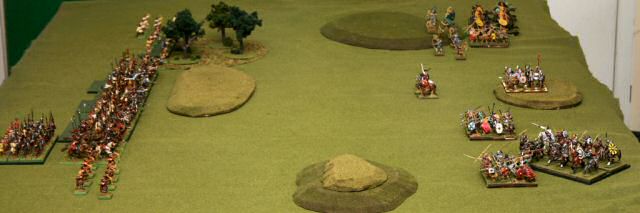
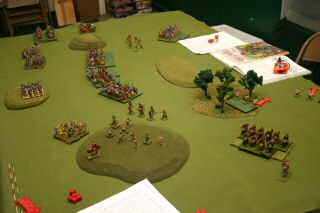
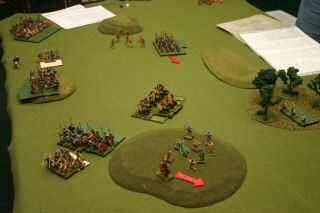
| Setup, prior to first turn |
This article discusses a Warhammer Ancient Battles (WAB) game thattook place at Great Hall Games in Austin, Texas on 2005/05/30.Kevin Dunn and the Saxons battled Dan Becker and King Arthur'sLate Romans in a 2000 point battle for western Englandsometime in history after 540 and prior to 900 A.D..(Click on the photos for a larger view.)WAB is a game in which opponents pick an army from army listsbased on a point cost for the figures and their options.The figures are grouped into units that move, shoot, and fightin close combat.Units give and take casualties and test morale until they win, flee, orare annihilated.
This photo shows the pre game setup with Arthurians on the leftand Saxons on the right.The Arthurians have a heavy cavalry and two light infantry unitsnear a steep hill toward the top of the picture.In the center is a heavy infantry unit on a hill.At the bottom are a light cavalry, light infantry and skirmishingbow unit. The Arthurians are from the Late Roman list of theArmies of Antiquity rule set.
The Saxons have a small bow, heavy cavalry mercenary, andceorl unit near the top of the photo.In the center they have three large units madeof mixed thegns (heavily armored, upper class figures)and ceorls (no armor, lower class figures).At the bottom right near the woods they have some javelin and bow skirmishers.The Saxons are from the Wessex list of theShieldwall rule set.
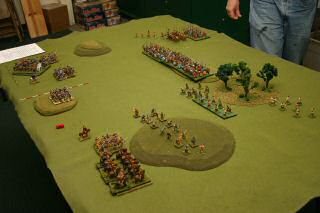 |
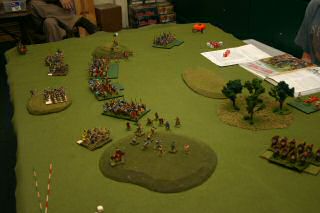
| Turn 1, Saxons move |
Arthurians win the toss and elect to have the Saxons move first.Immediately the heavy Saxon center units (thegns and ceorls) do double-time march moves forward.The skirmishers on the Saxon right also advance and take up a position beyond the trees.
It is clear the heavy Saxons center units are scrapping for a big fight.
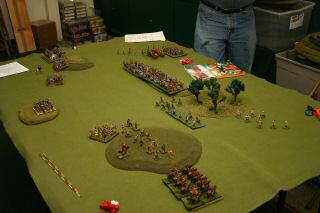 |
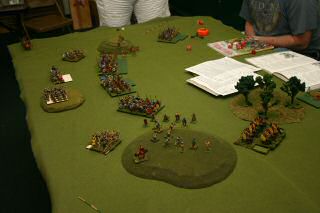
| Turn 1, Arthurians move |
Arthur responds by moving skirmishers to the top of the hill on theArthurian right near the lower center of the photo.The heavy cavalry swings left around the steep hill at the top leftof this photo.The light cavalry with kontos (long sharp pikes) swing right aroundthe hill at the bottom center of the photo.For the most part the infantry remains in placewaiting for the Saxon advance.It is clear the Arthurians are performing a pincer move on the flanks.
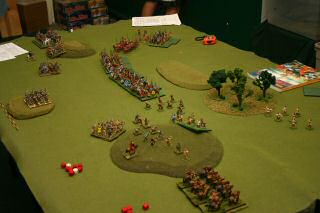 |
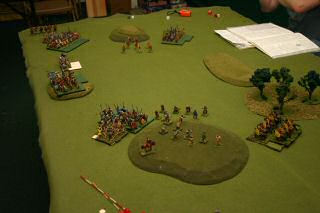
| Turn 2, Saxons move |
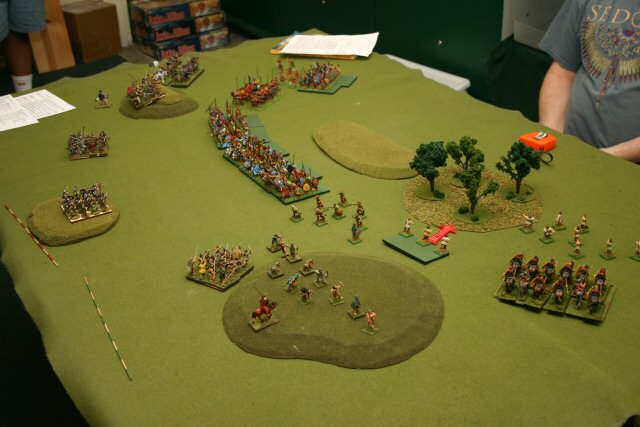
On the second turn the Saxon skirmishers move forward andinflict a few causalties on the Arthurian skirmisherson the hill near the center of this photo.The Saxon heavy units in the center keep racing forwardat double-time march move.The heavy Saxon mercenary horse turn right, expectingsome cavalry coming around the steep hill at the top of the photo.Saxon earls, standards, and musicians are integrated intothe units, leading from the front of the battle line.
 |
| Turn 2, Arthurians move |
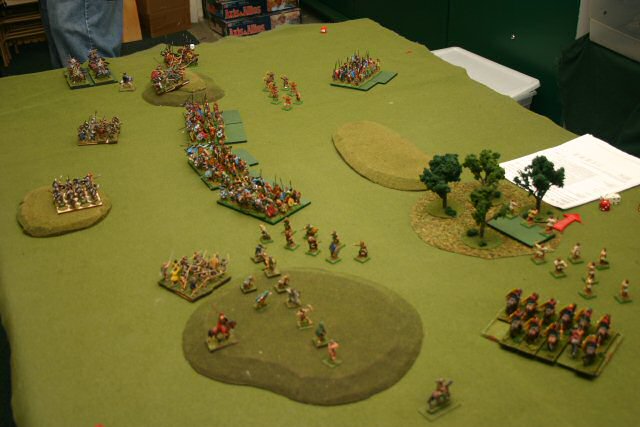
The Arthurian cavalry continue their pincer moveswith horses on the right and the left continuing round the flanksThe Arthurian skirmisherson the hill have inflicted many casualties on theSaxon javelins, causing them to retreat back to the woods.With their leadership rating of 5, the Saxon javelins may never come back.Aside from a light cavalry moving to the steep hill on the left,all Arthurian infantry hold in place.
Arthur, detached from all units, leads the left flankand is seen behind the units at the upper left of this photo.Sutton Hoo man, the Arthurian standard bearer, also detached, leads the rightflank at the gentle hill at the lower center of the photo.
 |
| Turn 3, Saxons move |
The close combat begins! Saxon heavy cavalry mercenariescharge the Arthurian heavy cavalry at the top left of the photo.The outcome is tied, but the Saxon trumpeter kicks in.The cav fail their break test and flee.The light infantry on the steep hill seeing theirheavy cavalry in retreat, also take a break test and fail,and head for the nearest exit.On the Saxon left flank, the skirmishing bowmentake out an Arthurian light cavalry on the right side of the photo.
 |
| Turn 3, Arthurians move |
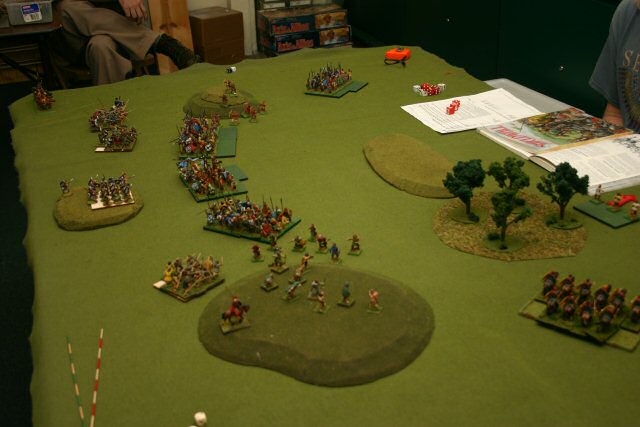
King Arthur manages to rally the heavy cavalry andthe light infantry on the left flank on the upper left in this photo.The rest of the Arthurian infantry back up or remain in placefor the inevitable shield wall battle to come.On the right flank, the Arthurian light cavalry chargethe Saxon bowmen, breaking them, and causing them to flee.The Arthurian skirmishers on the hill cause moredamage to Saxon skirmishers below.
 |
| Turn 4, Saxons move |
The heavy cavalry on the Saxon's right flank charge theArthurian heavy cavalry again.Once again it is a tied outcome,but the Saxon trumpeter blairs the horn,The Arthurian cavalry breaks a second timeand flees off the board.The Saxon cavalry pusues almost off the edge as well.In the center, the Saxon thegns and ceorls are in rangeto heave their javelins.They connect and cause casualties on both lightand heavy units in the center.
 |
| Turn 4, Arthurians move |
The Arthurian flanking manuever is looking graveat this point.The left side has fled and the right side has justmade their turn. Are they out of time?The two light infantry on the left decide tocharge the Saxon thegns and ceorls.Unfortunately it is too far - one of the units does notreach the enemy.The Saxons pound the Arthurian light infantry unitand cause them to break and flee with many casualties.
 |
| Turn 5, Saxons move |
Now the Arthurians are collapsing.The Saxon infantry connect in the center.The Saxon right flank crushes the Arthurians withadditional cavalry at the top left of the photo.The Saxon center unit breaks the heavy Arthurianscenter unit and causes them to flee.And the Saxon left locks with the Arthurian rightnear the center of the photo.
 |
| Turn 5, Arthurians move |
The Arthurian light cavalry continues to charge, but cannot connect.The Arthurian skirmishers attack a Saxon flank, but theyare driven off.With many units defeated, and many Saxon units still ready to fight,the Arthurians conceed defeat.With no hope of restoring Gaellic to this partof Britain, the farmers are forced to speakthe Germanic language of the conquerors.
Lessons Learned
As this is only my second game of WAB, I enjoyed the game and learned quitea bit.
- Standard bearers and musicians can often turn the tide of battle.In this game, they often tipped the scales and caused the enemy to break and flee.
- The Arthurian pincer move did not work out as expected.The cavalry were delayed or too occupied to cause any flank attacks.
- The Saxon thegns and ceorls controlled the board.They had no trouble racing across the field.Perhaps small skirmish units would have slowed them down andprevented them from doing the double-time march move so often.
- Safety in numbers. The Arthurian units should have beencloser together to provide better line ups and more coverageof the Saxon shield wall.
- Unit shape. The Saxons units attacked one on one, having a 7 by 4 (28 figure) unitattack a 4 by 4 (16 figure) unit and thus having the dice rolling advantage.The Saxons benefited from 3 or more rank bonus while theArthurians were limited to 2 rank bonus.The Arthurians should have spread out more, perhaps a 5 by 3 or 6 by 2 unit, to get moreunits into contact and make the throwing spears move effective.
- Mike B on the WABlist Yahoo group suggested that placing King Arthurwith the heavy cavalry would have given extra attacks and wouldhave tipped the left flanking maneuver in favor of the Arthurians.Similarly, placing the Sutton Hoo Man standard bearer with a strongerinfantry center would have helped out in those battles.
Related Reading
Nevertheless, it was fun watching all units take each other on.I hope you enjoyed reading the details of the battleand seeing photographs of a bunch of thegns.More miniatures-related articles are atDan Becker's Miniatures and Models site.Thanks for stopping by and reading about my miniatures.