|
|
|
|
The history of this island is quite unique. Only a few generations ago, the island was uninhabited by humans, but six families came to the island and built a few settlements. The families found that the lands were fertile and soon farms and pastures were cultivated. A bounty of trees, mountains, and rivers lent themselves well to the harvesting of many natural resources. Soon the settlements flourished and began to trade with one another. Ports were built and the natural resources were traded with other settlements.
Today the Island of Catan is a bustling community with many
towns and cities, a vast road network, and several
military garrisons that protect the cities.
There are many beautiful buildings such as Libraries, Universities,
Markets and the glorious Governor's House.
However, we warn all tourists to watch their valuables carefully,
as there are robbers that roam the island and steal from
both tourists and inhabitants.
Do not be alarmed, the island is generally safe and robbery usually
occurs in one or two of the many districts.
So as we descend, sit back and enjoy your tour
of the wonderful Island of Catan.
|
|
|
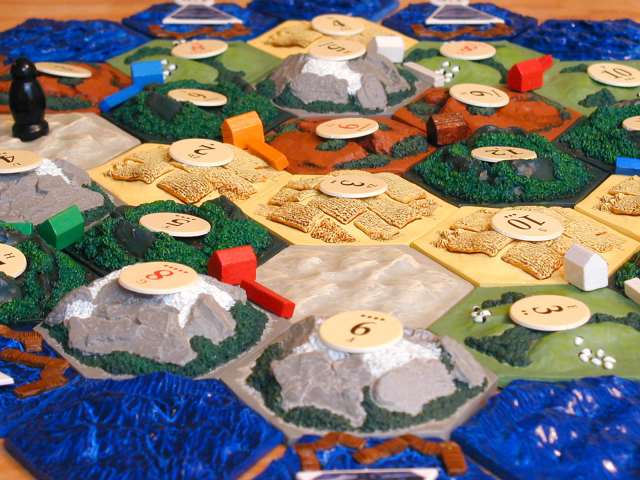
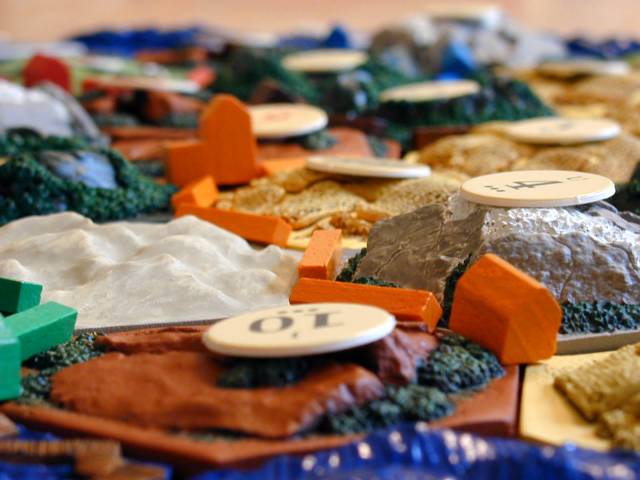
My foremost goal in making these 3D Settlers tiles was to make them as useful and as playable as possible. The choice of material, resin, was a good one. Resin tiles are very durable, and since they are primed before painting, they hold the paint very well. No chips or scratches here. They are slightly smaller than the Settlers tiles. I used the Tikal game hexes as a size prototype mainly to economize on resin. Thus the size is not compatible with Settlers, but this has no effect on play.
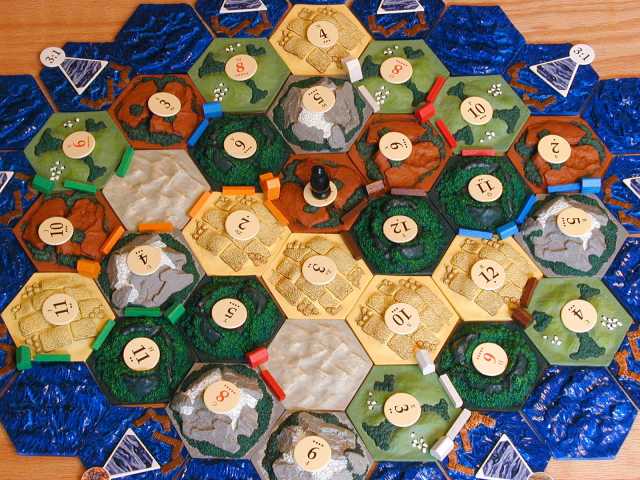
As you see from the first photo, the tiles are quite colorful when placed next to each other. One of the goals was to make the colors highly distinguishable, and not suffer the problems that the Mayfair Settlers editions suffer, namely the forest and pastures are too similar. Hopefully these appear different enough to a normal sighted person, but, in order to pass the acid test, I will have to ask a few color blind people how the tiles look. Additionally, the pasture and the forest tiles are very different in height, and this might help distinguish them.
When sculpting the prototype tiles for each hex type, I took care to
ensure that they were as close to regular hexagons as possible.
However, the original Sculpey clay hexes were subjected to the oven,
then to silicone mold casting, then cast in resin, sanded, and
painted.
Through this process, the regularity of the hexes changed somewhat,
and thus they do not abut with the precision of the original cardboard
hexes.
No matter, the slight gaps between the tiles are quite good for holding
the roads in places.
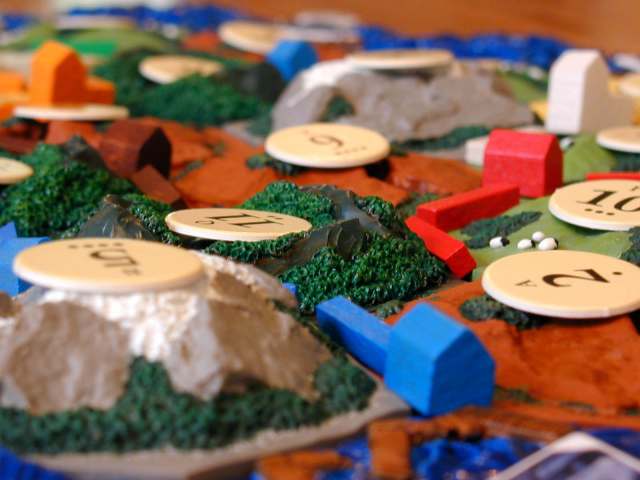
Similarly the ocean hexes are somewhat smaller than the other hexes,
and this creates gaps, but I did the best I could without
fancy tools and precision laser cutting.
I am happy with the fit and playability of the 3D hexes.
|
|
|
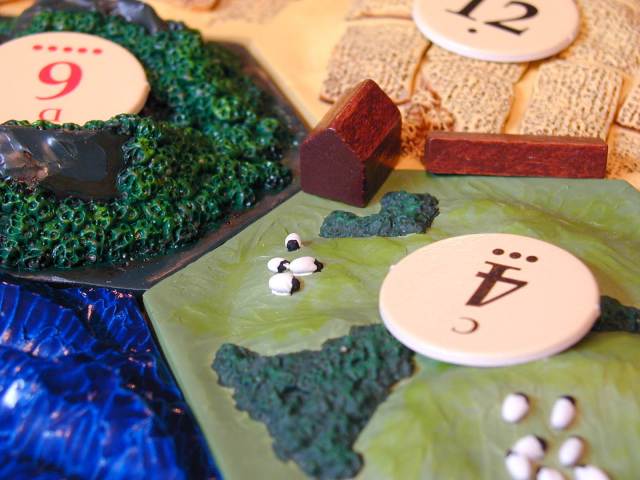
I did make the center of each tile flat and somewhat devoid of features to help hold the number disc. The forest tile has a good depression in it, but most of the other tiles just have the disc balanced in the center. This holds reasonably well even when the surly Robber is placed on top. Since Settlers involves no movement, and generally pieces stay put, there is no problem with pieces flopping about or tiles spreading apart.
All the hex tiles are primed with white primer. The land hexes are painted with water based paints such as Polly-S and Citadel paints. Most of the features are either dry-brushed or inked to help bring out the contrast. Once finished, the land tiles are sprayed with matte varnish to protect the paint job.
The sea hexes are slightly different.
Although they too are painted with white primer, the blue
is a glossy royal blue Rustoleum enamel.
This is done in one light coat that allows the white to show
through partially.
It gives a nice translucent, clear look to the tiles.
Originally, I cast a few ocean tiles in clear resin, but this
proved to be difficult to master.
Any slight imperfection or bubble became immediately visible.
Also, they could not be sanded without becoming opaque.
Therefore, I went with this nice translucent glossy look.
It look close enough to water to me.
|
|
|
When playing with this set, it helps to play on some sort of skid resistant surface. Since the tiles are hard, they will slide on a hard surface, but if you place them on a table cloth or rough surface, they stay put nicely. The set takes a little longer to set up than the cardboard tiles, but once set up, it is a joy to play on.
All in all, I am quite happy with my project. It took an incredible amount of my free time, but much of that was learning resin-casting and experimenting with this new (for me) medium. Once I got the hang of resin, things progressed quickly.
If you are a modeller or are happy working with your hands this is a fun
project.
For some reason, I have this incredible curiosity about improving
game components, so this project was ideal for me.
If you have any questions, please email me, and I will be happy to
answer them.
(However, please don't ask me to make you a set.
My free time is at an extreme premium.)
Stay tuned to this web site, for I intend to make many more
hobby projects and publish the "how to" here.
Thanks for reading!
|
|
|
Previous Settlers articles:
If you like miniatures, modelling, and historical
battles, you might like Dan Becker's Miniatures Site.