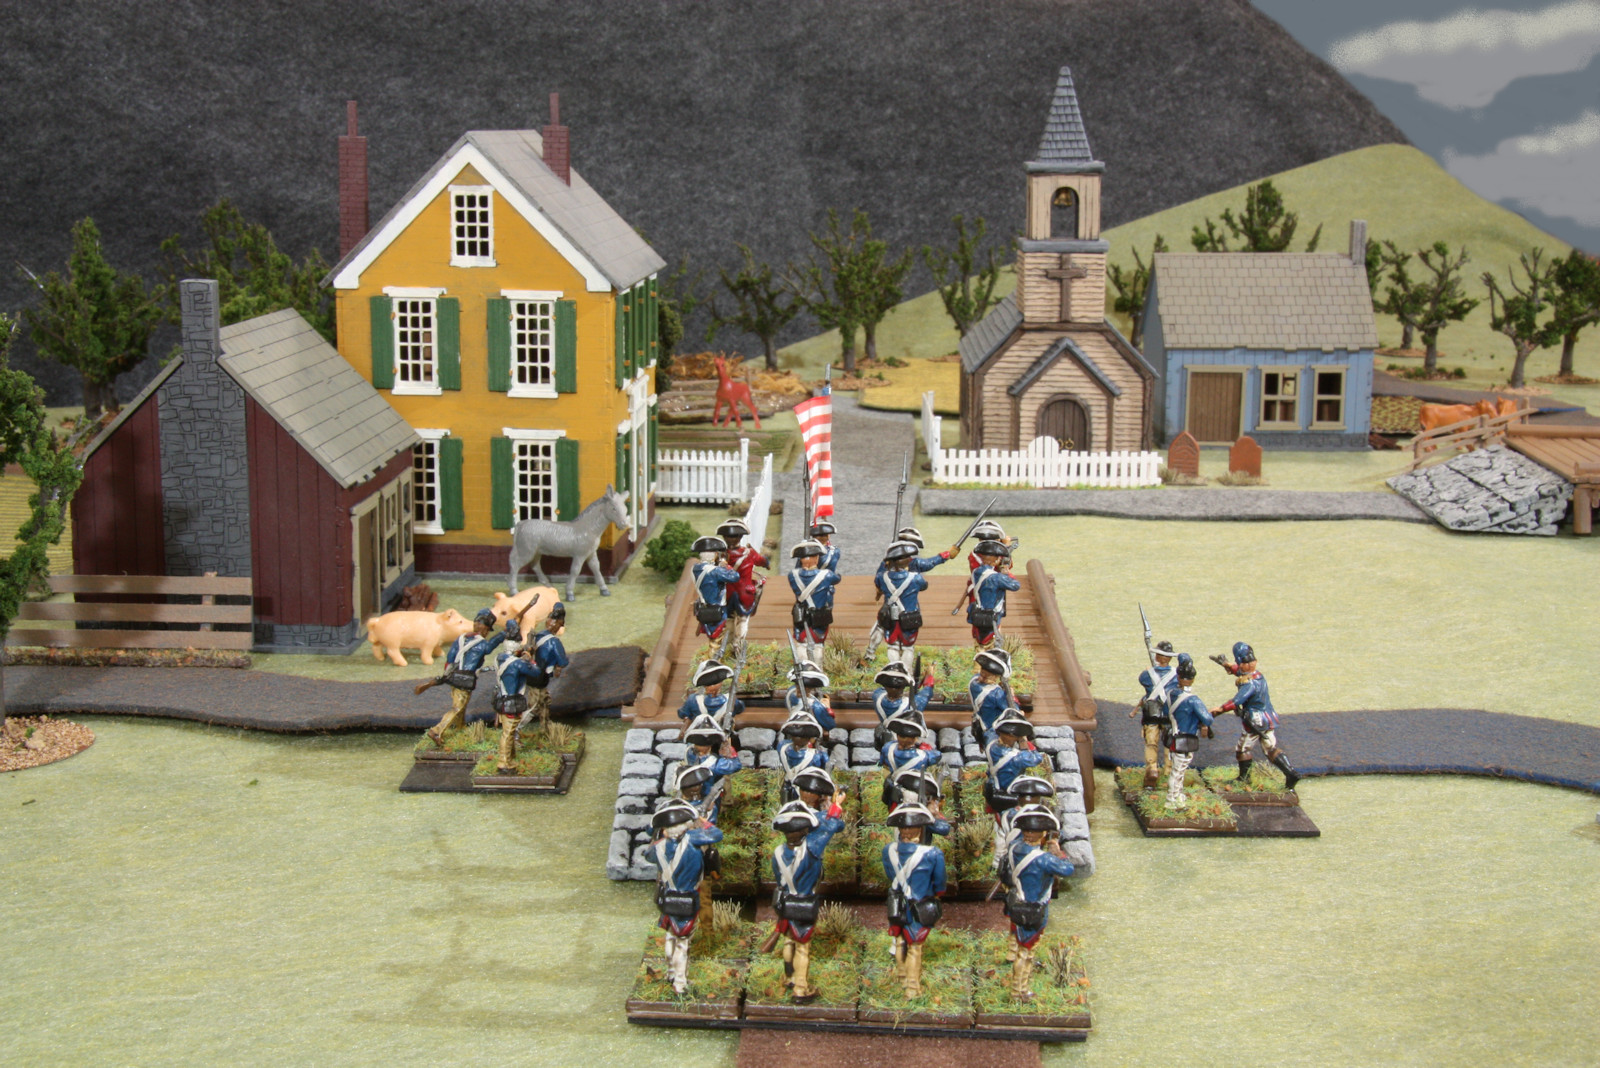
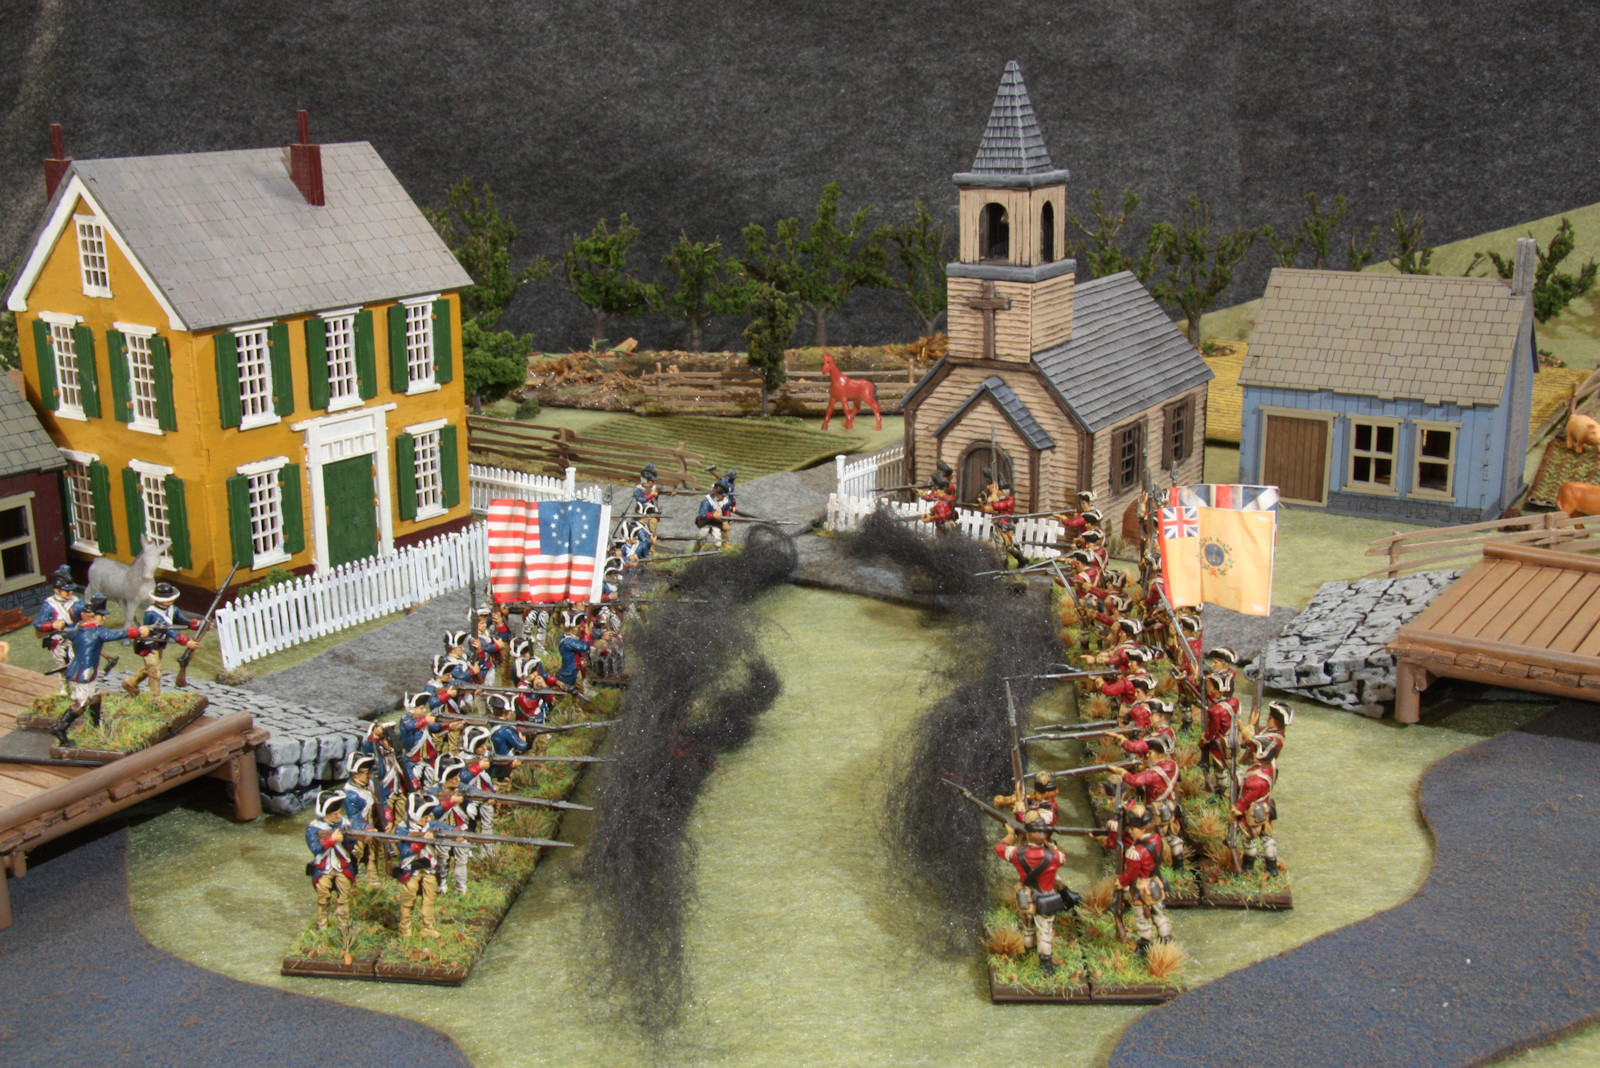
This photo shows a small American town some time around the year 1777. Although the American War for Independence has been going on for over a year, this town remains neutral and relatively unaffected by the skirmishes between the Rebels and the Crown.
It is late summer, and there are still crops waiting to be harvested. Excess crops will be sold to either the Americans or the Brits, whoever pays the highest price.

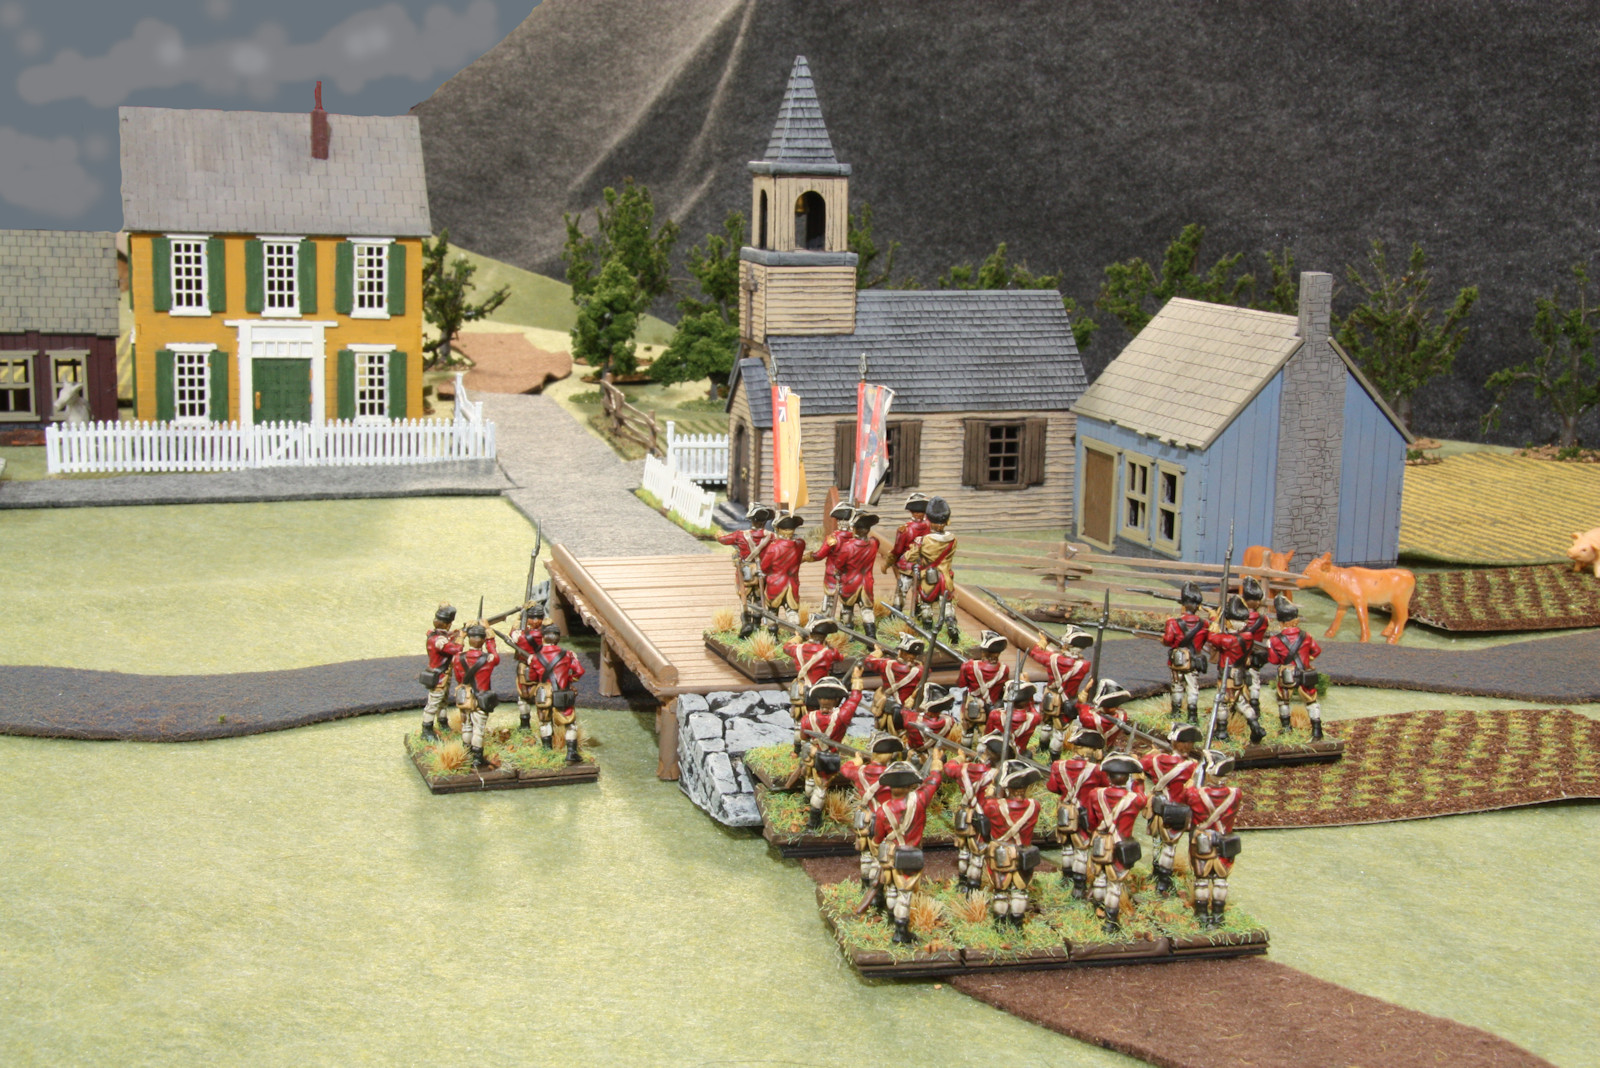
The plan to remain neutral is interrupted. A regiment of British redcoats enters the town from the east.
The townspeople pray that the Brits are here to buy provisions and not burn the town down.
A regiment of the Continental Army enters the town from the west oblivious to the enemy's approach.
Could it be that the scouts of both regiments all have missed the approaching enemy?
Both regiments have crossed the town bridges. It will be deadly to try to retreat back across the exposed platforms.
Both sides quickly form battle lines in the town square. Whoever can form lines and load their muskets more quickly will win this battle.
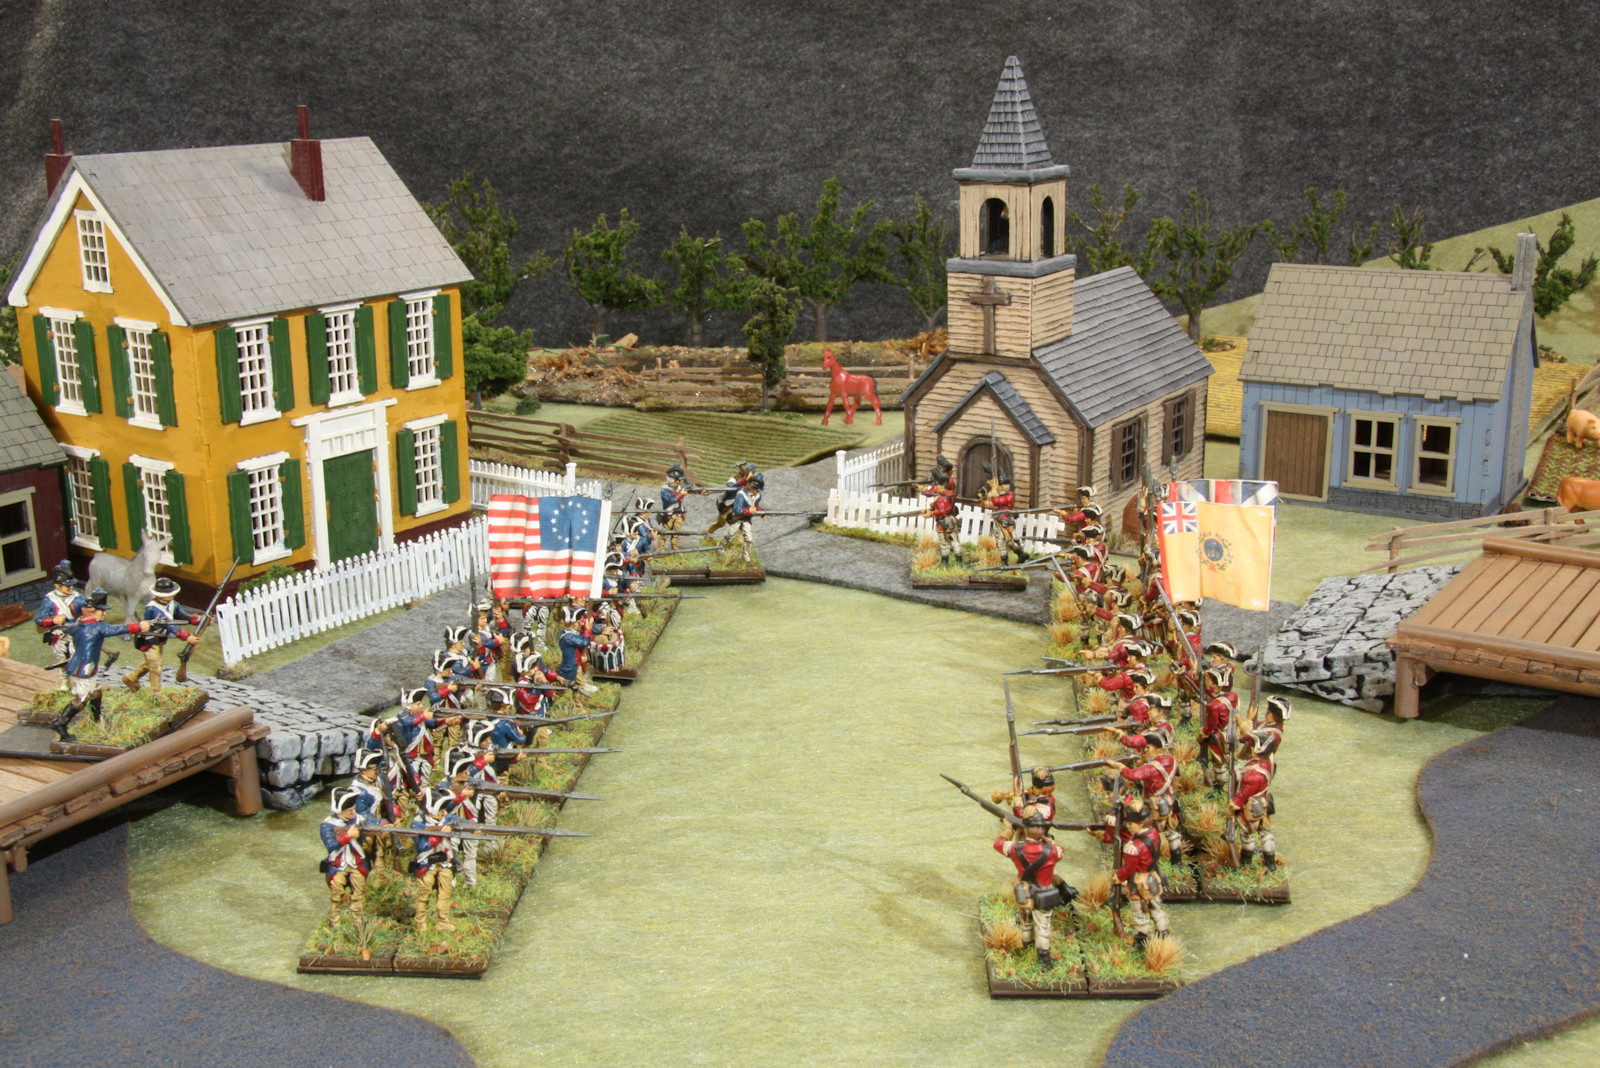
Both sides fire simultaneously!
Heavy lead musket balls rip through the enemy. Thick black powder smoke fills the air.
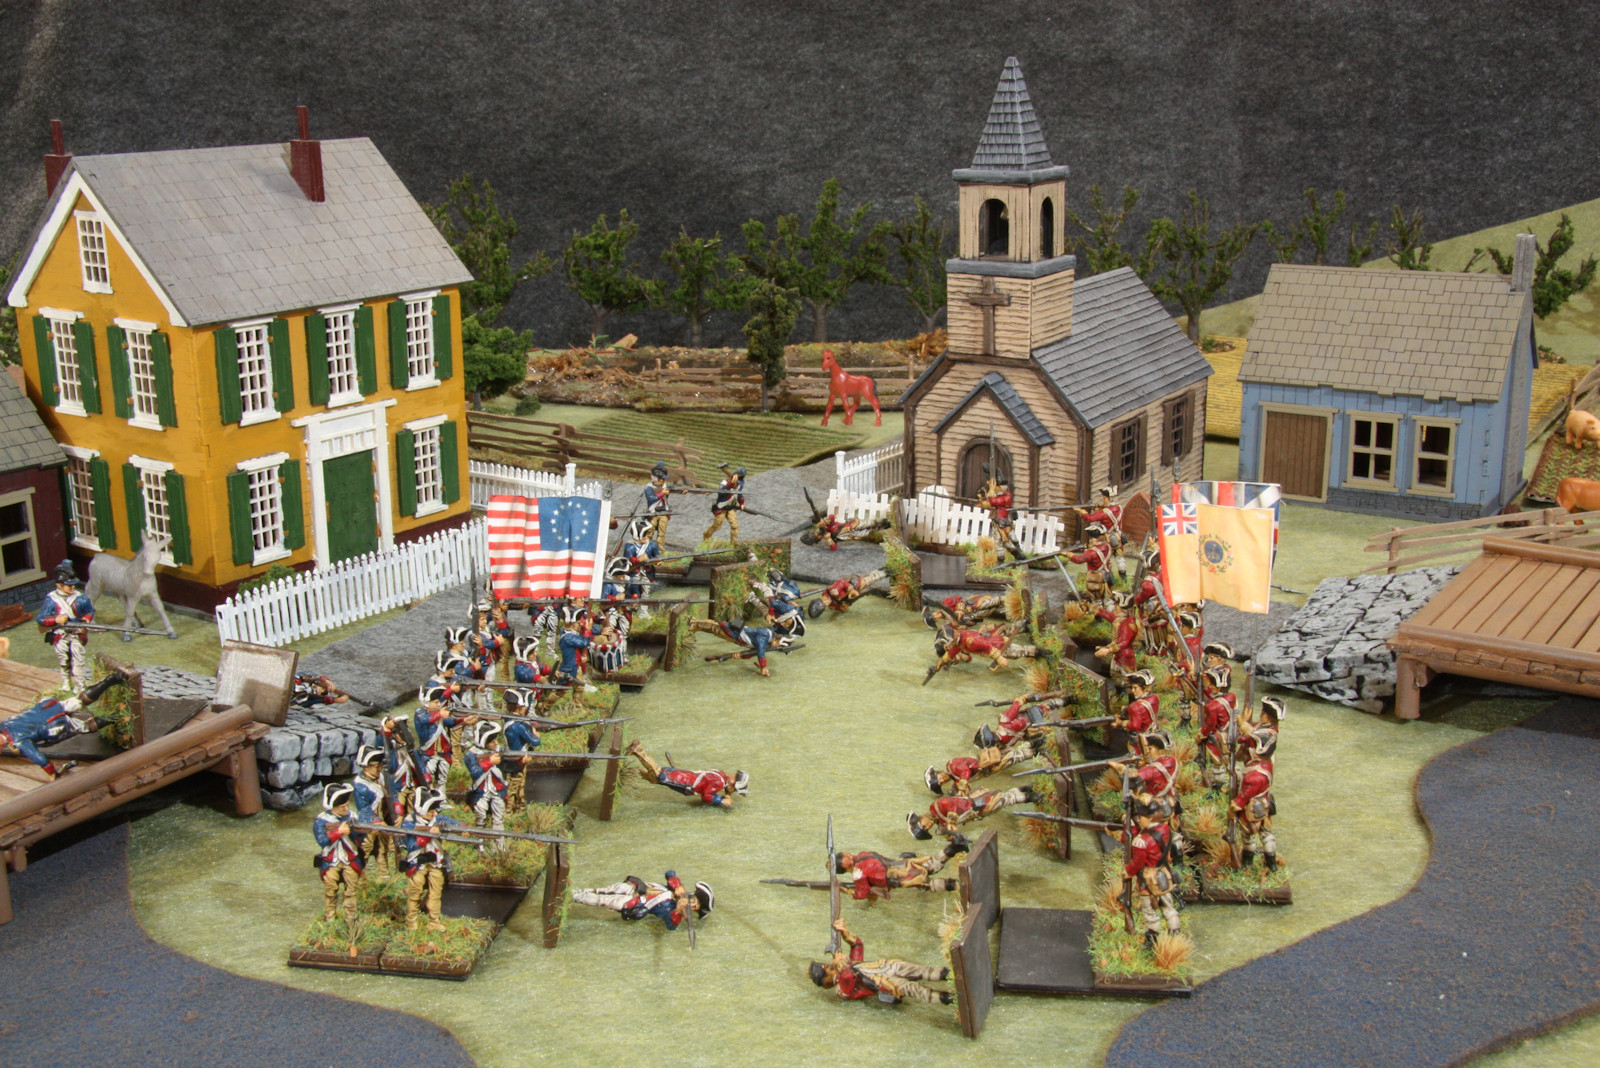
People drop to ground. There are casualties on both sides.
A quick count from the commanders reveal that the Americans have done slightly better.
All soldiers work furiously to reload and deliver another volley. Although it takes a minute, reloading the muskets seems like forever.
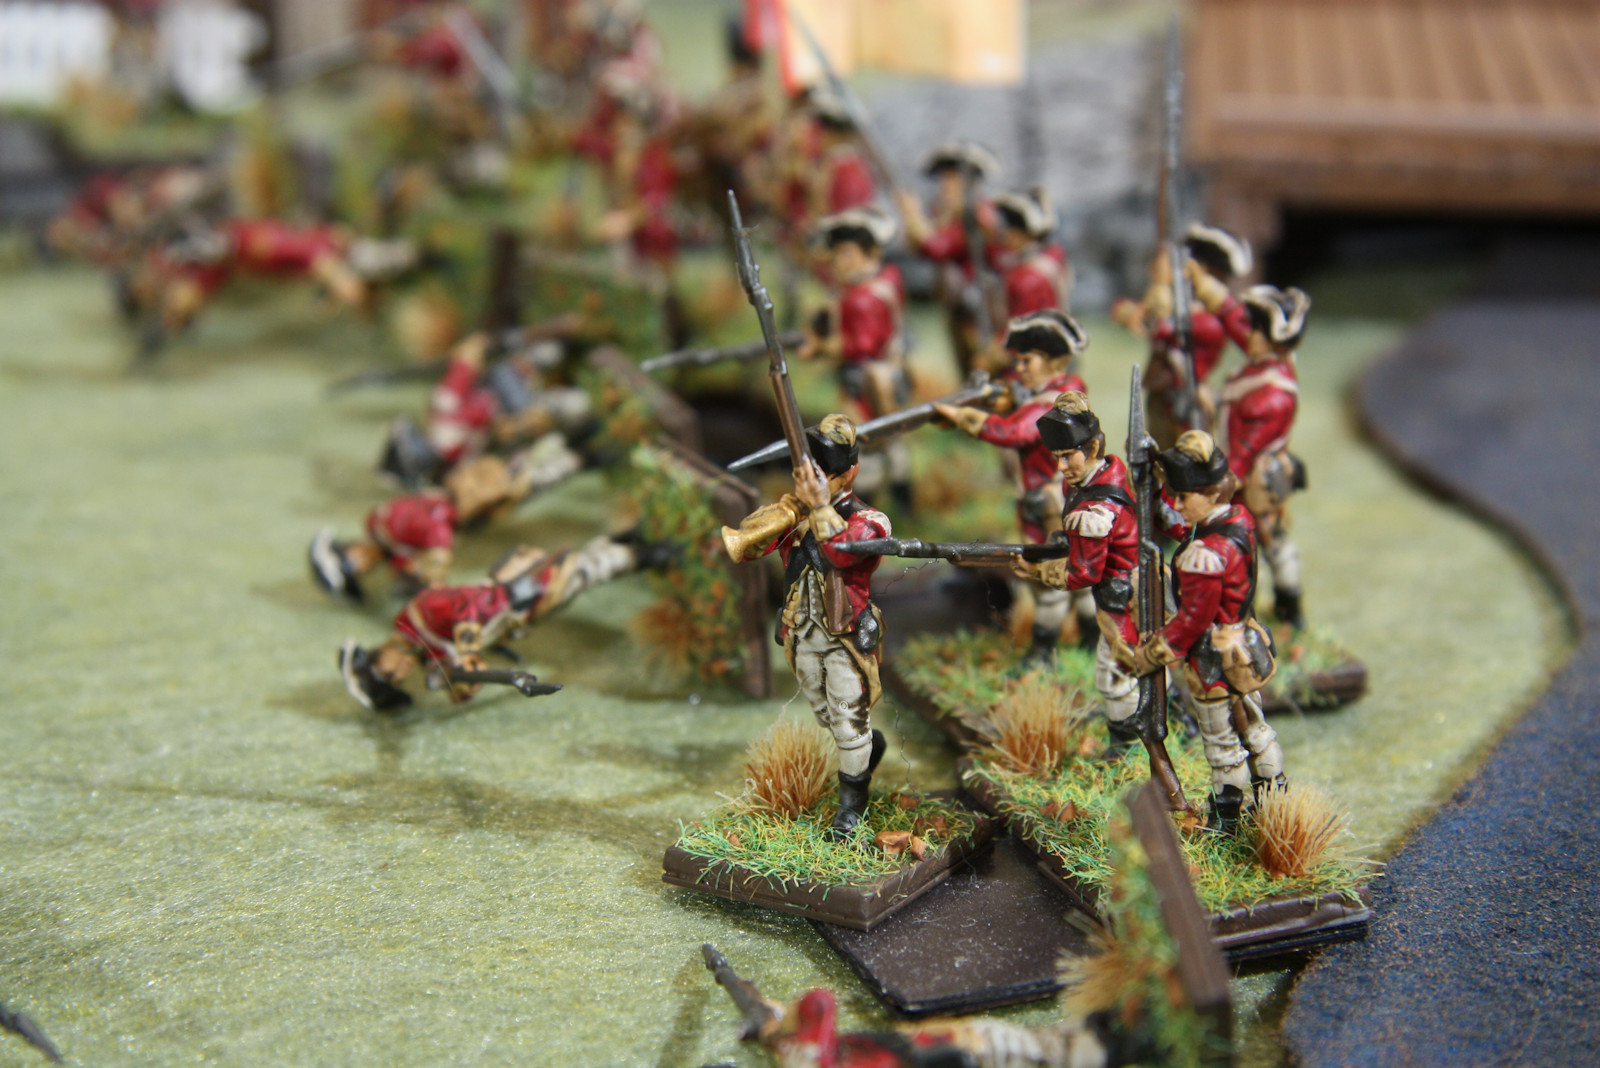
In the midst of it all, a British light infantryman pulls out his bugle and blows.
But he is not blowing a retreat or a rally. He is blowing a signal call across the valley. Can there be reinforcements in the area?
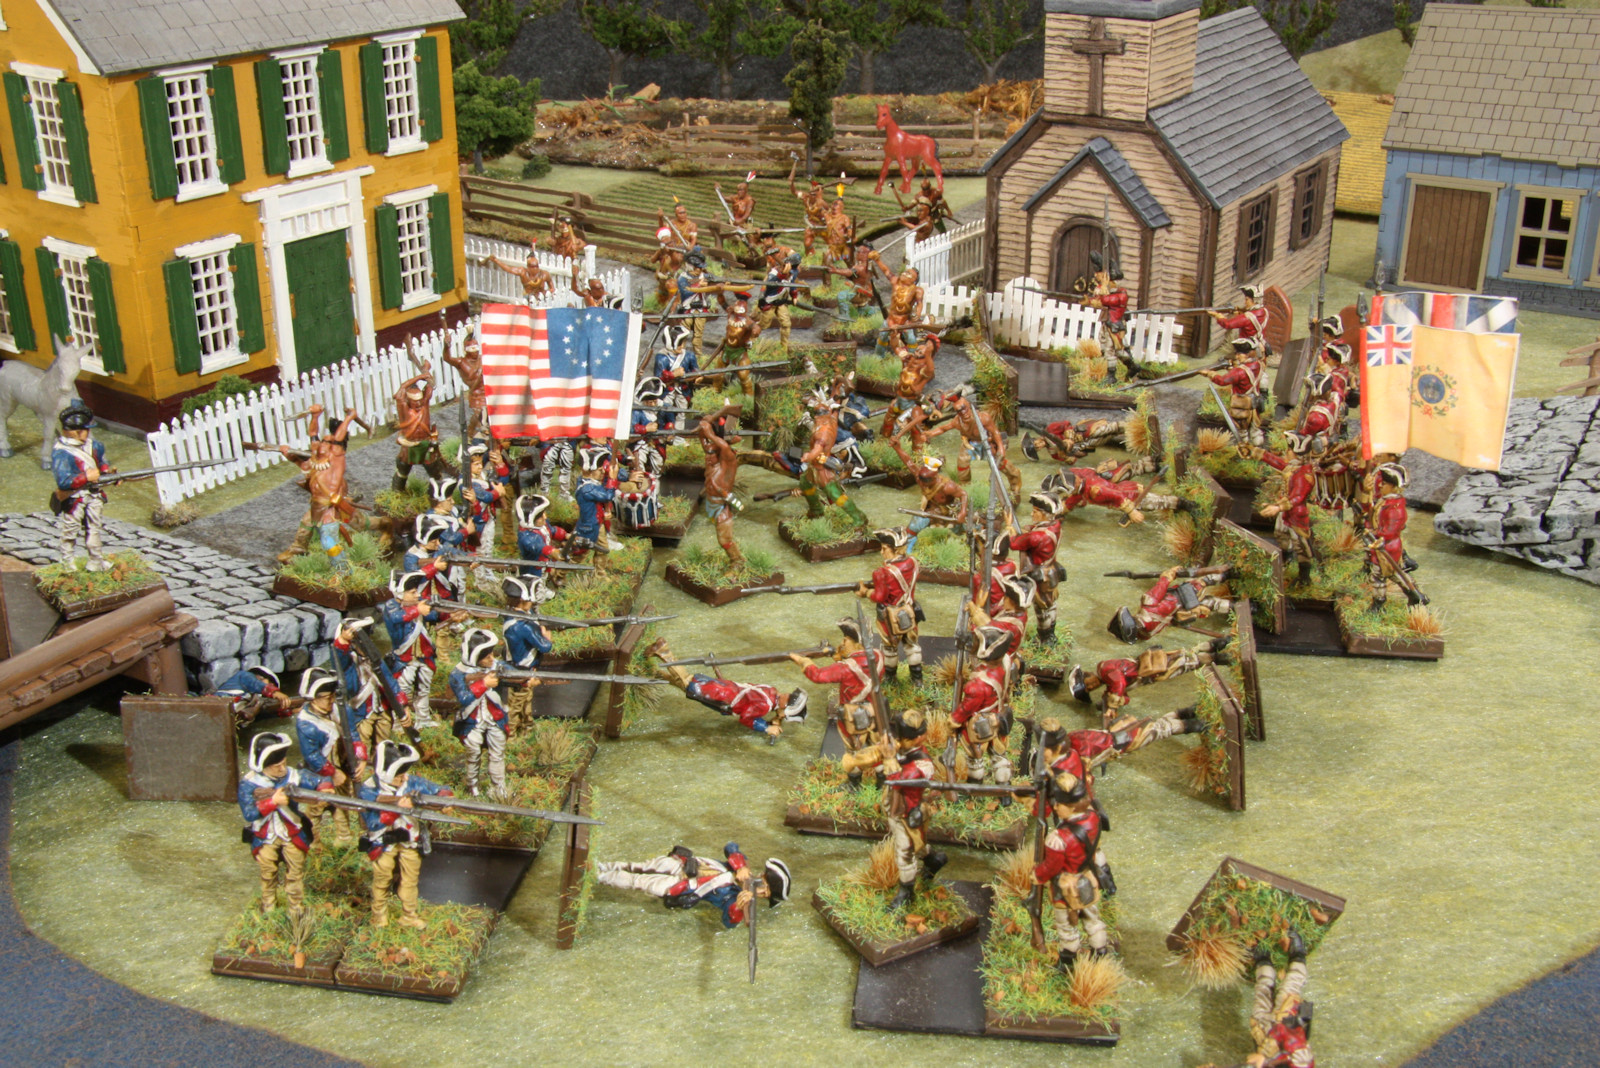
The British reinforcements have arrived and join the battle.
However, the reinforcements are not citizens of the Crown, they are allied Native Americans, and they come to fight for the British. Because of years of trading and treaties, the Brits and the Natives are friendly to each other.
The quick and deadly Native warriors attack the Americans and wreck havoc in hand-to-hand combat. No more shots are fired, that takes too long. This has become a melee of bayonets, axes, clubs, and rifle butts.
Making the Miniatures
Thanks for reading about this tabletop battle. The rest of this article is about making the figures and the scenery.
All of the miniatures in this article are 28 mm plastic soldiers from Warlord Games. Warlord Games has a large line of historical miniatures, but these figures are intended for using their rule set for battles in the years 1700-1900 Black Powder.
The photo shows the first half of a box of 24 figures Woodland Indians Tribe (cover artwork by Peter Dennis). You must assemble these figures like any plastic model: cut the parts from a sprue, glue them together, prime, paint, and base the figures.
I bought this first box as an experiment to see if I liked the figures. Would they be easy to assemble? Are there good historical notes? Are they example painting suggestions? Are the sculptures proportional and interesting? The answer to all these questions is YES, and it quickly lead to subsequent purchases.
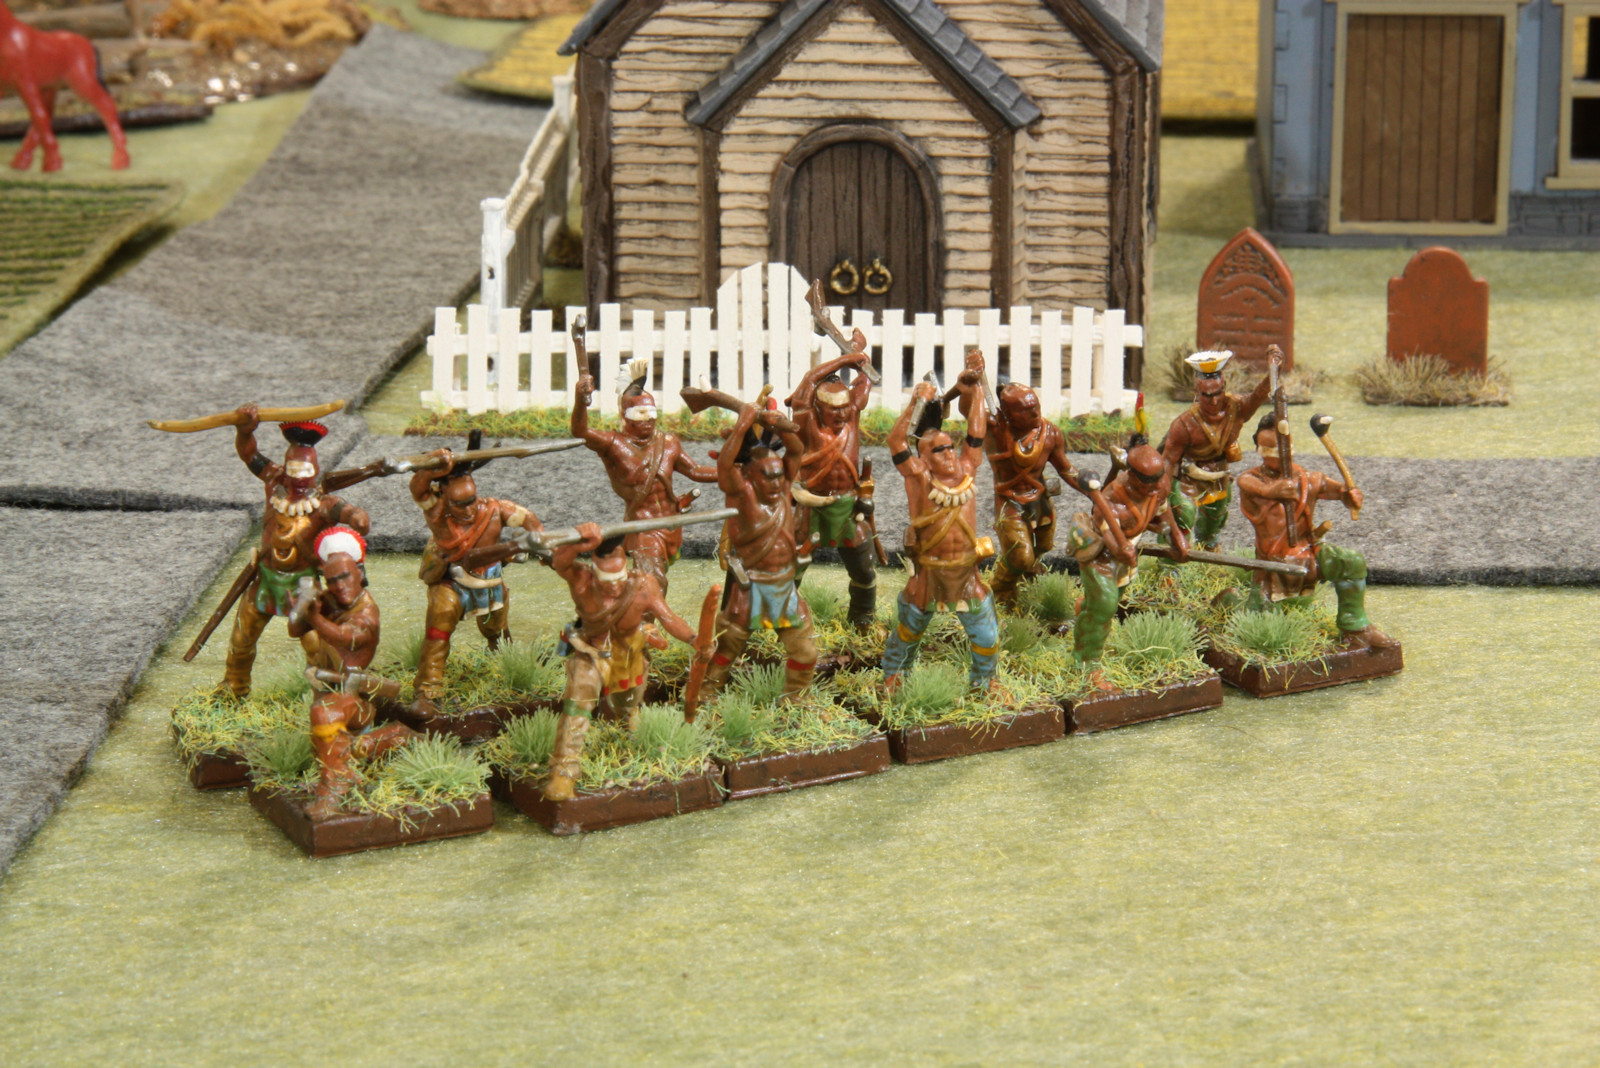
This photo shows an alternate view of the miniatures. What is great about plastics is that Warlord Games provides so many alternate heads, arms, and weapons. You get about 6 body poses, but then there are enough bits to make every figure unique.
I painted these figures with The Army Painter Warpaints acrylics. Although I usually paint miniatures with Vallejo model acrylics, I wanted to try a different brand to experiment. The Army Painter Warpaints are a little thinner out of the bottle so I use them straight up with no thinning. The Vallejo paints to be a little thicker, so I continually thin them down as I paint. Both brands have excellent fine pigments and coverage.

This photo shows the second group of Native Americans from the American War for Independence era.
I hope I made plausible skin tones for these warriors. I have not met many Native Americans, so I am just guessing at what would be realistic.
Army Painter has fanciful names for most of their paints. For example, you have to know that "Scaly Hide" and "Wizard's Orb" are greens, "Alien Purple" is a violet color, and "Warlock Purple" is a magenta color. For these natives, I took "Tanned Flesh", a ruddy brown midtone, and added more red.
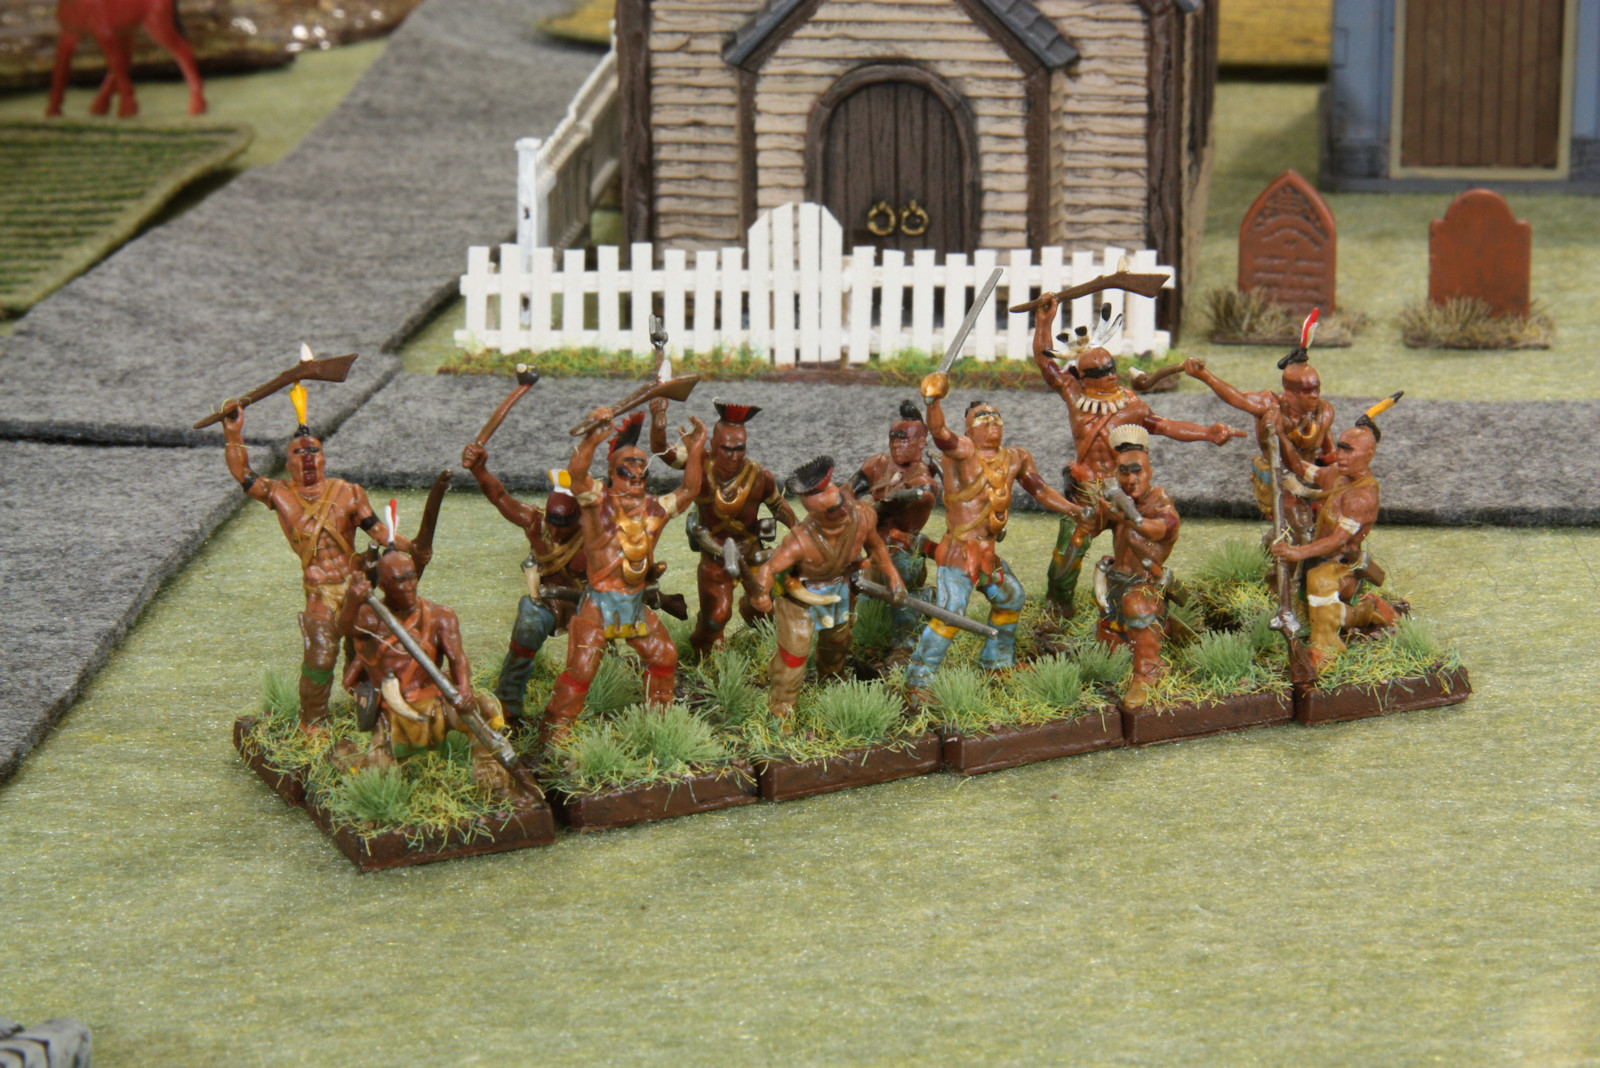
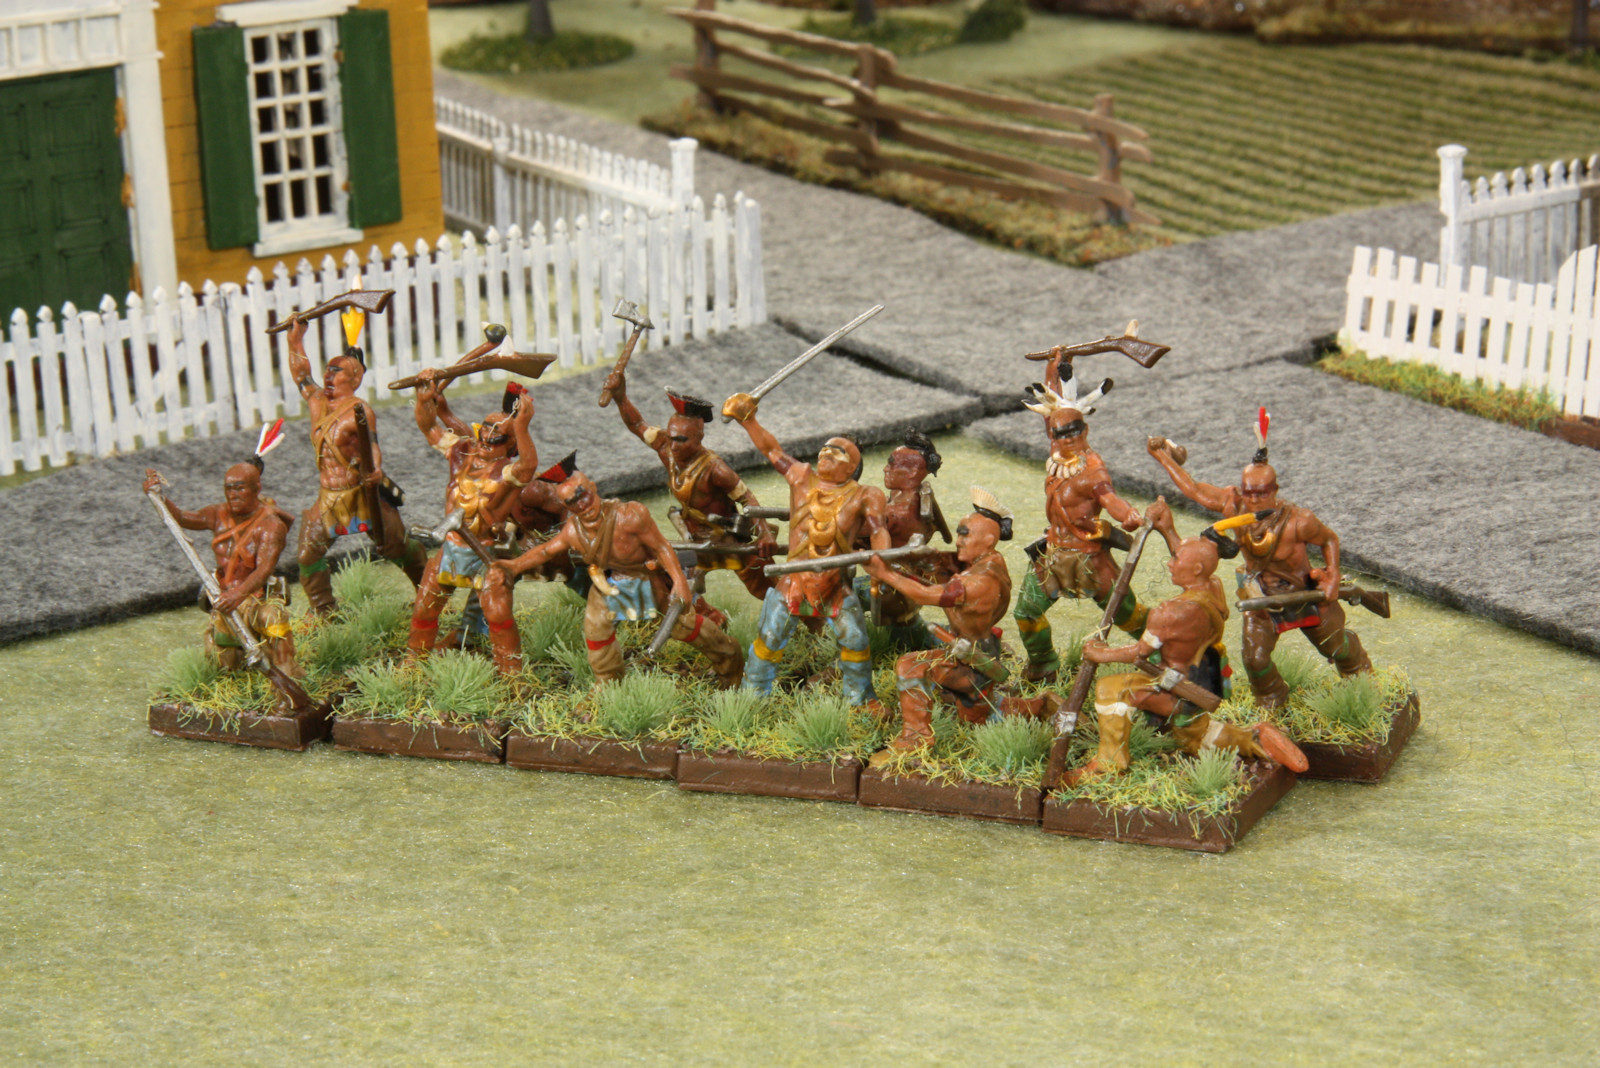
Here's another view of the second group of Native Americans. After gluing them together with Testor's plastic model glue, I prime them all with middle gray or black primer. I use Krylon primer because it is cheaper than Army Painter. Don't use "primer and paint all in one" paints as those tend to be thicker and hide the model details.
After painting all the details, I like to protect the miniatures with a coat of Krylon Matte Finish. It is best to use this spray on a low humidity day when the temperature is about 70 to 80 F (20 to 30 C). If you spray this on a high humidity day, you are likely to get a milky cloudy finish. Don't worry, let it dry and spray another coat when the conditions are better. The second coat will melt and merge with the original coat. Also, one coat can be slightly shiny as shown here. If you want a dead matte look, let the first coat dry and apply a second coat.
The bases are the plastic 20 mm squares provided in the boxes. Additionally I have added Wargames Accessories 20 mm steel squares beneath which make the light plastics less likely to topple, and also make them attachable to magnetic sheet bases from Litko Games. Trays make them easy to move 8 or more at a time. The terrain is Army Painter static grass and tufts attached with white glue.
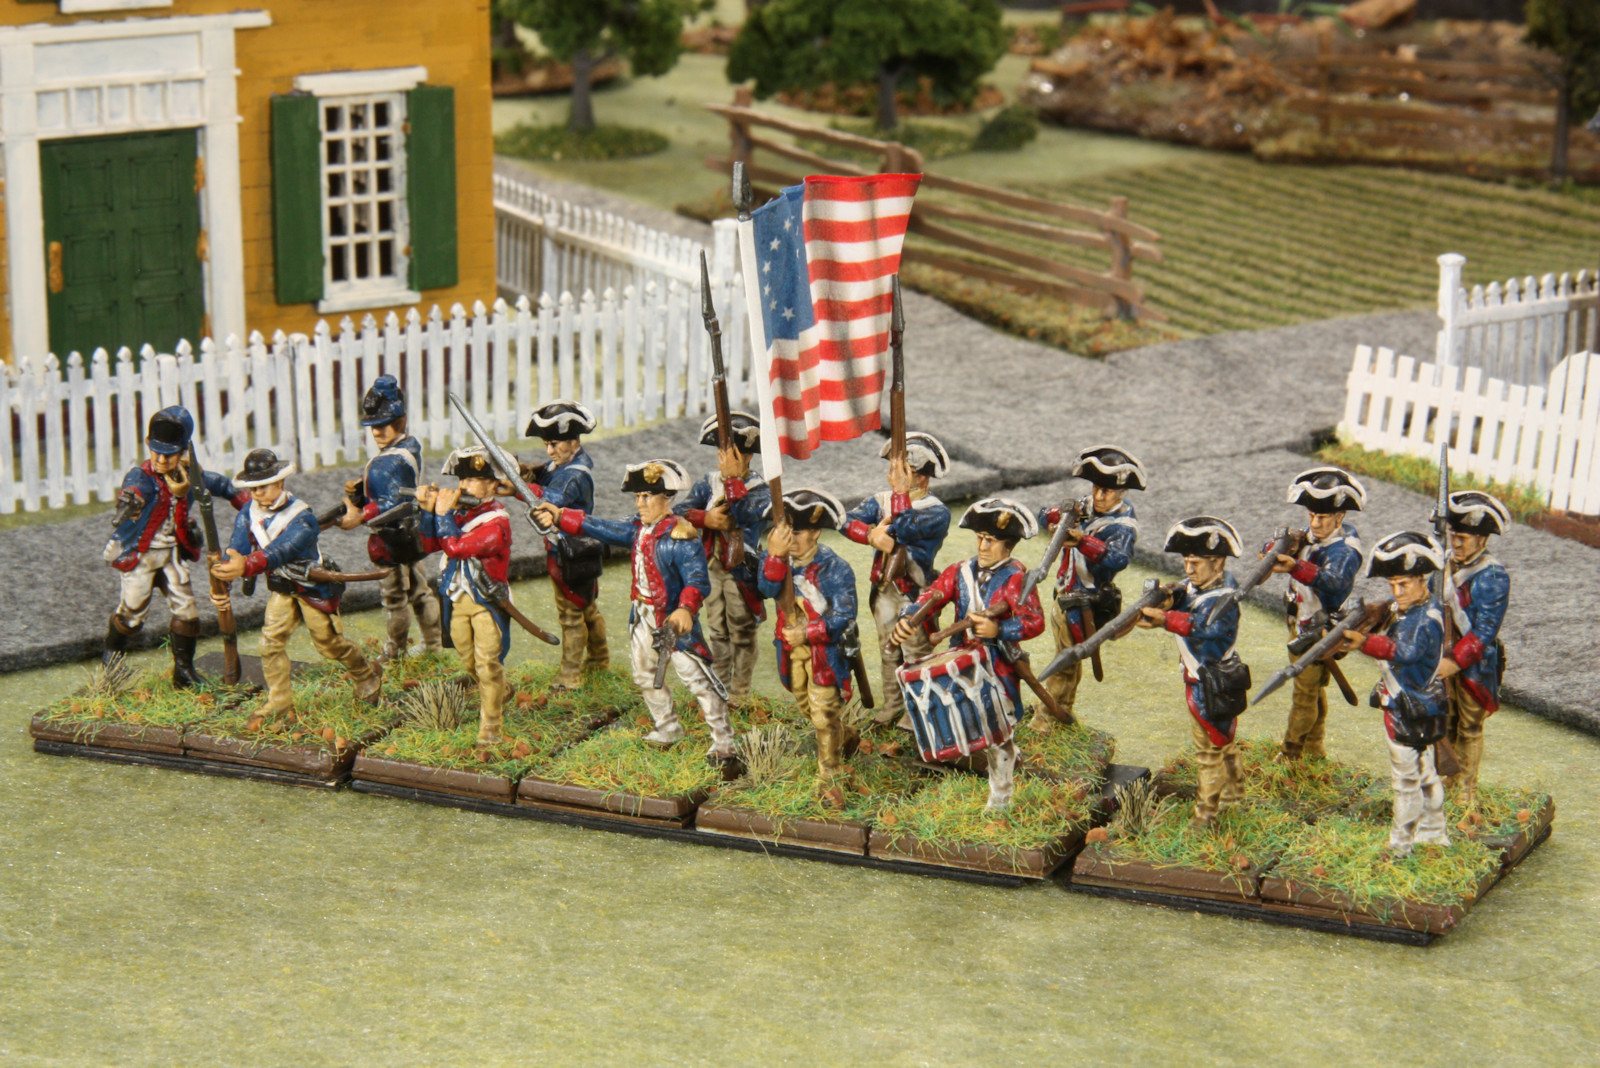
The next group I painted is the American Continental Infantry from Warlord Games. There are 30 figures in the box along with excellent assembly notes, history, and example flags.
Like the Native American set, there are a variety of body poses, and various hats, arms, and weapons to make many individual poses. In the center of this group, front row, you will see a commander, a flag bearer, and a fife and drummer. To the far left are a few soldiers with distinctive hats to be used as light infantry skirmishers. The rest of the group are musket line men in tricorn hats who are mostly shooting or reloading.
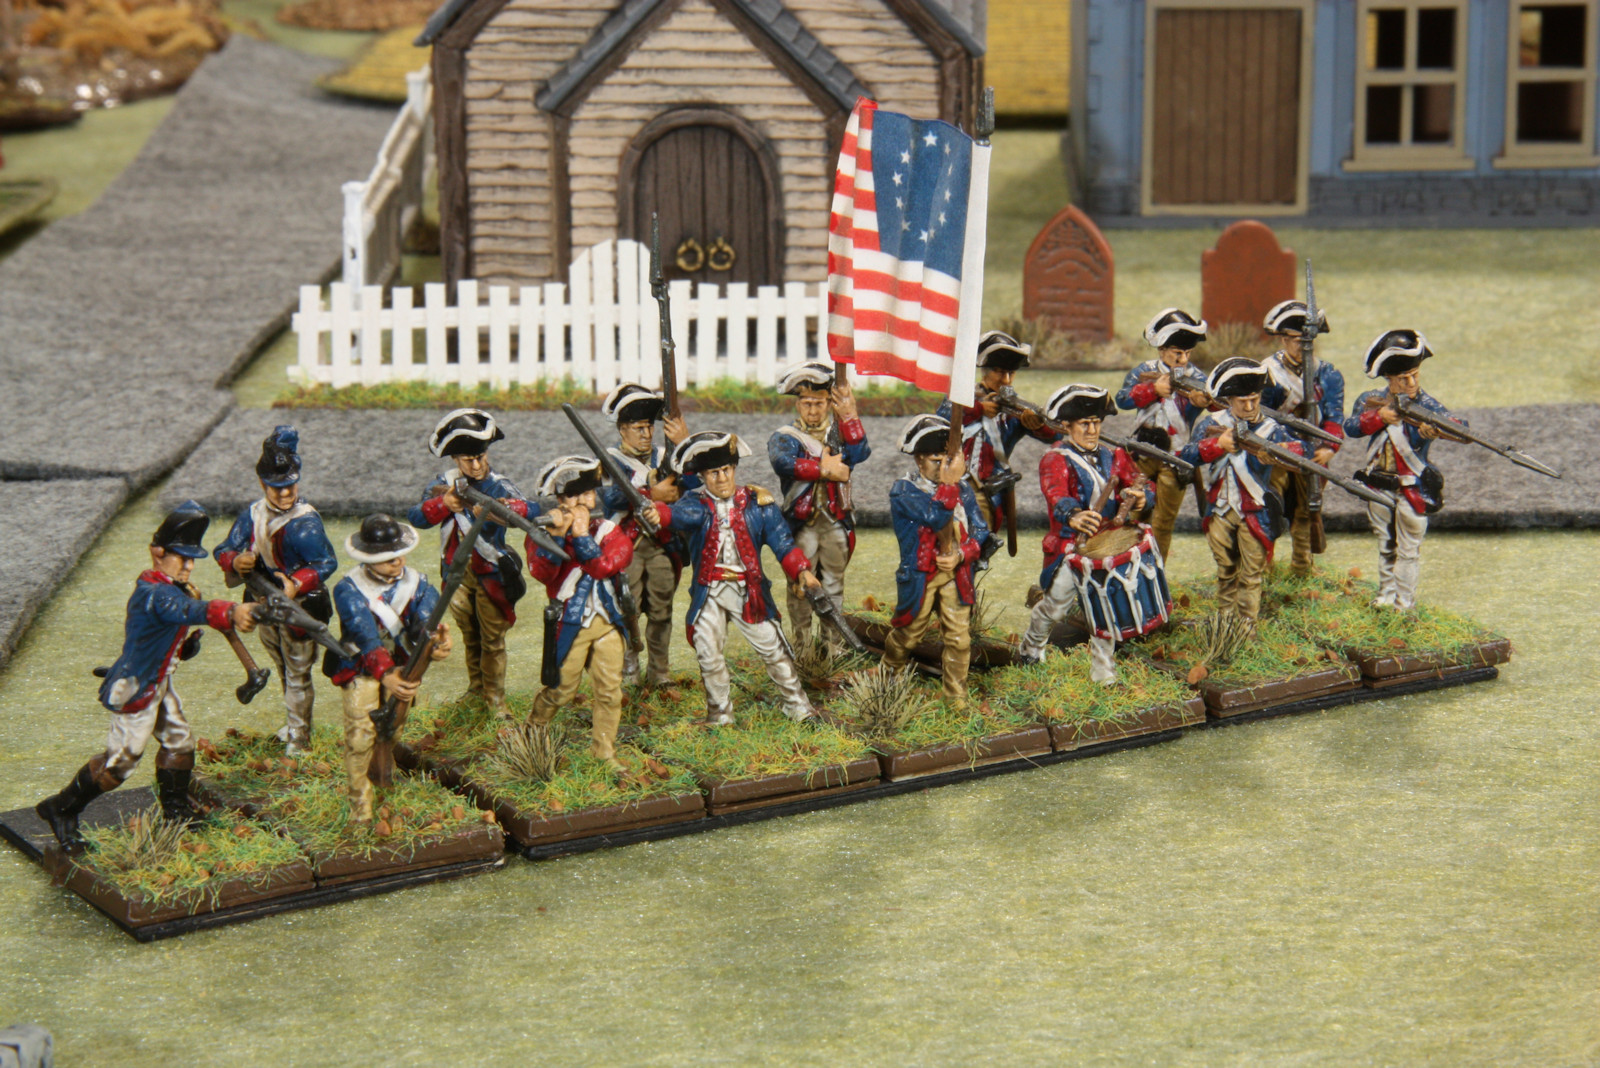
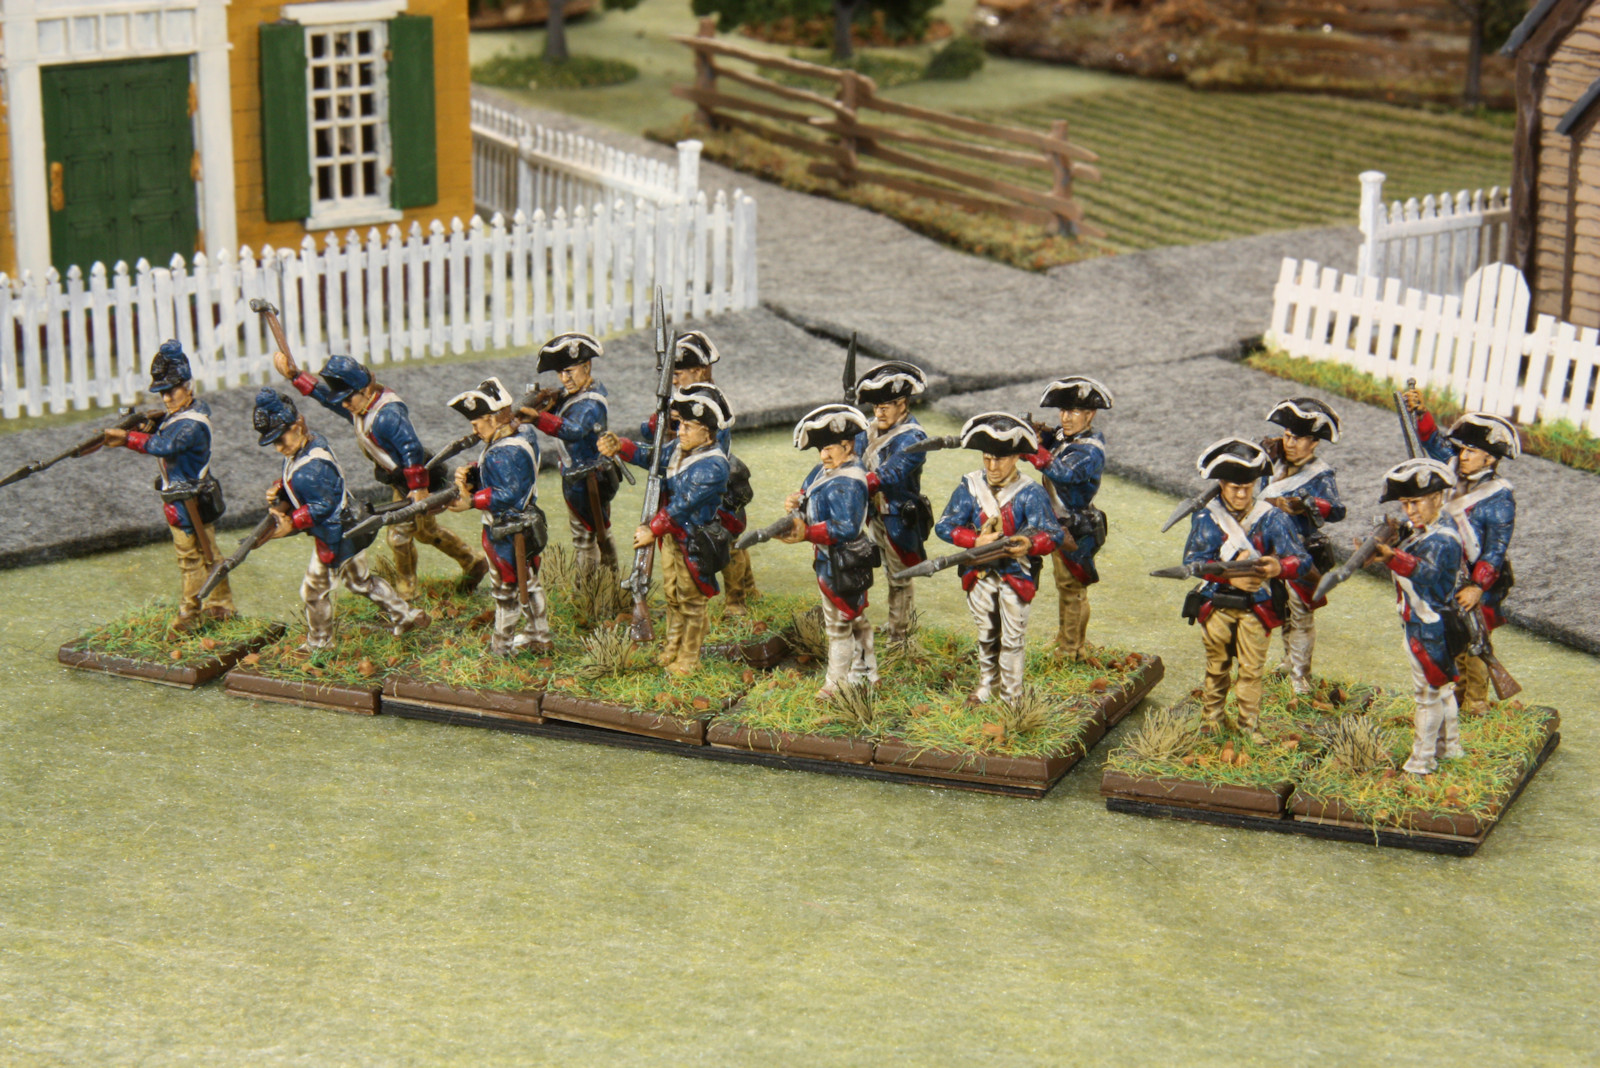
Here is the same group from the left side. I choose the blue infantry coat which was used in the later part of the war. To these I added red facings (cuffs, lapels, and linings) which were generally worn by the New Jersey and New York armies.
You might note that the fife and drummer have "reverse facings" with the coat in red and the facings in blue. This was common in the American and British line units. These individuals often served as a rallying point, so they had distinctive uniforms.
Here is the second group of Continental Army for the American War for Independence. Most of these soldiers are line soldiers with muskets. The three to the left have special hats which signify them as light infantry, scouts, or jaegers.
Notice the pants and gaiters over the shoes are either off-white or buff. The American army uniform was a bit more varied than other countries of the time. The American outfits were manufactured and distributed in a hurry and thus more variation.
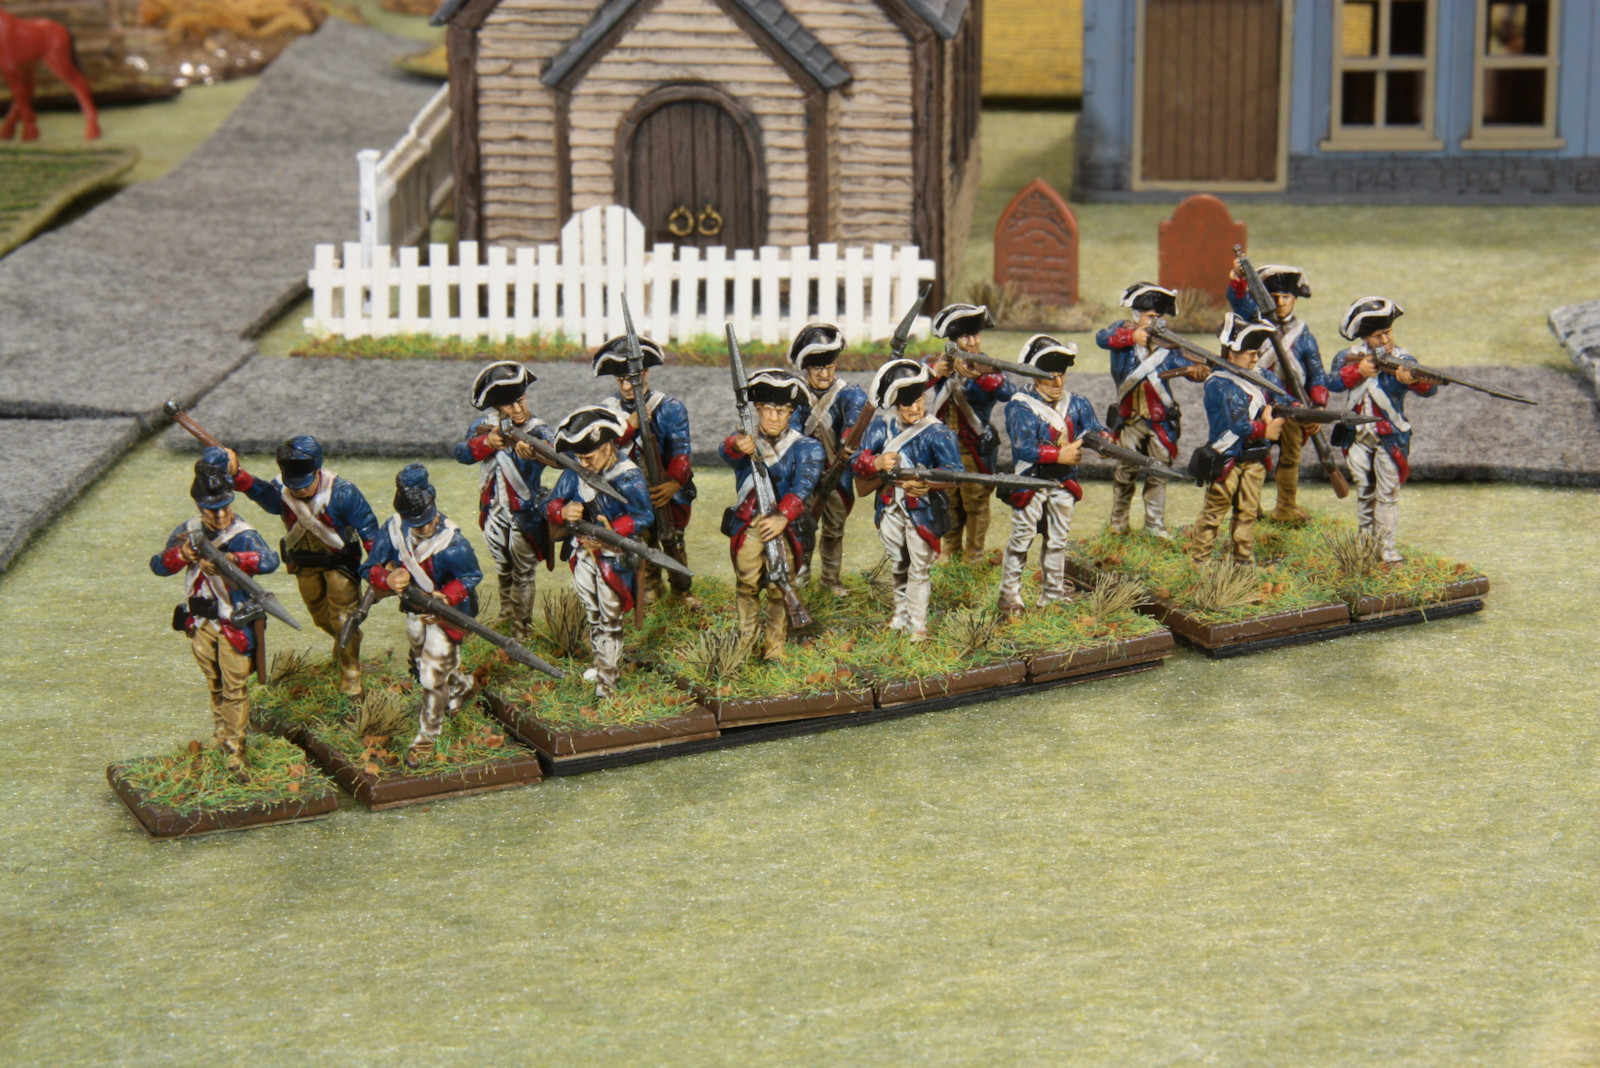
Here is another view of the Continental Army group 2.
These folks have a final dip into MinWax Tudor polyurethane which gives the dark shading in the cloth folds and the men's faces. Most of the near-black poly is removed with a Q-Tip, but the rest settles into the cracks and give them the dark shadows.
If you leave too much poly on the miniature, it might make your soldiers look dirty or dark. In this bright photography lighting, it looks very dirty. However, under normal room lighting, the dark contrasts make the miniatures really stand out.
These fellows have the plastic 20 mm bases from the box, a metal square, and then they are arrayed on 2 by 4, 2 by 3, or 2 by 2 trays. Magnet sheets on the tray helps the soldiers stay in line.
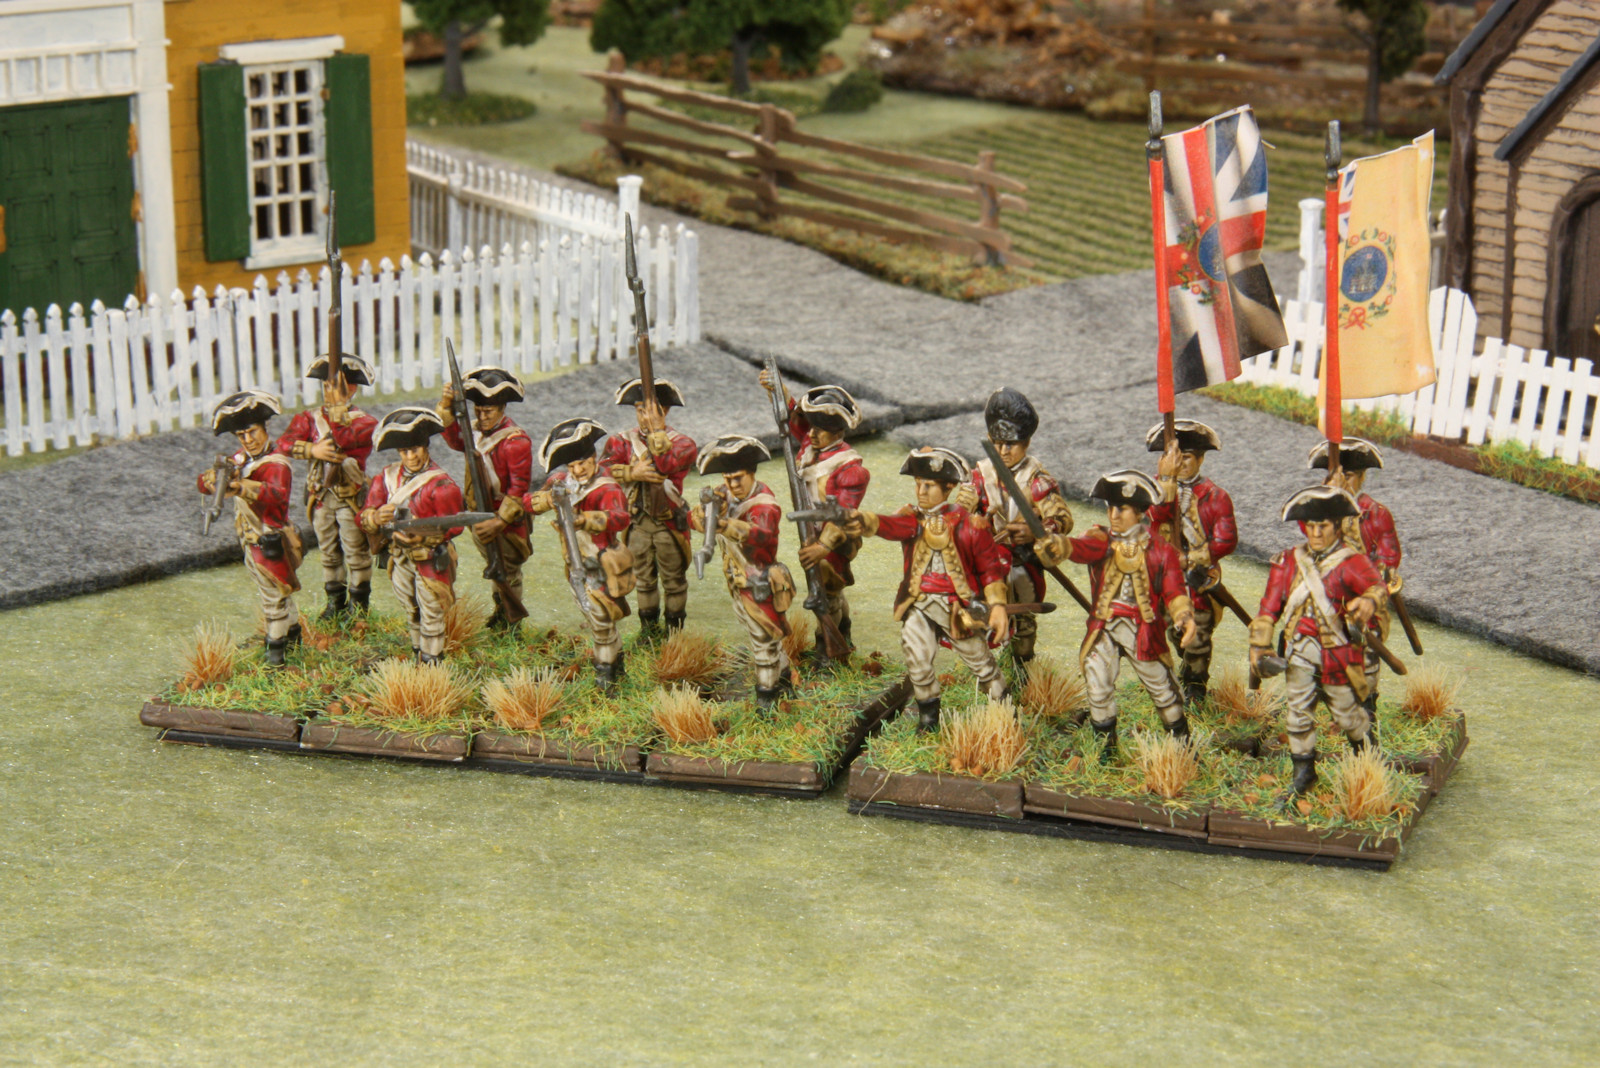
This photo shows the British Infanry Regiment from Warlord Games. Once again, a great set of miniature sculptures with great assembly notes, history, painting ideas, and example flags.
These British line soldiers have two flag bearers seen at the far left. One is holding the Union Jack and the other holds the regimental color buff. So this regiment has red coats and buff facings. There is no fifer, but the drummer has the reverse facings of buff coat and red facings.
In the front of the drums and flags are the leader units. Two appear to be captains with epaulets and a shiny gorget. The third appears to be a sergeant with one epaulet, a sword, and a commanding finger pointing gesture.
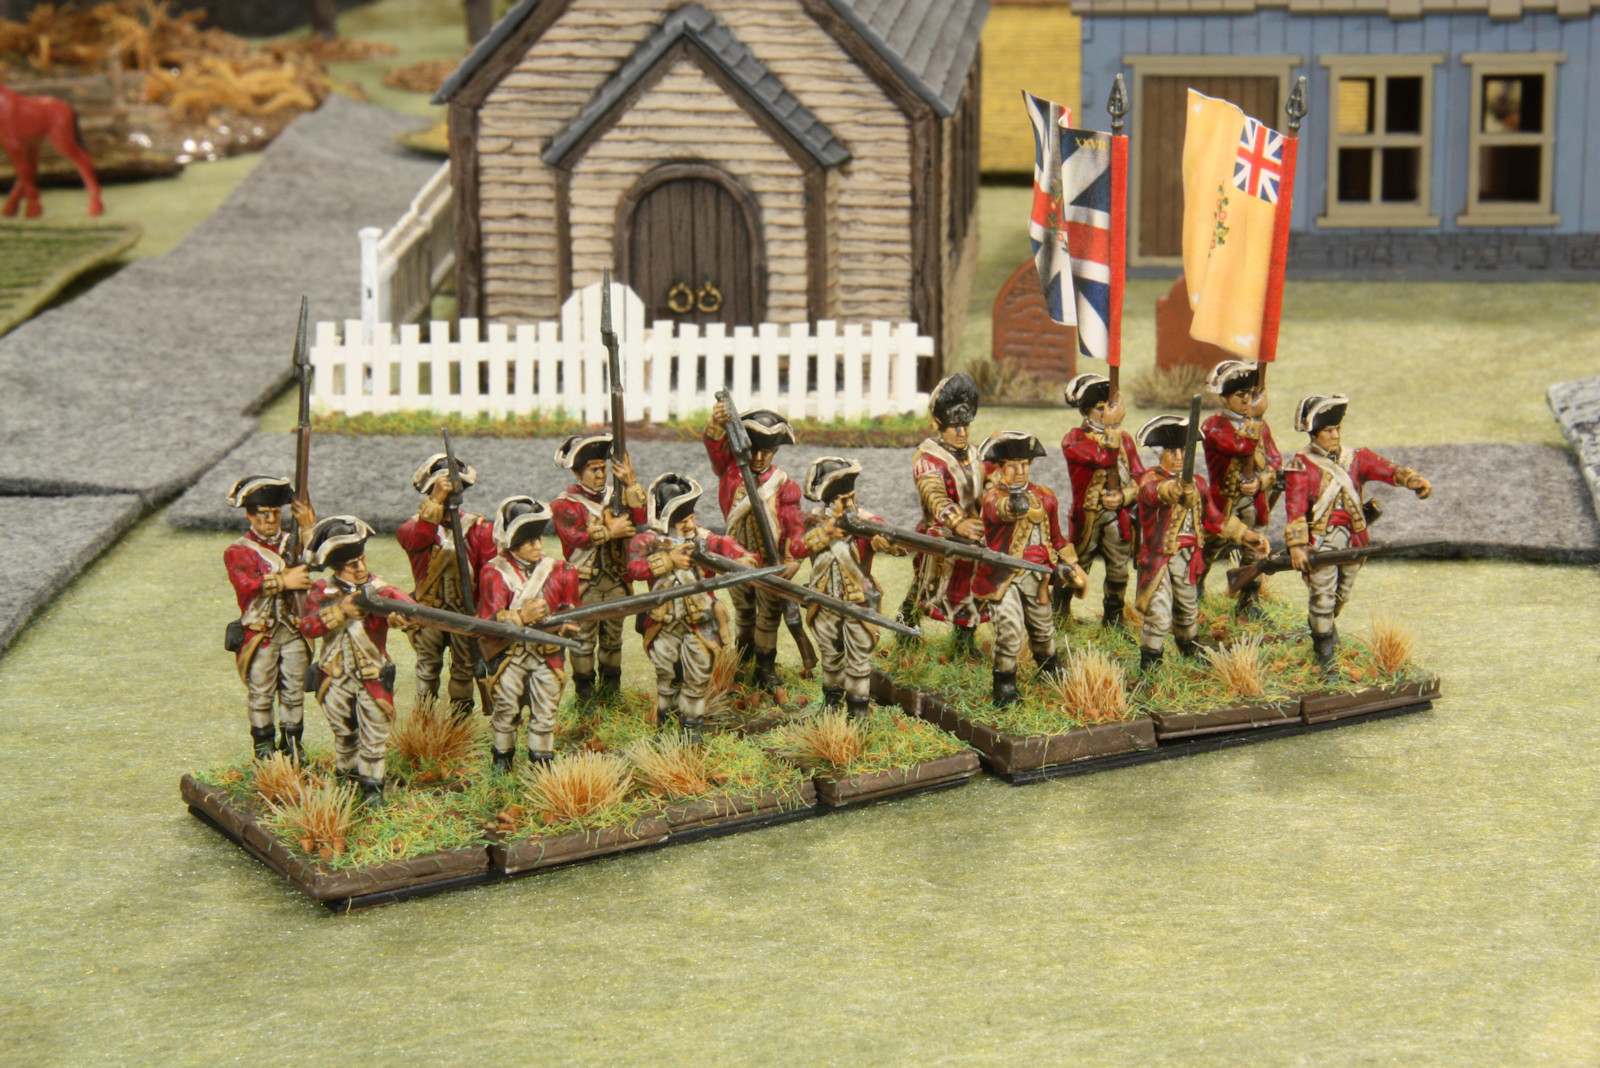
Here is a second view of the British infantry. Lots of muskets and pointy bayonents in this group.
In addition to field more British regiments in different colors, I am sure this box can be used to paint American Loyalists (Tories). The Loyalists would probably look better in mostly brimmed slouch caps.
Here is a photo of the second group of British infantry. In the center of the group are the usual musket men in various poses. On the ends are the really cool light infantry skirmishers. The group on the left have epaulets and tall grenadier hats. I'm sure you can make an entire grenadier unit with this kit. The group on the right have tall bear-skin hats with a fancy tassle. Once again, great variety and possibilities.
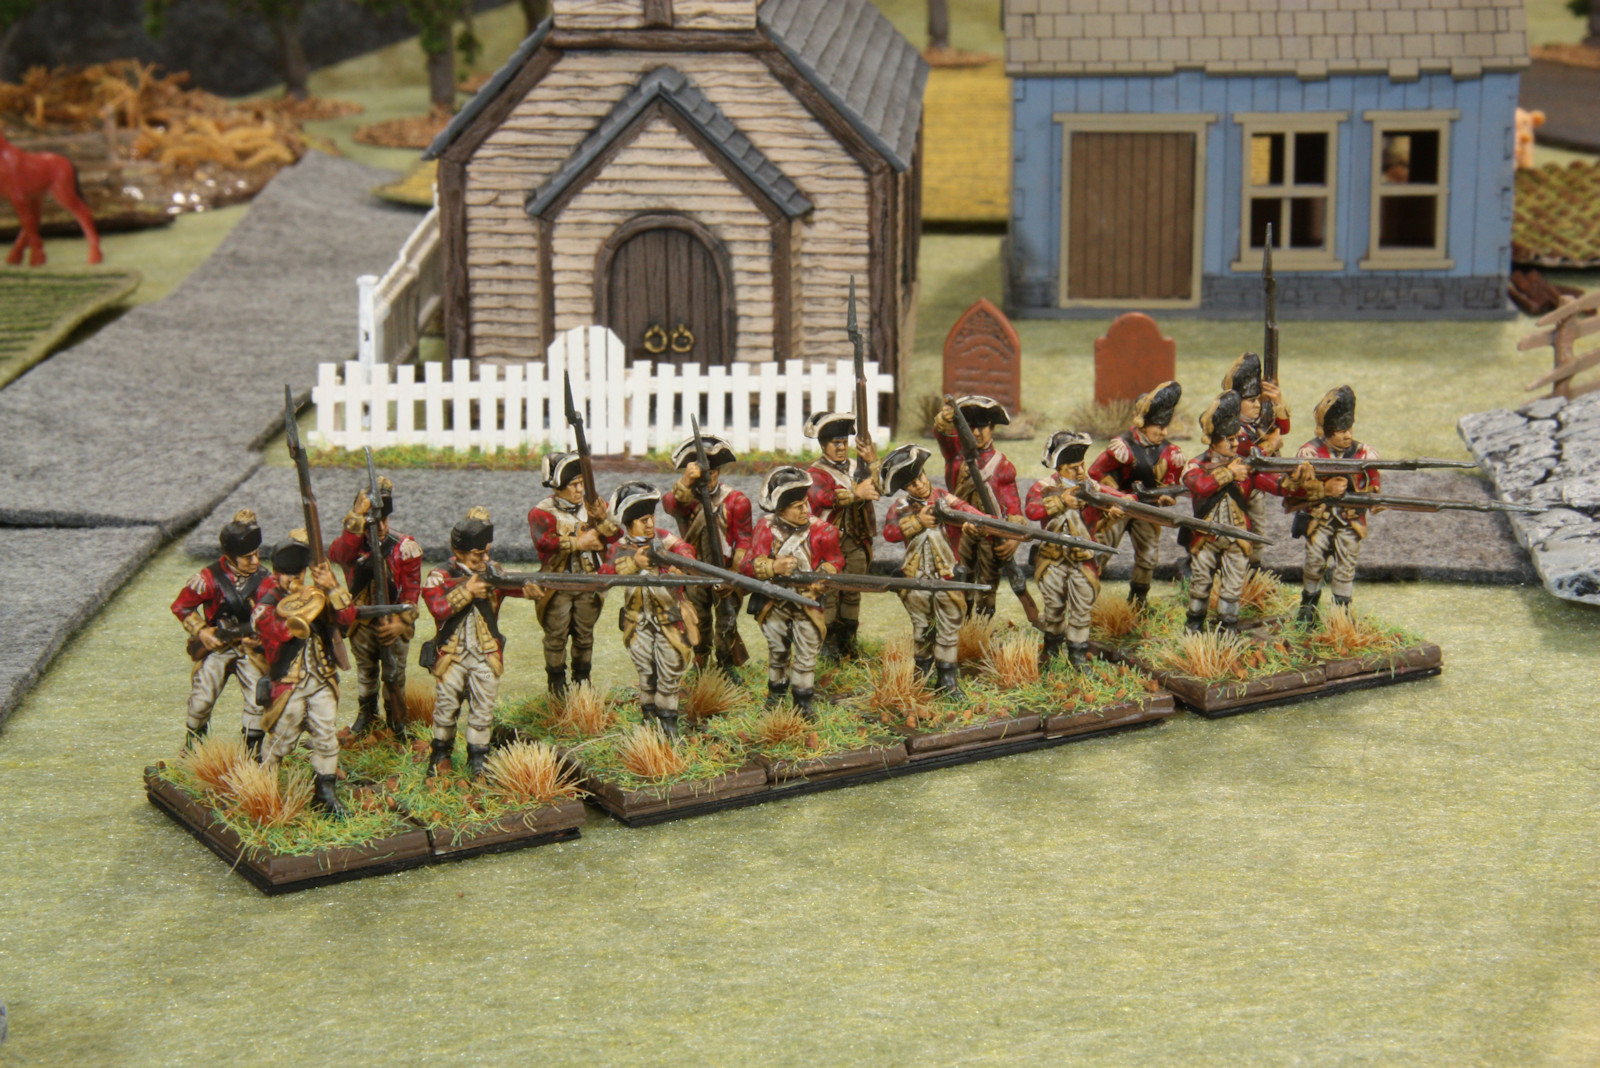
Here is a second view of the second group from the British Infantry regiment.
For this unit, I dipped the soldiers in the Army Painter Quickshade soft tone rather than MinWax Tudor polyurethane. The soft tone is browner than the Tudor tone. It also appears to have a bit less pigment. So I would say use the Quickshade soft tone for cleaner, less-contrasty models. Use the MinWax Tudor for blacker, more-contrasty models.

Thus far I've gone on and on about the miniatures. What about the terrain?
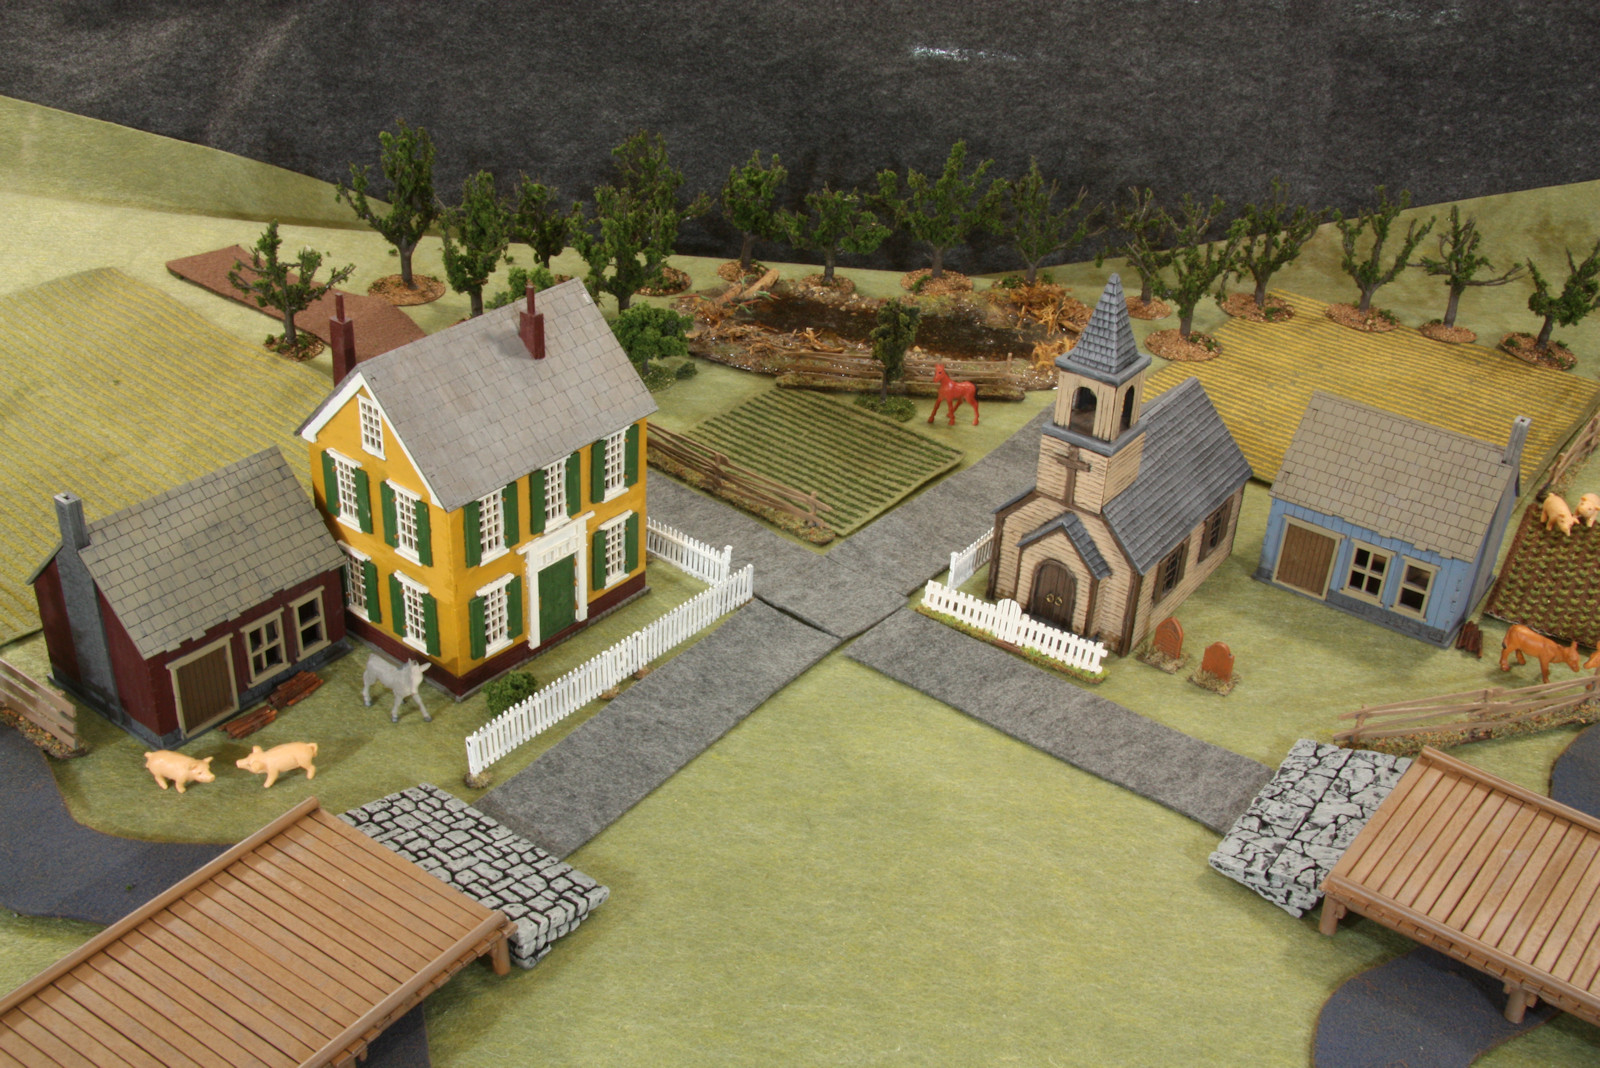
In the center of this photo are buildings from two manufacturers. The church is a plastic model from Renedra This church comes with two cool gravestones and some plastic picket fencing (in front the the yellow two-story building in this picture). The two story building and the smaller houses are from Sarissa. These models are laser cut fiberboard. Both models are easy to assemble. I would recommend painting the Sarissa models before assembly. It is a bit tough painting all those window frames in a contrasting color after assembly.
I've painted the tall house in the color of Cannon Ball House in Springfield, New Jersey. This house was hit by a British cannon ball in the Battle of Springfield in 1780. You can still visit and tour the house. It's a nice local museum and home to the historical society.
The roads and rivers are cut and painted felt. The fields are felt and cardbord with painted crops. Much of the fencing is made from craft sticks. The animals are from a children's barnyard play set. Trees are from a Woodland Scenics train scenery set. And the table has a large green felt. The backdrop is a dark gray felt.
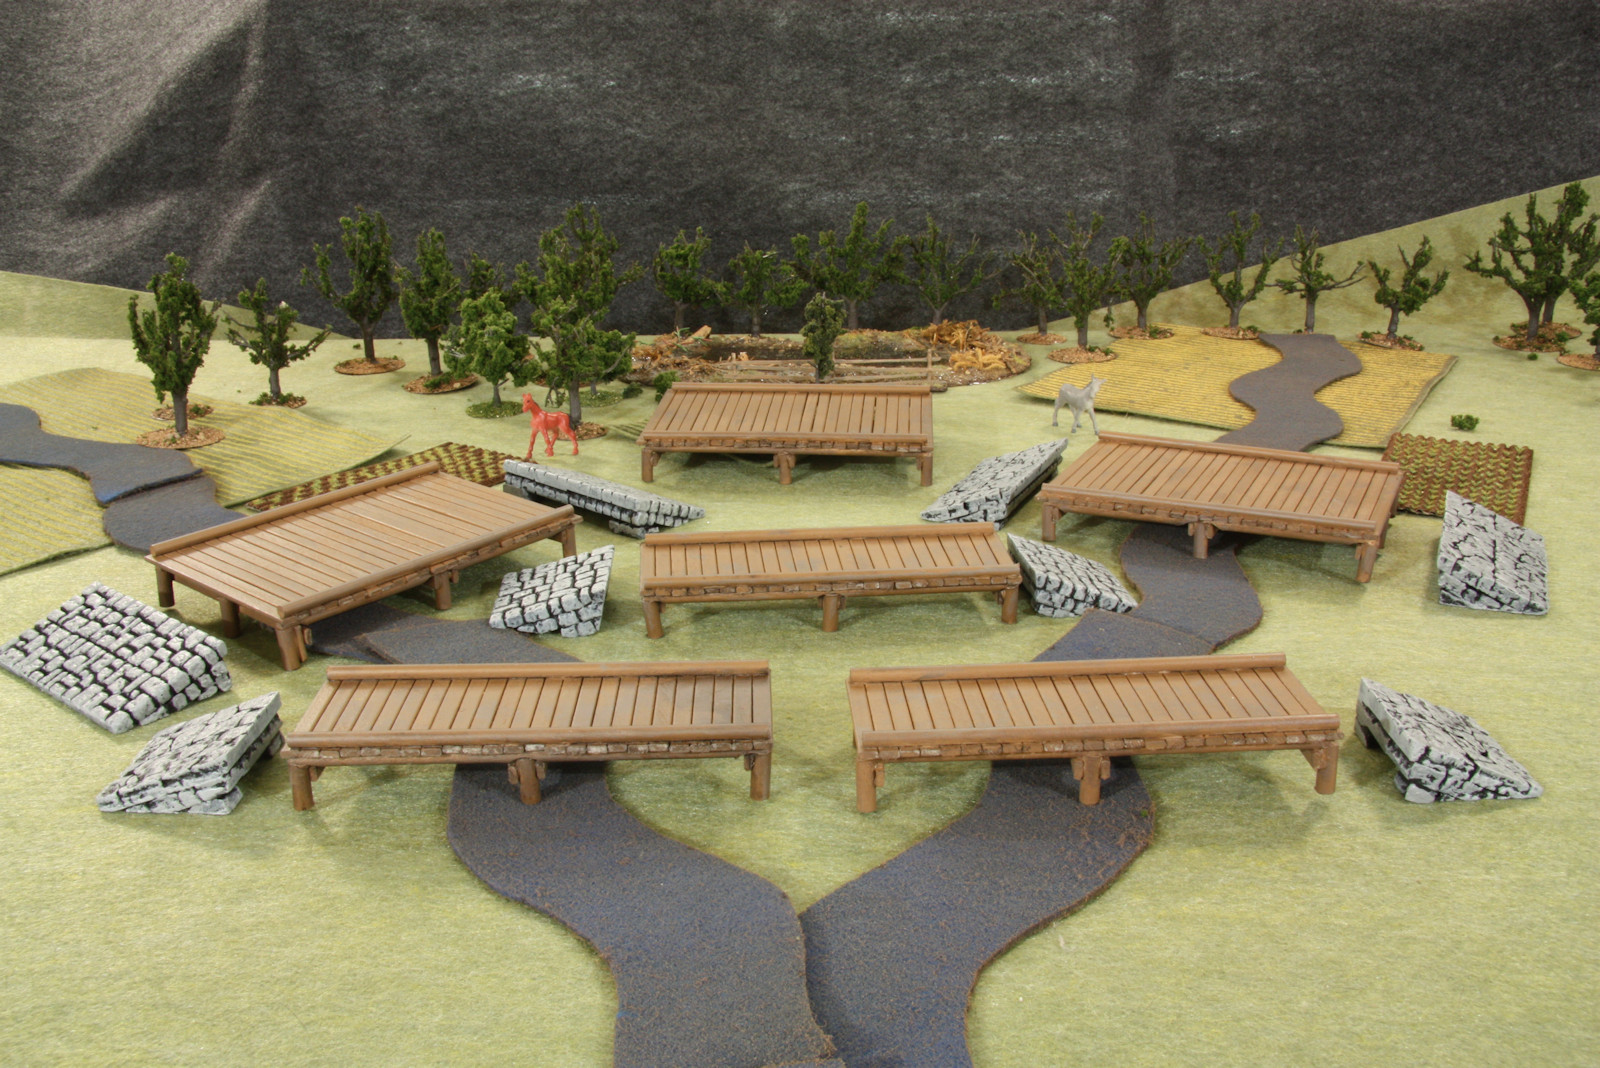
This photo shows some bridges I've made for the battles.
The ramps are made with floor tiles from Hirst Arts. The floor tiles are normally flat, but I stacked two or three and sanded them into a wedge with a belt sander. Wow, that was a dusty mess!
The wooden platforms are made with dowels and craft sticks from the local crafting store. The craft sticks are about 1/4 inch wide and are a bit smaller than a popsicle sticks so they look more true to this scale. Notice the bridges come in 4-soldier and 2-soldier widths.

Here is another view of the bridges, this time they are separated to show the various pieces. There is no glue holding the stone ramps to the wooden platforms. The weight of the stone is enough to hold it all in place. Note that I made three 4-soldier and three 2-soldier platforms. This is so you can make long and dangerous spans for wide rivers. You can also use the wooden platforms as boat piers and wharves for boat docks.