|
|
|
|
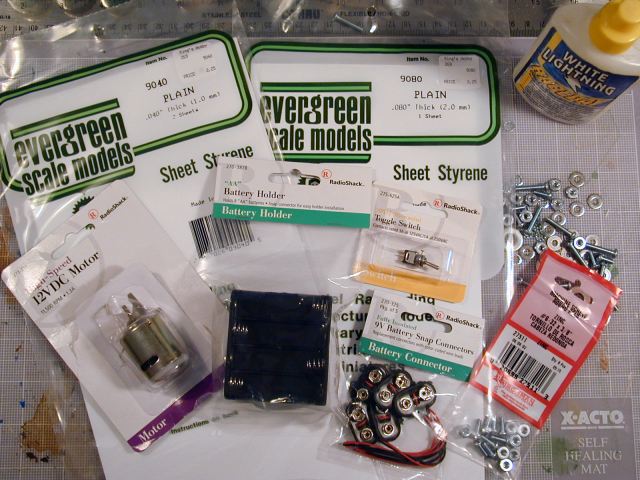
The picture at left shows some of the parts needed to make a small paint mixer. At the bottom of the pile is the sheet styrene used for the platforms and footings of the machine. Styrene plastic is ideal because it is tougher than wood, easy to drill and snap, and takes a beating. The styrene comes in many thicknesses. For this project I used 2 mm thickness which is quite stiff. To cut the styrene to size, you do not saw it like bass wood. Rather, you score the sheet with the back of a hobby knife and snap the sheet in two by applying uniform pressure along the score mark. Pressing the sheet along the edge of a sharp tabletop snaps the sheet very cleanly.
Also shown are machine screws, motor, battery pack, switch and wires for the project. The total cost for all these parts is about $12 plus another $5 for batteries. At top right is a bottle of White Lightning bicycle lube which lubricates the machine and lessens friction. This lube makes sense for any indoor projects as it is mostly wax suspended in light mineral oil. It is a viscous, clean and long-lasting lube. Get it at better bicycle shops. "3 in 1", WD-40 or sewing machine oil might be too light for this machine.
|
|
|
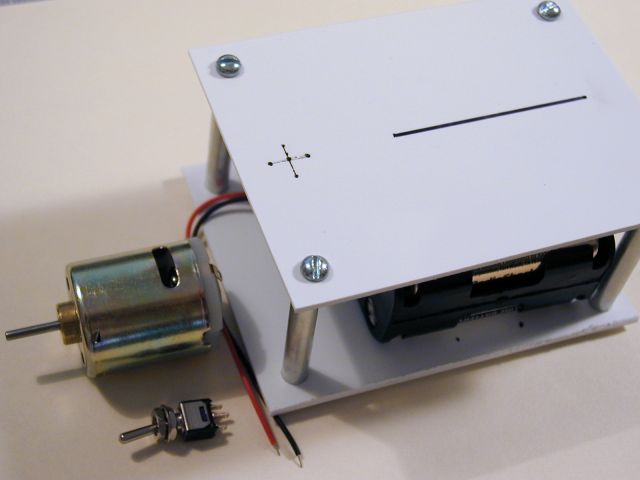
The electric motor is a 12 V DC model from Radio Shack which provides about 56 g / cm of torque and spins at 11,500 RPM with no load. This is about 10 times stronger than the previous Mark I motor. It really gives a kick when it starts! I think this type of motor is used for remote control cars and VCR tape drives. It requires 12 V of electro motive force (EMF) which is provided by the block of eight 1.5 V AA size batteries. I wired and soldered the on-off switch in series with the battery leads.

|
|
|
One of the toughest parts of the design of this machine is the interface between the motor and the thing it must drive. The shaft of the motor is 1 mm diameter stainless steel. I decided to use a disc of 0.25" (6 mm) thick, 1" (2.5 cm) diameter hardwood disc glued to a 2" (5 cm) diameter plastic styrene hexagon. The birch hardwood grips the motor shaft tightly and since the birch is so dense it is unlikely to deform or enlarge like a softer wood. It's diameter provides enough area to make a good glue contact with the hexagon. Unfortunately, this assembly is hidden from view in the photographs. I decided on hexagon spinner since this is easier to cut than a circle from the sheet styrene.

|
|
|
The plank is affixed to the spinning hexagon with machine screws. Often where machine screws meet plastic I use washers and lube to spread any contact force and lessen friction. Some of the screws have double hex nuts on them. This is because you cannot tighten a nut down on the plastic. It would simply lock the piece in place and prevent it from moving. Rather you use two nuts and tighten them against each other most times with a lock washer in between. Without the lock washer, the spinning contraption would loosen and fly apart possibly injuring unsuspecting bystanders.
The reciprocating end of the plank attaches to a long screw. Fortunately the nuts are carefully tightened to ensure it remains vertically while the rotating end drives it back and forth horizontally. This requires a bit of tuning to get the end tightened properly - loose enough to slide, tight enough to prevent twisting or turning.
|
|
|
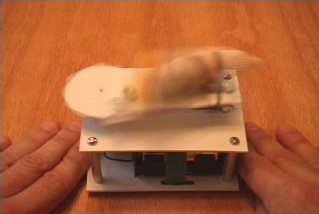
Notice that with all this action, the machine has the potential to dance across the table. With this much spinning mass and such a high-torque engine, it would require a very large lower platform to make a free standing machine that stays in place. In the movie, I hold the platform in place, but it would be more ideal to clamp or bolt the machine to the table.
I am quite please with the Mark II Hobby Paint Mixer. In total it took about $17 and 3 hours to build. It also frees me to paint for a few minutes while the next paint bottle is being mixed. It is a major improvement over its ancestral prototype Mark I Hobby Paint Mixer.
If you have any designs or ideas for future paint mixers,
please let me know.
Also, if you have a simpler household method for mixing paints,
let me know as well.
It would be nice to discover a $10 blender or electric drill
attachment that could do the same thing.
Thanks for stopping by.