|
|
|
|
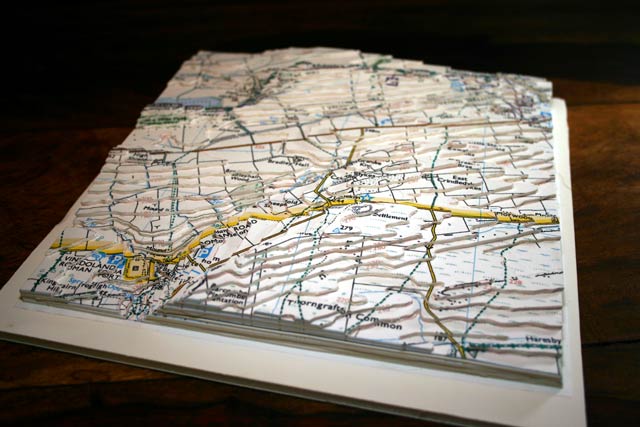
This article shows you how to make a 3 dimensional model from publically-available elevation maps. Elevation maps help map readers understand the hills and valleys an area. Hikers can read the maps to understand which areas will be difficult to walk or where the hilltops and scenic views are located. Surveyors can use the map to find where to build a tower or roadway. A model more vividly displays the topology and elevations of a particular area. Using the model you can see the hills and valleys, and you can get an idea of why the buildings, roads, forests and lakes are situated where they are. With this project, you can model your hometown or a famous region of the world and take a tour of nearly any place you desire.
Using a computer printer and simple materials such as glue and cardboard,
one can make these elevation maps come alive.
By cutting layers along the contour lines, one can build a model
that shows the hills and valleys in 3 dimensions: width, depth, and height.
Because this project involves using sharp razor knives, I recommend
it for ages 15 years and up. However, younger modellers can also build this project easily
if an adult does the cutting.
|
|
|
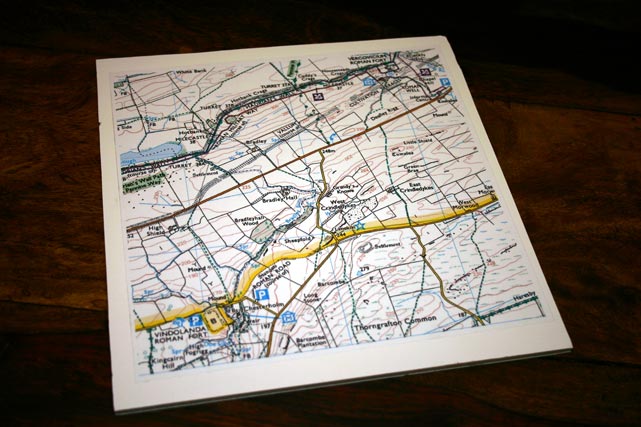
To make this model, you must start with quality maps. These Hadrian's Wall maps are produced from the Ordnance Survey Get-a-map service and reproduced with kind permission of Ordnance Survey, the government mapping service of the United Kingdom. This particular map shows a 3 km by 3 km region at 1:25,000 scale and is printed out to be about 21 cm (8 inches) on a side. You can choose any region or scale you like, but I like the 1:25,000 scale because it is the most detailed that Ordnance Survey offers, and it is easy to envision yourself hiking or mountain biking the region at this scale. For similar maps of the United States visit the U.S. Geological Survey site.
First, use your browser to save the map image to your computer. You must print a number of maps equal to the number of elevation changes you wish to model. For instance, my map of Hadrian's Wall had elevation lines that range from 150 to 320 meters above sea level. The elevation lines are spaced every 10 meters, so I need to print 17 maps, one each for 150 m, 160 m, 170 m, etc. to 320 m. For your first model, I recommend that you choose a map that has no more than 15 to 20 elevation lines.
The first map is trimmed and glued to a piece of foam core, which is a 5 mm (1/4 inch) thick sandwich of
foam between two sheets of cardboard. You can also glue the first map to plywood or some
other material, but it is good to start with a nice sturdy base for your model.
For glue, I use spray adhesive that many people use to mount photos.
The spray makes a nice thin, even coat of glue on the underside of the map with no lumps.
Use permanent adhesive, not the removable kind: you don't want your map lifting away from
the backing.
|
|
|
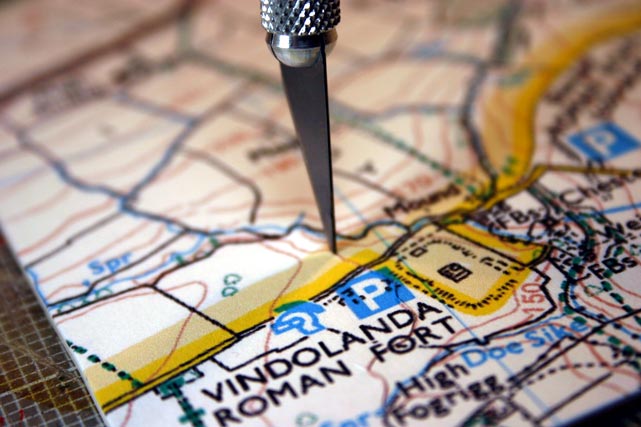
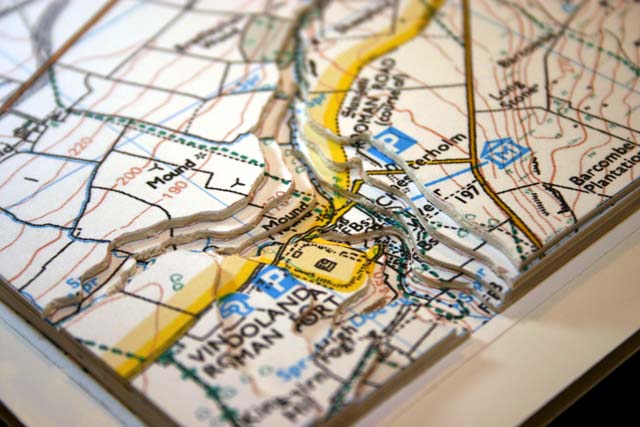
Now here is the tricky, dangerous, and time-consuming part of the project. Using a sharp razor knife, cut along each contour line. As shown in the photo, the Ordnance Survey maps have contour lines printed in tan/salmon colored ink. Using sharp blades, it often takes two or three traces to cut through the matte board. Be careful and never cut towards your body parts. You don't want the knife to slip and cut you. Do your cutting on a plastic razor mat or disposable work surface. You don't want to leave razor marks in the dining room table.
Take your time. Each matte board required about 30-45 minutes to cut. I cut and glued about 2 to 4 layers per night. Mind your body. It is very tiresome on the hands and fingers, and you should take breaks to avoid soreness or repetitive stress injuries.
|
|
|
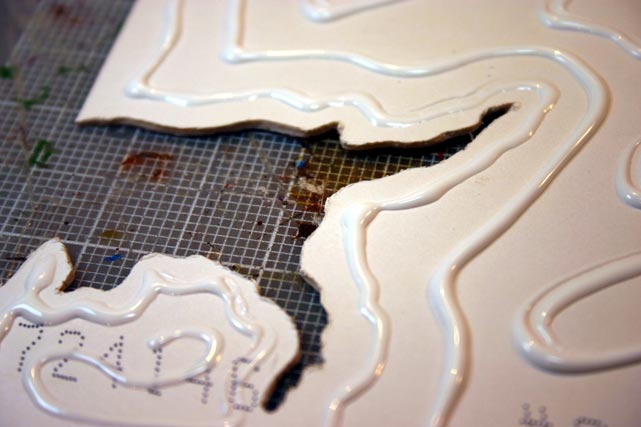
If you are doing this project in groups or as a family, note that the matte cutting is about 80 percent of the work. Another 10 percent is printing the maps. The last 10 percent is gluing the maps. Estimate about an hour per layer for a model of this size. Of course, the first few layers may take twice as long.
Consider a few cutting alternatives.
This project would be much easier with an automated method to cut the mattes.
One could cut the mattes easily with a product such as the
Versa Laser.
Also some sort of computer numeric controlled mill would allow you
to make layers in wood or plastic.
Such products would make this project as easy as making a set of printouts.
However these tools are expensive.
Also, a fine-toothed coping saw would be much easier on the hands
because you would use a sawing motion rather than a pressing motion.
|
|
|
|
|
|
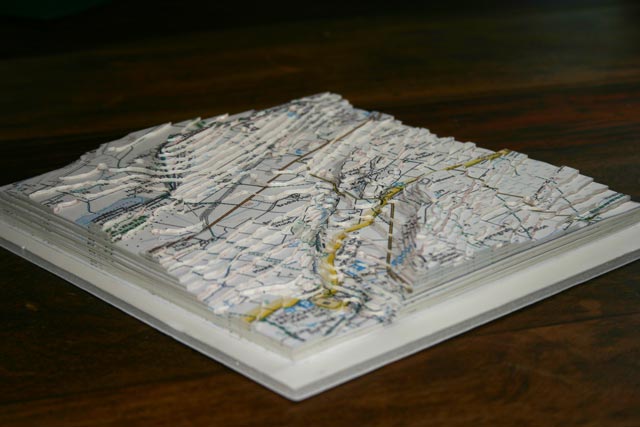
Note that the vertical scale of the model is exaggerated.
The map represents an area of 3 km by 3 km, and
1 km on the map is about 7 cm on the model.
Since the map expresses a vertical change of about 150 m,
a scaled vertical change on the model would be about 10 mm.
My model height is about 3 times that change.
If you want a truly scaled map, consider using heavy folder paper rather than matte board.
This also might ease cutting of the layers of the model.

|
|
|
One of the hilltops near Little Shield has an item
known as a Tumulus.
This was a burial mound
perhaps containing the bones and possessions of a regional
king.
Likely it was robbed of all valuable materials long ago.
But it is fascinating to see that this important person
was buried in a mound on the top of a hill.

|
|
|
|
|
|
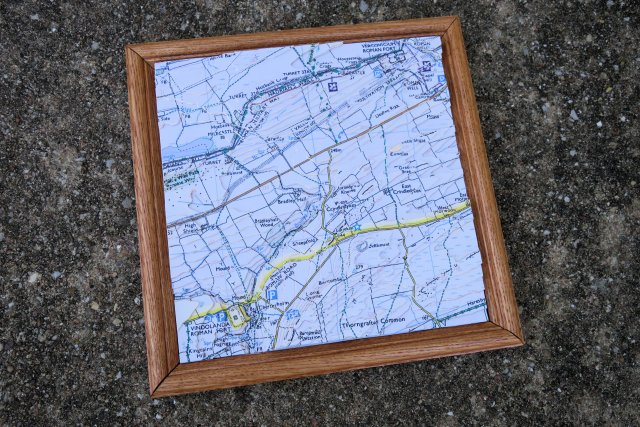
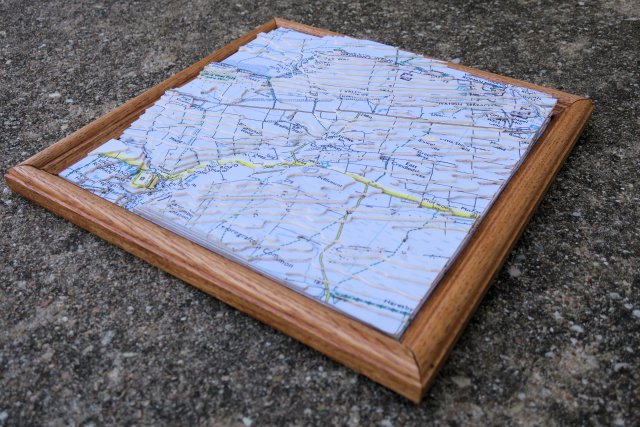
I always wanted a frame for my Hadrian's Wall relief map. However, the square size and the depth made a frame hard-to-find.
I finally bought a nice piece of oak moulding.
I used a miter saw to cut it at 45 degree angles.
I glued the corners and the points where the oak met the backing of the map.
I used some Minwax stain and poly to paint the oak.
Viola, a nice oak frame.
|
|
|
Thank you for reading this far about my 3 dimensional map of Hadrian's Wall. Those who like making projects might also like my Trebuchet or Armor Construction pages. Those who like miniatures and models might like the Miniatures pages of this site. Those who like board and card games might like the Board Games site.
If you have any models or projects related
to history or Hadrian's Wall, let me know.
I would love to hear about it.
Also any other links that would further illustrate this story are
also appreciated.
Thanks for visiting and reading my site.